
1. Introduction: Why Your Backpacking Adventure Depends on Staying Dry
There’s an old saying among experienced backpackers: “There’s no such thing as bad weather, only bad gear.” When you’re miles from shelter with everything you need strapped to your back, this wisdom becomes starkly apparent. Staying dry isn’t just about comfort—it’s about safety and survival in the backcountry.
Rain, snow, river crossings, and even heavy morning dew can quickly transform an enjoyable adventure into a miserable—or even dangerous—situation. Wet clothing drastically reduces its insulating properties, potentially leading to hypothermia even in mild temperatures. Damp sleeping bags lose their loft and warmth. Soaked electronics fail. Food supplies become unappetizing mush. The cumulative effect? A trip cut short, or worse, an emergency situation.
Understanding the benefits of waterproofing outdoor gear goes beyond merely avoiding discomfort. It’s about maintaining your body’s core temperature, protecting your essential equipment, and ensuring you can continue your journey safely regardless of what Mother Nature throws your way.
This comprehensive guide draws from years of field-testing and technical expertise to help you navigate the complex world of waterproof backpacking gear. From cutting-edge membrane technologies to practical application techniques, we’ll cover everything you need to know to stay dry on the trail—whether you’re facing an unexpected mountain thunderstorm, persistent Pacific Northwest drizzle, or challenging river crossings.
At Explore Elements, we’ve tested our gear in extreme conditions from desert downpours to alpine blizzards, giving us unique insight into what truly works when the skies open up.
2. Understanding Waterproofing Technologies: The Science of Staying Dry
Before diving into specific gear recommendations, it’s essential to understand the technologies that keep water out while allowing your body’s moisture to escape. This knowledge forms the foundation for making informed purchasing decisions.
Waterproof vs. Water-Resistant vs. DWR
Waterproof materials prevent water penetration completely, even under pressure or during prolonged exposure.
Water-resistant items can handle light moisture but will eventually allow water to penetrate during sustained precipitation.
DWR (Durable Water Repellent) is a chemical treatment applied to fabrics that causes water to bead up and roll off rather than soak in. It’s usually the first line of defense but requires periodic refreshing.
Key Performance Metrics
Hydrostatic Head (HH)
This measurement indicates how waterproof a material is by measuring how tall a column of water (in millimeters) the fabric can support before leaking. Understanding waterproof ratings for backpacking gear helps you match products to conditions:
- 1,000-5,000mm: Resistant to light rain, suitable for brief showers
- 10,000mm: Good for moderate rain and average conditions
- 20,000mm+: Highly waterproof, suitable for heavy, sustained precipitation
Breathability
Measured as Moisture Vapor Transmission Rate (MVTR) or Resistance to Evaporative Transfer (RET), breathability indicates how well moisture can escape from inside the garment:
- Higher MVTR = Better breathability (10,000g/m²/24hrs is decent, 20,000+ is excellent)
- Lower RET = Better breathability (under 6 is excellent, over 20 is poor)
Waterproof Membrane Technologies
The heart of modern waterproof gear is the membrane—a microscopically porous layer that blocks water droplets while allowing smaller water vapor molecules to pass through. The materials used in waterproof hiking gear vary significantly:
Premium Options:
– Gore-Tex (various versions including Pro, Active, Paclite)
– eVent
– NeoShell
– OutDry Extreme
Mid-Range Alternatives:
– Pertex Shield
– H2No (Patagonia)
– Dry.Q (Mountain Hardwear)
– Futurelight (The North Face)
Budget-Friendly Options:
– Polyurethane (PU) coated fabrics
– Hydrosphere
– Various proprietary coatings
Construction Methods
2-Layer: A membrane bonded to an outer fabric with a separate hanging liner. Moderately durable and comfortable but bulkier.
2.5-Layer: A membrane bonded to an outer fabric with a protective pattern printed on the inside. Lighter and more packable, but less durable and sometimes clammy.
3-Layer: A membrane sandwiched between an outer fabric and a bonded inner fabric. Most durable and comfortable for extended wear, but typically heavier and more expensive.
The construction method significantly impacts durability, weight, comfort, and price points—important considerations for backpackers where every ounce matters.
3. Essential Waterproof Outer Layers: Jackets and Pants
Your outer shell is your primary defense against precipitation. When evaluating options, we’ve considered not just waterproofness, but also weight, packability, durability, and value—factors crucial for backpackers who must carry everything they need.
Waterproof Jackets: Your First Line of Defense
The ideal backpacking rain jacket balances protection with weight and packability. Look for these critical features:
- Hood Design: Fully adjustable with a stiff brim that moves with your head
- Ventilation: Pit zips or core vents to release excess heat during exertion
- Pocket Placement: Higher pockets accessible while wearing a hip belt
- Adjustability: At cuffs, hem, and hood to seal out driving rain
- Seam Sealing: Fully-taped seams to prevent water entry at stitch points
When choosing between durability and weight, consider your typical terrain and trip duration. Dense forests with brushy trails demand more robust fabrics, while open terrain may allow for ultralight options. Rainy backpacking strategies for staying dry often involve careful selection of gear based on expected conditions.
Jacket Recommendations by Use Case:
| Type | Weight Range | Key Features | Best For |
|---|---|---|---|
| All-Around | 11-14 oz (310-400g) | Durable face fabric, pit zips, adjustable hood | Extended trips, variable conditions |
| Ultralight | 5-9 oz (140-255g) | Minimalist design, packable, limited features | Weight-conscious thru-hikers |
| Budget-Friendly | 9-16 oz (255-455g) | Basic functionality, less breathable | Occasional backpackers, lighter rain |
Waterproof Pants: Often Overlooked, Always Essential
While many backpackers skimp on rain pants, they’re invaluable in sustained precipitation or when temperatures drop. Quality rain pants feature:
- Full or Partial Side Zips: For ventilation and easy on/off over boots
- Articulated Knees: For freedom of movement on technical terrain
- Reinforced Seat and Knees: In high-wear areas
- Compatible Layers: Ability to fit over base layers or lightweight hiking pants
Rain pants become non-negotiable in environments with consistent precipitation, temperatures below 50°F (10°C), or when sitting on wet surfaces is unavoidable. In warmer conditions with intermittent rain, some experienced backpackers opt for quick-drying hiking pants instead.
4. Protecting Your Gear: Pack Covers, Liners, and Dry Storage
Even the most waterproof outer layers won’t help if everything inside your pack gets soaked. A comprehensive approach to gear protection combines multiple strategies.
Pack Covers vs. Pack Liners: A Critical Comparison
Pack Covers
– Wrap around the outside of your backpack
– Easier to put on and remove quickly when showers pass
– Protect the pack fabric from getting waterlogged and heavy
– Vulnerable to catching on branches or being blown off in high winds
– Less effective during sustained downpours as water can seep through backpanel
Pack Liners
– Typically heavyweight plastic bags or specially designed waterproof sacks that line the inside of your pack
– Provide more reliable protection for contents
– Cannot be dislodged by wind or brush
– Don’t protect the pack fabric itself from getting wet and heavy
– Require removing some items to access others
The Pro Strategy: Use both systems in challenging conditions—a pack liner for bombproof protection of essential items and a cover to prevent the pack itself from absorbing water weight.
Dry Bags and Stuff Sacks: Organization Meets Protection
Essential waterproof gear for backpackers always includes a system of dry storage options. Consider these specialized solutions:
Electronics and Documents: Use ultra-reliable roll-top dry bags with secure closures and consider double-bagging particularly sensitive items.
Sleeping Bag and Insulation: Lightweight waterproof stuff sacks or compression sacks with waterproof coatings keep your insulation dry—essential for safety.
Clothing: Organize by category (sleep clothes, active wear, insulation) in color-coded dry bags for easy access.
Food: Waterproof food sacks protect meals and minimize smells that might attract wildlife.
Material Options:
– Traditional nylon with polyurethane coating: Affordable and reasonably durable
– Siliconized nylon: Lighter weight with good water resistance
– DCF/Dyneema Composite Fabric: Ultra-lightweight, waterproof, but expensive
An effective system uses multiple sizes—from 1-liter bags for small electronics to 20-liter bags for bulky sleeping gear. This “redundant waterproofing” approach ensures that even if your pack takes an unexpected swim during a river crossing, your essential gear remains dry.
5. Footwear Solutions: Keeping Your Feet Dry and Comfortable
Wet feet can quickly lead to blisters, maceration, and discomfort that can derail a backpacking trip. However, the “perfect” approach to footwear varies dramatically based on conditions and personal preference.
The Waterproof vs. Quick-Drying Debate
Waterproof Boots/Shoes Approach
Pros:
– Keep feet dry during stream crossings up to their height
– Provide protection in snow and mud
– Keep feet warmer in cold, wet conditions
– Often more durable and supportive
Cons:
– Once water gets in (from deep crossings or sweat), it stays in
– Heavier than non-waterproof alternatives
– Less breathable, leading to sweaty feet in warm conditions
– Longer drying time if they do get wet inside
Quick-Drying Trail Runners Approach
Pros:
– Allow feet to breathe, reducing sweat build-up
– Dry rapidly when they do get wet
– Significantly lighter weight
– More comfortable in hot conditions
Cons:
– Feet get wet immediately in rain or water crossings
– Less protection from cold in shoulder seasons
– Generally less durable than boots
– May require careful sock management
The key decision factors include:
– Temperature (colder conditions favor waterproof options)
– Trail conditions (mud and snow favor waterproof boots)
– Crossing frequency (numerous crossings may favor quick-dry approach)
– Trip length (longer trips increase the importance of foot health)
Gaiters: The Unsung Heroes of Dry Feet
Gaiters bridge the gap between pants and footwear, providing crucial protection from water entry. The ultimate guide to weatherproof gear for backpacking highlights their importance in comprehensive protection:
Ankle Gaiters: Lightweight protection from trail debris and light moisture; ideal for desert environments.
Mid-Calf Gaiters: The most versatile option, offering good protection from rain, snow, and brush while remaining relatively lightweight.
Full-Length Gaiters: Maximum protection for deep snow, extreme conditions, or off-trail travel through wet vegetation.
For effective waterproofing, look for gaiters with:
– Waterproof materials (not just water-resistant)
– Secure underfoot attachment systems
– Snug closures at top and bottom
– Reinforced lower sections for durability
When properly fitted, quality gaiters can significantly extend the effective waterproofness of your footwear system, keeping debris and moisture out while allowing appropriate ventilation.
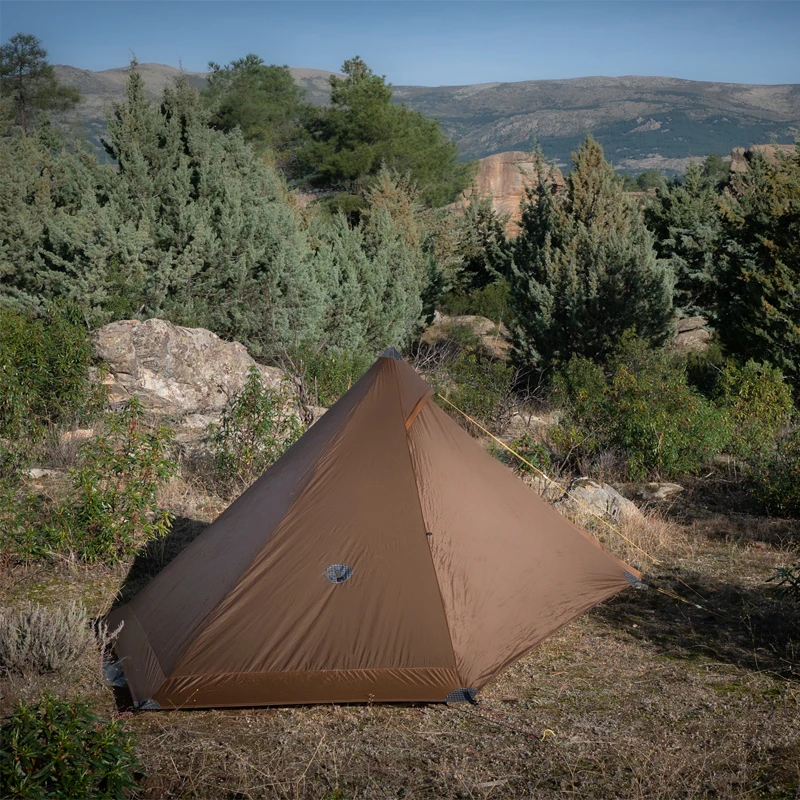
6. Waterproof Shelters: Your Haven During Stormy Conditions
After a long day hiking in the rain, your shelter becomes your sanctuary. Understanding what makes a truly waterproof tent or shelter is critical for comfortable backcountry experiences.
Key Waterproofing Specifications for Backpacking Shelters
Flysheet Hydrostatic Head: For three-season backpacking, look for ratings of at least 1,500mm, while for extended rain exposure or winter conditions, 3,000-4,000mm provides significantly better protection.
Floor Hydrostatic Head: Floors face greater water pressure from ground contact and should have ratings of 3,000mm minimum, with 5,000-10,000mm being ideal for consistently wet conditions.
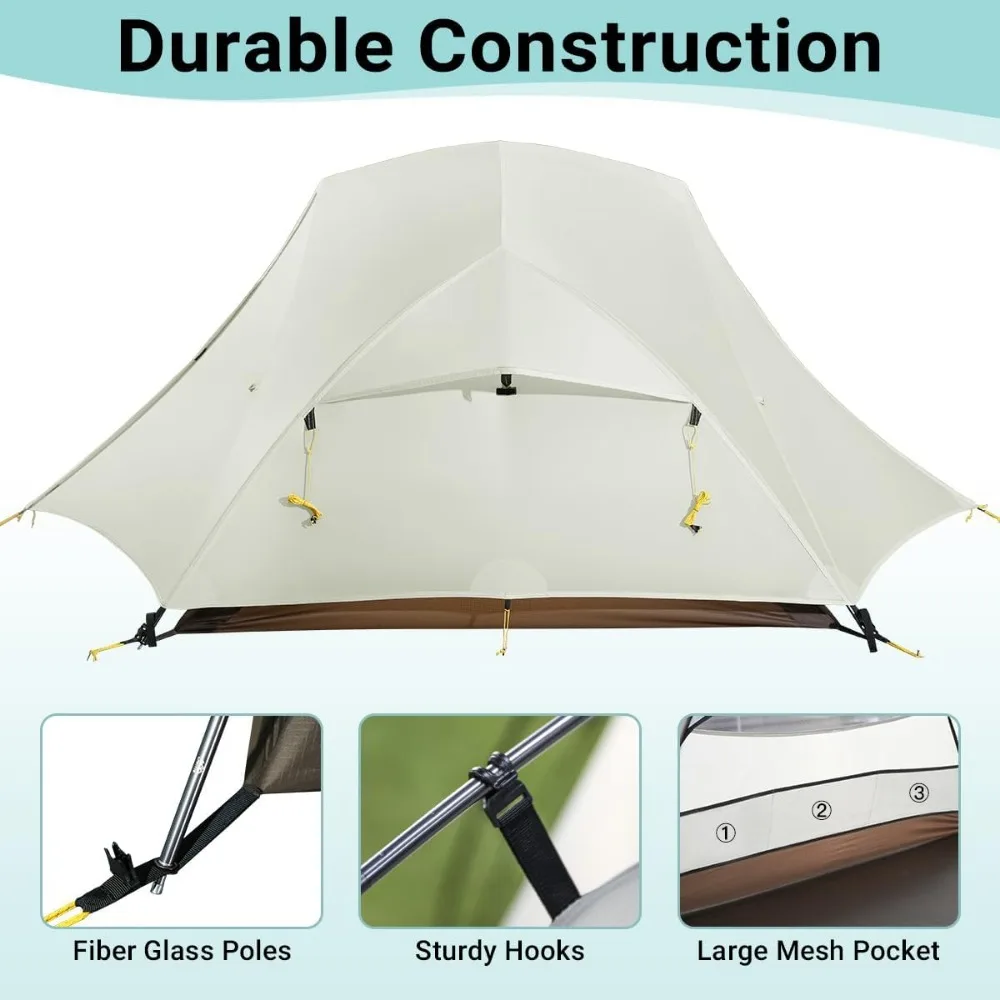
Seam Construction: Factory-taped seams provide significantly better protection than untreated seams. Double-stitched, inverted seams with full taping offer the best waterproof integrity.
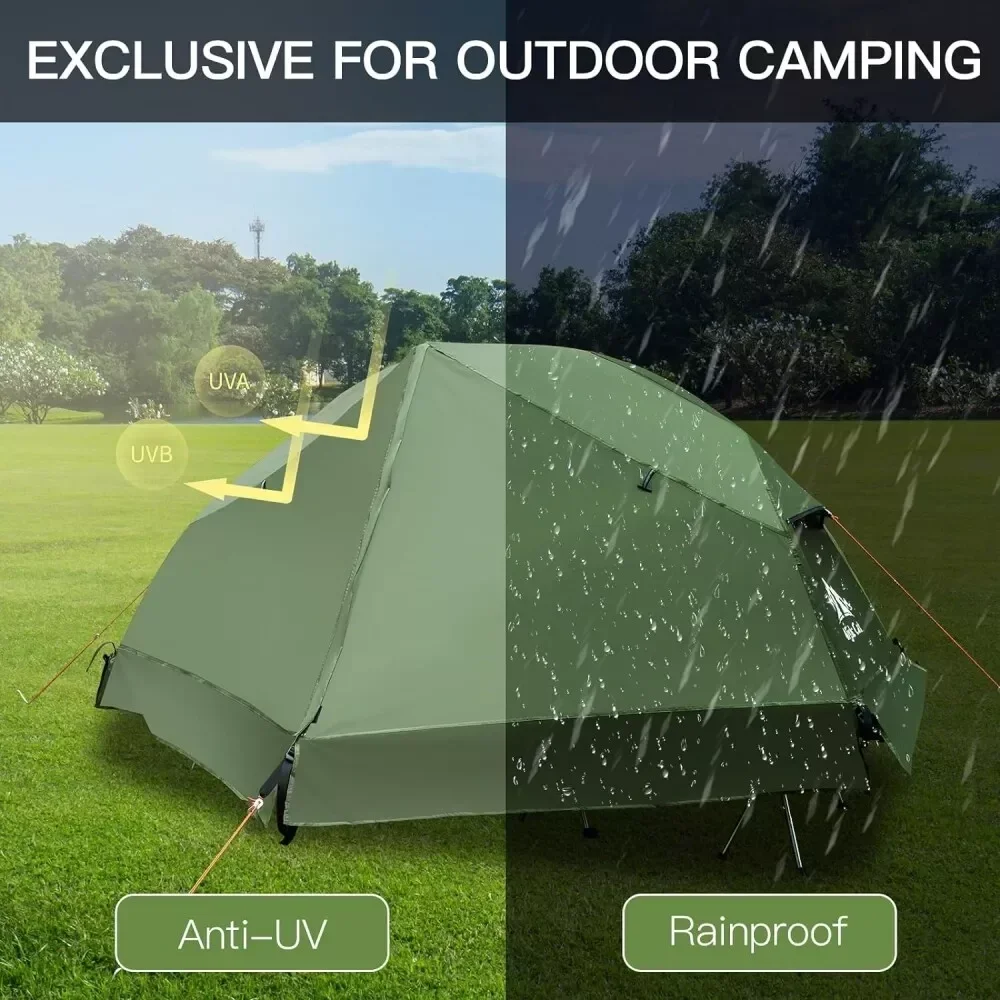
Seasonal Ratings: While 3-season tents balance ventilation with weather protection, heavy-duty 4-season tents provide superior storm protection with more robust pole structures and reduced mesh for winter expeditions.
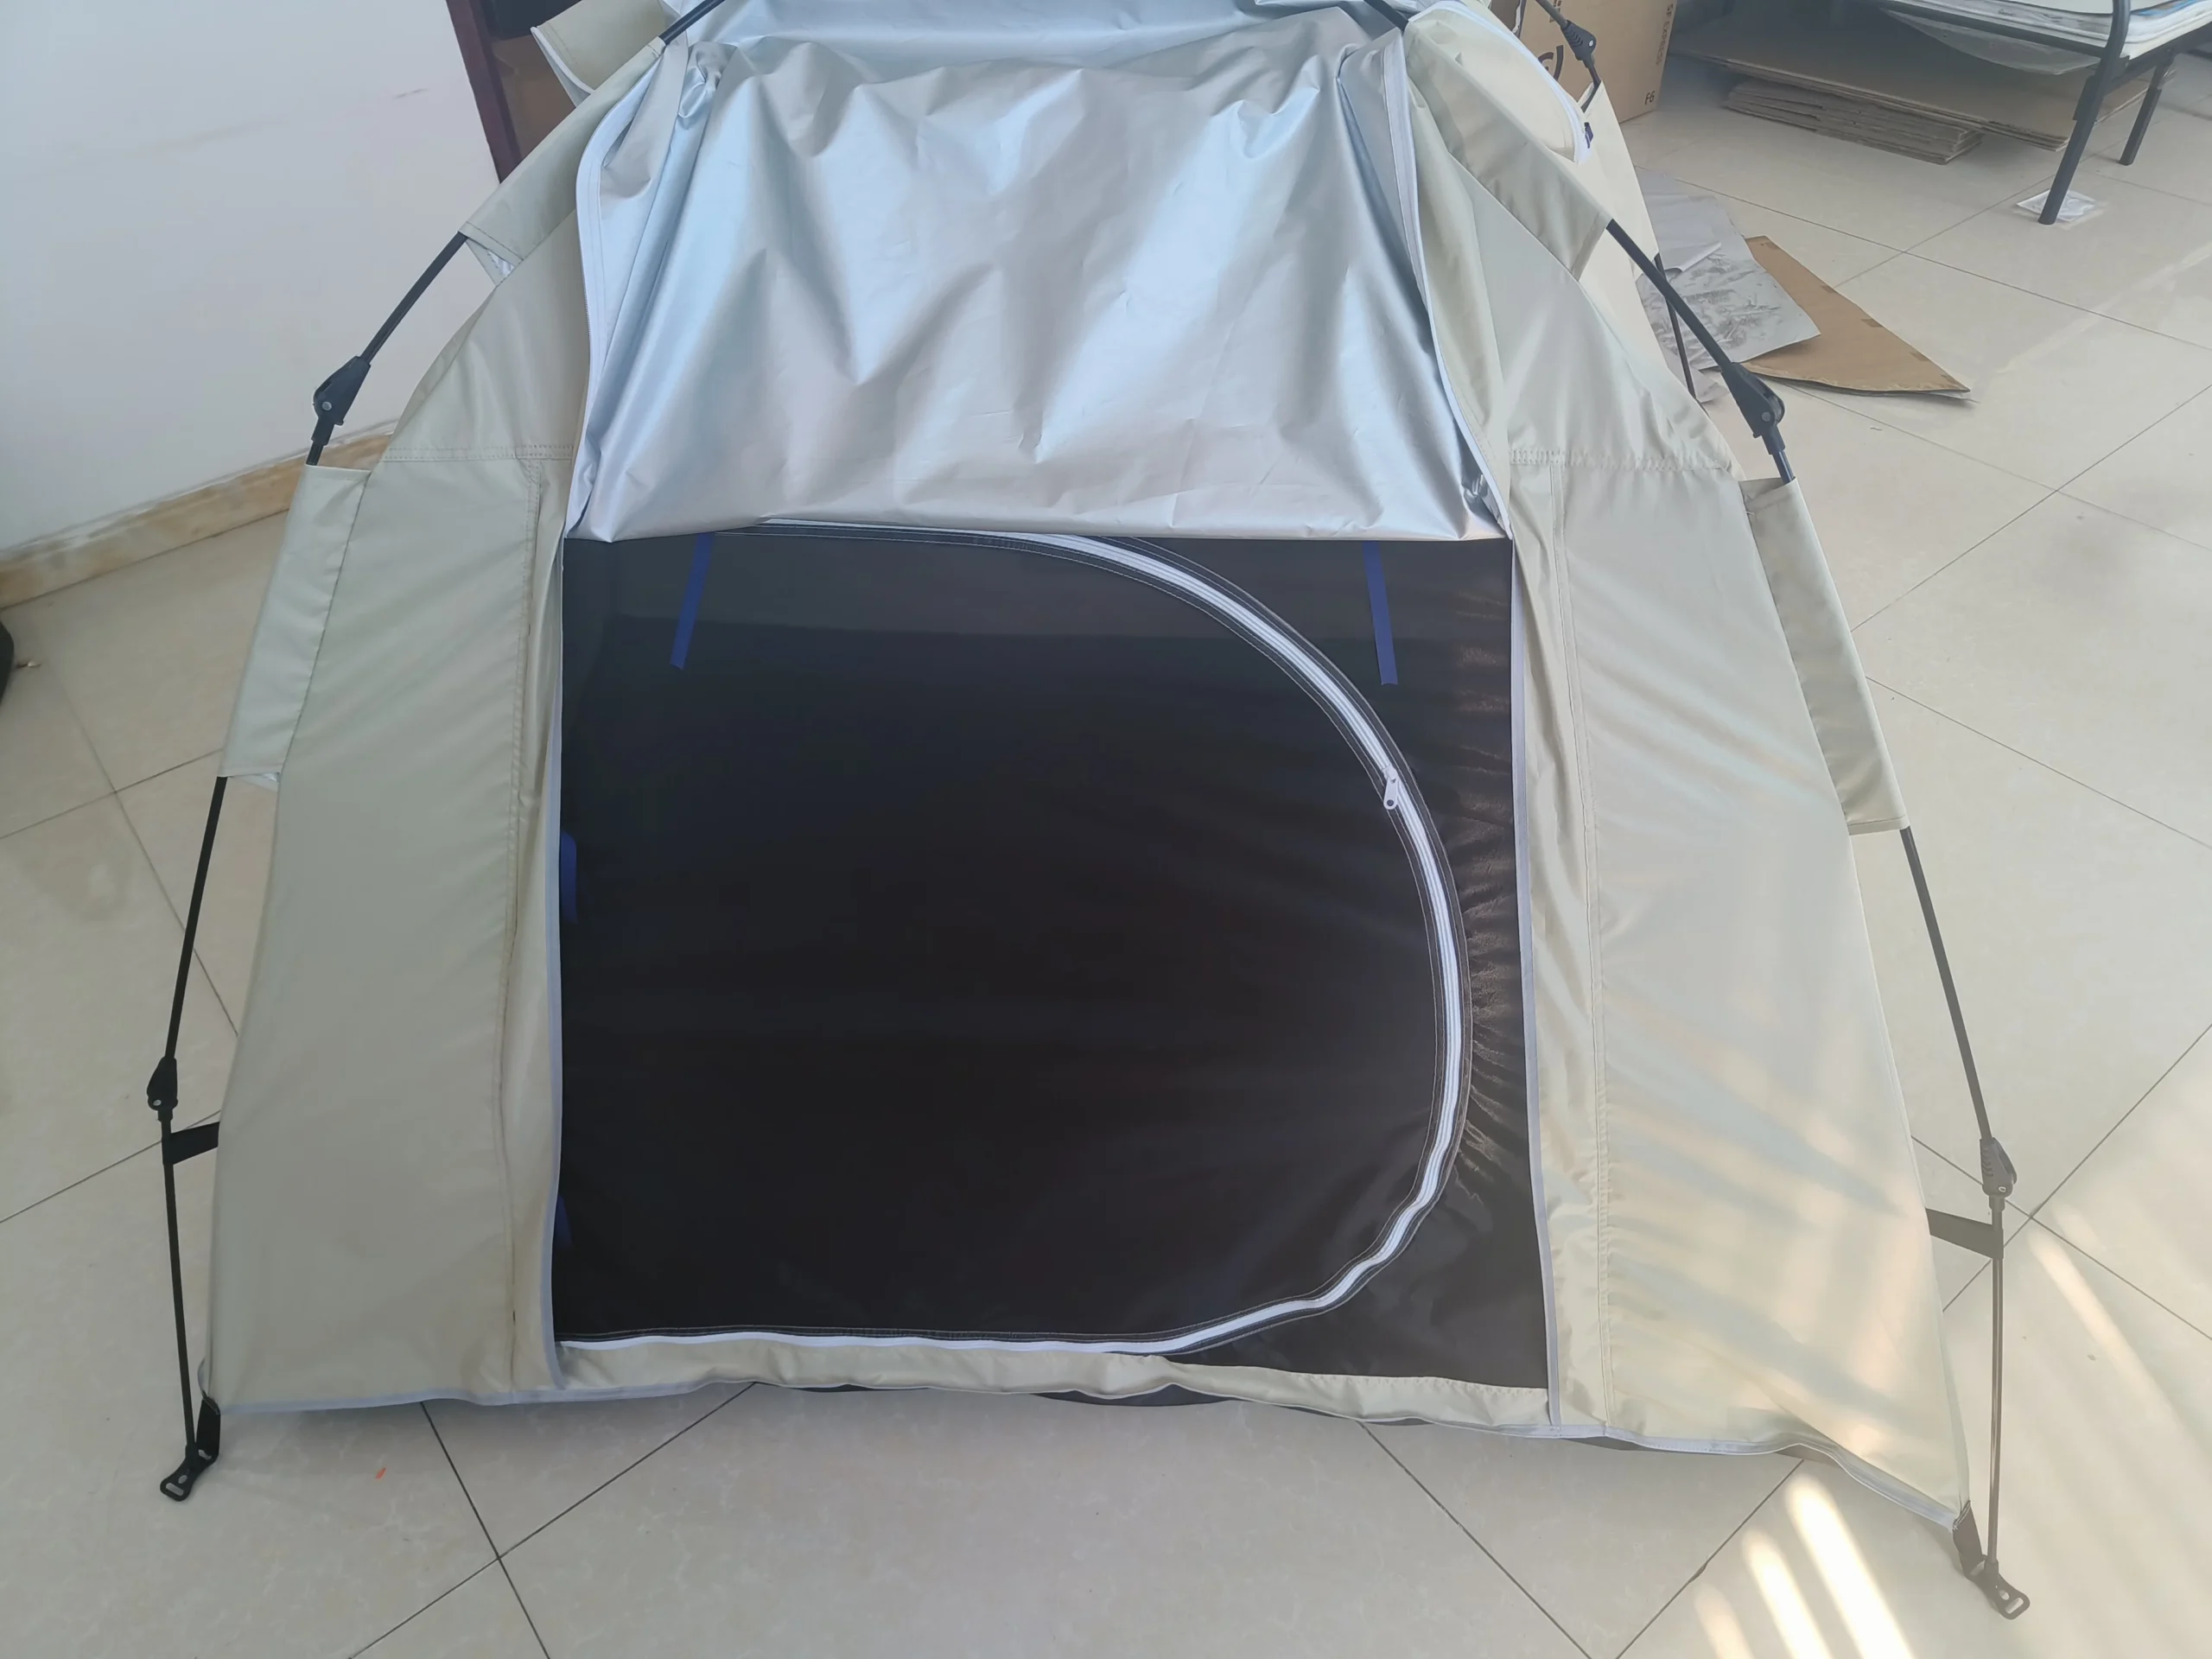
Evaluating Shelter Waterproofness Quality
Beyond the specifications, these construction details determine real-world performance:
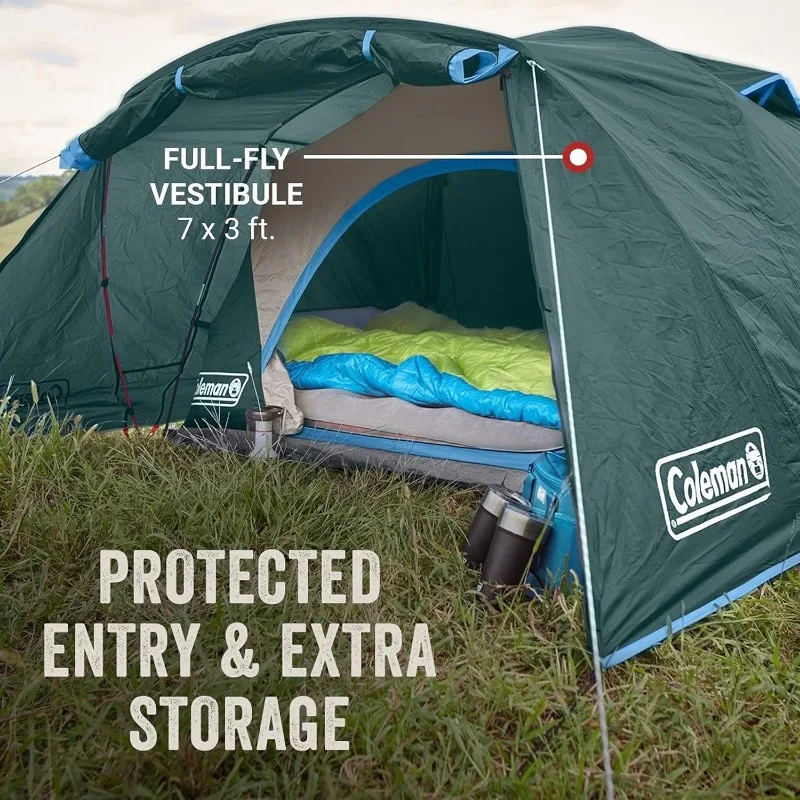
Vestibule Design: Adequate vestibule space keeps wet gear outside your sleeping area while providing protected cooking space during storms.
Door Configuration: Doors that zip from top to bottom prevent water entry better than side-zipping designs.
Pole Structure: More crossing points and attachment points create greater stability in high winds that often accompany storms.
Ventilation: Strategic placement of vents, especially high vents that remain functional during rain, reduces condensation that can mimic leakage.
The top waterproof shelter picks for backpackers balance these technical specifications with practical design features. Premium tents from quality manufacturers feature fully-sealed, double-stitched seams, optimized ventilation systems, and weather-tested designs that have proven their worth in challenging conditions.
Quality waterproof backpacking tents represent one of your most important gear investments, providing the critical barrier between you and the elements when you’re furthest from civilization.
7. Choosing the Right Waterproof Gear for Your Backpacking Style
With so many options available, selecting the right waterproofing strategy requires understanding your specific needs and backpacking approach. This personalized framework helps you invest wisely in gear that matches your adventures.
Assessing Your Personal Waterproofing Needs
Consider these factors when building your waterproof gear system:
Trip Duration and Environment:
– Weekend trips in predictable weather require less redundancy than extended backcountry expeditions
– Alpine environments demand higher waterproofing standards than desert trails
– Forest cover provides some natural protection compared to exposed terrain
Typical Precipitation Patterns:
– Frequent brief showers need different solutions than constant drizzle
– Thunderstorm-prone regions require rapid deployment features
– Snow considerations differ from rain protection
Personal Factors:
– Heat output during exertion affects breathability requirements
– Cold sensitivity influences insulation needs when wet
– Risk tolerance determines redundancy level in your system
Key Decision Factors for Waterproof Gear Selection
Weight Considerations
Weight represents a fundamental consideration in backpacking gear decisions. Understanding the relationship between the backpacking big 3 essential gear (shelter, sleep system, and backpack) and your waterproofing strategy helps optimize both protection and packability.
Ultralight backpacking tents save weight but may require supplemental groundsheet protection. Similarly, ultralight rain gear typically sacrifices durability and feature sets to achieve minimum weight.
The complete guide to tent weight for backpacking explores these tradeoffs in detail, helping you balance protection with portability based on your specific needs.
Durability Requirements
Your expected usage pattern dramatically impacts durability needs:
– Occasional backpackers can often use lighter, less durable options
– Frequent backpackers need robust gear that withstands repeated compression and rough handling
– Off-trail hikers require reinforced materials that resist tears and punctures
Breathability and Comfort
Higher exertion levels demand more breathable waterproof gear:
– Fast-paced hikers and those covering significant elevation gain need maximum breathability
– Cold-weather backpackers may prioritize heat retention over breathability
– Hot, humid environments make breathability essential to prevent internal condensation
Budget Optimization Strategies
Quality waterproof gear represents a significant investment, but strategic purchasing maximizes value:
– Prioritize waterproofing for your “critical dry items” (sleeping bag, insulating layers)
– Consider investing most heavily in pieces you’ll use beyond backpacking
– Look for versatile items that perform well across multiple conditions
The optimal waterproofing system integrates with your broader layering strategy, ensuring you remain comfortable across varying conditions while carrying only what you truly need.
8. Expert Field Techniques: Staying Dry in Challenging Conditions
Even the best gear requires proper usage techniques. These field-tested strategies help you maximize protection when the weather turns against you.
Strategic Packing for Maximum Protection
Layer waterproofing strategies from inside out: individual dry bags inside waterproof liners inside pack covers.
Pack in order of water-sensitivity, with the most critical items (sleeping bag, insulation) in the center and deepest part of your pack.
Use your sleeping pad as internal structure and protection, placing it vertically against the back panel to shield contents from potential water entry points.
Develop a quick-access rain strategy with shell layers stored in outer pockets for immediate deployment when weather changes.
Proactive Weather Management
Learn to read cloud formations and barometric trends to anticipate weather changes before they arrive.
Deploy rain protection early rather than waiting until precipitation begins—getting ahead of the weather keeps your core dry from the start.
Take advantage of natural shelters like tree cover during brief showers, saving your gear from unnecessary exposure.
Site Selection and Camp Management
Proper campsite selection significantly impacts your ability to stay dry. Waterproof camping tents perform best when placed on well-drained ground:
Avoid low spots and natural drainage channels even if they appear dry—they’re the first places water collects during rain.
Look for slight slopes and natural ground cover that aids drainage rather than perfectly flat areas that pool water.
Consider wind direction when orienting your shelter, with the smallest profile facing prevailing winds to reduce rain spray under the fly.
Create protected changing areas within vestibules using ground cloths to maintain dry clothing during prolonged storms.
Managing Condensation and Internal Moisture
Ventilate aggressively during breaks in precipitation to release trapped moisture.
Minimize moisture-generating activities inside shelters, including cooking or drying wet gear.
Use body heat strategically to dry small essential items by keeping them close to your core during sleep.
Durable tents for all seasons incorporate ventilation features that help manage condensation, but proper usage techniques remain essential. During multi-day rain events, establishing a condensation management routine prevents the gradual accumulation of internal moisture that can be just as problematic as external precipitation.
9. Care and Maintenance: Maximizing the Lifespan of Your Waterproof Gear
Quality waterproof gear represents a significant investment. Proper maintenance not only extends its lifespan but ensures it performs optimally when you need it most. Maintaining waterproof gear requires specific procedures tailored to modern technical materials.
Cleaning Procedures for Waterproof Materials
For Waterproof/Breathable Fabrics:
1. Rinse with cool water to remove surface dirt and debris
2. Wash using technical cleaner specifically designed for waterproof/breathable fabrics
3. Avoid regular detergents, fabric softeners, or bleach that can damage membranes
4. Use front-loading washers without agitators that can physically damage fabrics
5. Rinse thoroughly to remove all cleaning agents
For Coated Fabrics (like pack covers and stuff sacks):
1. Hand wash with mild soap
2. Focus on removing dirt and oils that can degrade waterproof coatings
3. Air dry completely before storage
Frequency Guidelines:
– Rain jackets and pants: After 2-3 weeks of use or when visibly dirty
– Tents: After each extended trip, particularly if used in dusty conditions
– Pack covers and dry bags: When visible contamination occurs
DWR Restoration Techniques
When water stops beading up and begins to “wet out” the fabric surface, it’s time to restore the DWR treatment:
Spray-On Application:
1. Clean and dry the garment completely
2. Apply spray evenly from 6-8 inches away
3. Remove excess with a clean cloth
4. Allow to dry naturally, then heat-activate according to product instructions
Wash-In Application:
1. Clean the item first
2. Add DWR product to wash cycle according to instructions
3. Run a full rinse cycle
4. Tumble dry or iron according to product activation instructions
For environmental considerations, look for newer DWR formulations that avoid harmful PFCs (perfluorinated chemicals) while still providing effective water repellency.
Inspection and Repair
Regular inspection prevents minor issues from becoming major failures:
- Check seam tape for lifting or peeling
- Look for punctures and abrasions, particularly in high-wear areas
- Test zippers and closures for smooth operation and water-resistance
- Examine coating for flaking or separation from base fabric
For field repairs, carry:
– Seam sealer for tent and shelter maintenance
– Tenacious Tape or similar repair patches for tears
– Silicone sealant for pinhole leaks
Professional repair becomes necessary for:
– Delamination of waterproof membranes
– Failed seam tape over large areas
– Zipper replacement on waterproof closures
Storage Best Practices
Between trips, proper storage preserves waterproofing effectiveness:
1. Always store completely dry to prevent mold and mildew
2. Hang jackets and pants loosely rather than compressed
3. Store tents loose in storage sacks rather than tightly stuffed
4. Keep all waterproof gear away from heat sources and direct sunlight
5. Avoid folding along the same lines repeatedly to prevent creating permanent creases where water can pool
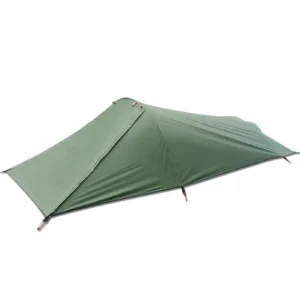

Lightweight Backpacking Tent, Ultralight Backpacking Tent, Ultralight Bivy Tent
Ultralight Single Person Camping Tent with Aluminum Poles for 3-Season Backpacking Waterproof DesignPrice range: $94.88 through $326.82 Select options This product has multiple variants. The options may be chosen on the product page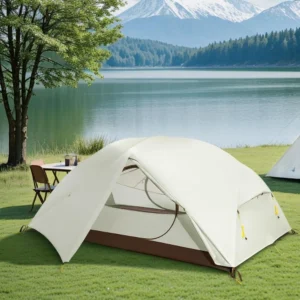
Lightweight Backpacking Tent, Ultralight Backpacking Tent, Waterproof Backpacking Tent
$391.05 Select options This product has multiple variants. The options may be chosen on the product page
Heavy Duty 4 Season Tent, Mountaineering Tent, Winter Camping Tent
$870.40 Select options This product has multiple variants. The options may be chosen on the product page
Compact Backpacking Tent, Lightweight Backpacking Tent, Waterproof Camping Tent
$335.52 Select options This product has multiple variants. The options may be chosen on the product page
Ultralight Backpacking Tent, Ultralight Dome Tent, Winter Camping Tent
Price range: $369.63 through $370.07 Select options This product has multiple variants. The options may be chosen on the product page
Camping Tent with Vestibule, Waterproof Camping Tent
Price range: $407.89 through $479.48 Select options This product has multiple variants. The options may be chosen on the product page
10. Frequently Asked Questions: Expert Answers to Common Waterproofing Concerns
What’s the minimum waterproof gear I need for a weekend backpacking trip?
At minimum, carry a quality rain jacket, pack liner or pack cover, and dry bags for electronics and sleeping gear. For moderate rainfall regions, add rain pants and waterproof footwear or gaiters. In persistently wet climates, a comprehensive system including all the above plus backup options is advisable. Lightweight backpacking tents with good waterproof ratings form your essential shelter component.
How often should I reapply DWR to my rain gear?
DWR should be reapplied when you notice water no longer beading up on the fabric surface. For typical use, this means every 10-20 field days or when the fabric begins to “wet out” (absorb water rather than repel it). Washing frequency, abrasion, and exposure to oils (including skin oils) accelerate DWR degradation.
Are premium waterproof fabrics worth the extra cost?
For frequent backpackers, extended trips, or challenging conditions, premium waterproof fabrics offer tangible benefits in durability, breathability, and comfort. Occasional backpackers in moderate conditions may find mid-range options sufficient. The greatest value often lies in selective investment—premium protection for your most critical items and budget-friendly options elsewhere.
How do I protect my sleeping bag in extremely wet conditions?
Use multiple layers of protection: a waterproof stuff sack, placed inside a pack liner, with your pack itself covered. In extremely wet conditions or for extended trips, consider vapor barrier liners or waterproof bivy sacks as additional protection. Always treat your sleeping bag as your most essential dry item, as its insulating properties are severely compromised when wet.
What’s the best way to dry waterproof footwear in the field?
Remove insoles and loosen laces completely. Stuff with quick-dry towels or unused clothing to absorb moisture, replacing as needed. If conditions allow, place boots in morning sun but avoid extreme heat that can damage adhesives. Avoid placing directly by campfires, which can melt synthetic components. For faster drying, consider ultralight trekking pole tents with vestibules that provide protected drying space.
11. Conclusion: Invest Wisely for Dry, Comfortable Backcountry Adventures
Staying dry in the backcountry isn’t just about comfort—it’s about safety, endurance, and the ability to fully enjoy your wilderness experience regardless of conditions. The difference between quality waterproof gear and inadequate protection often determines whether challenging weather becomes a minor inconvenience or a trip-ending ordeal.
When evaluating your waterproofing strategy, consider the integrated nature of effective systems. No single piece—not even the most expensive rain jacket or tent—can compensate for weaknesses elsewhere in your setup. Instead, build a complementary system that addresses your specific needs, environment, and backpacking style.
Begin by investing in crucial areas that directly impact safety, particularly quality shelters and sleeping bag protection. Then gradually upgrade other components as your experience and budget allow. The best ultralight hiking tents of 2025 represent significant advancements in waterproof technology, demonstrating how targeted investments yield substantial real-world benefits.
Remember that even the best gear requires proper usage, maintenance, and field techniques. The knowledge you’ve gained through this guide empowers you to make informed decisions both before and during your adventures, helping you stay dry whether you’re facing an unexpected afternoon thunderstorm or a week-long Pacific Northwest drizzle.
With proper preparation and equipment, you can confidently venture into the backcountry knowing that rain won’t end your adventure—it might just become part of the story.