
Understanding Tent Vestibules: Your Camping Extra Space
A tent vestibule is that covered area outside your tent’s main sleeping space but still protected by the rainfly. Think of it as your tent’s front porch or mudroom – a transitional space between the outdoors and your cozy sleeping quarters. Vestibules come in several configurations, including front vestibules (extending from the main entrance), side vestibules (along the sides of the tent), integrated vestibules (built into the tent design), and add-on vestibules (attachable extensions).
The primary purpose of these covered areas is threefold: they provide valuable storage space for gear, create a buffer zone between the elements and your sleeping area, and offer protection from rain, snow, and sun. This extra space proves invaluable for keeping your main tent area clean and organized, especially during extended camping trips.
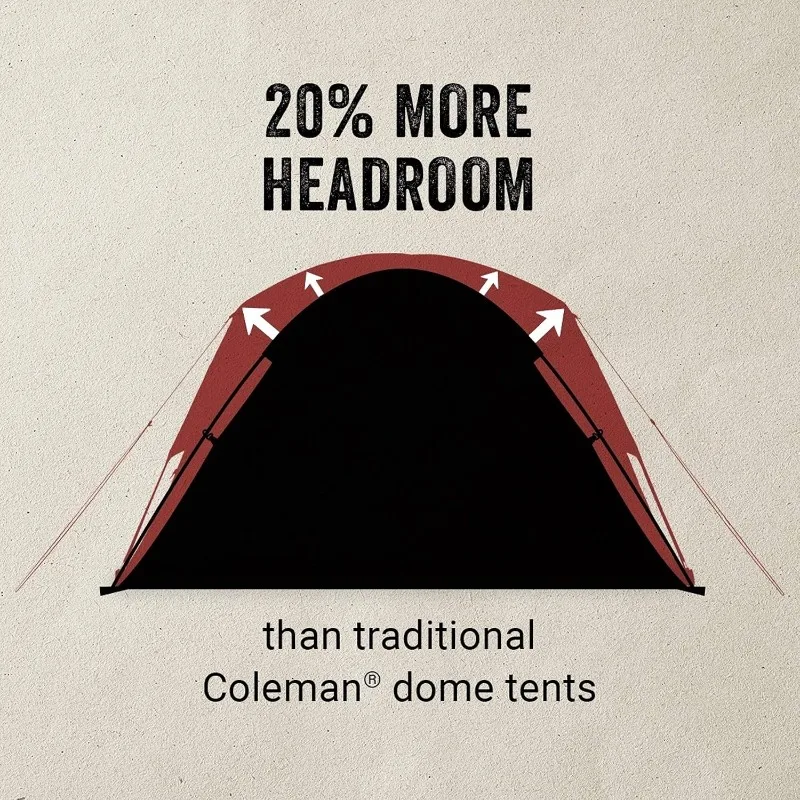
Vestibule sizes vary significantly across tent styles. Backpacking tents typically feature vestibules ranging from 4 to 8 square feet – enough for a backpack and boots. Family camping tents often boast more generous vestibules exceeding 10 square feet, accommodating multiple gear items and sometimes even camp chairs. Some expedition tents feature extra-large vestibules that can serve as cooking or gear maintenance areas during poor weather.
The fundamental purpose of tent vestibules extends beyond simple weather protection. These spaces serve as critical organizational zones, creating a natural boundary between the outdoors and your sleeping quarters. With thoughtful organization, a vestibule transforms from merely a covered area into a functional extension of your living space.
When shopping for tents, it’s worth comparing vestibule designs across different models. Some camping tents with vestibules feature innovative configurations like asymmetrical shapes that maximize usable space while minimizing overall footprint. Others include multiple vestibules for shared tents, allowing each occupant their own storage and entry zone.
Properly utilized, vestibules can dramatically transform your living space into the ultimate game-changer for comfortable camping. By keeping wet, dirty items outside your sleeping area while still protected from the elements, you maintain a cleaner, more organized, and ultimately more enjoyable camping experience.
Why Smart Vestibule Storage Matters for Campers
Effective vestibule organization isn’t just about keeping things tidy—it fundamentally enhances your entire camping experience. When properly executed, smart vestibule storage addresses several critical camping challenges simultaneously.
First and foremost, well-organized vestibule storage protects your valuable gear. Camping equipment represents a significant investment, and exposure to excessive moisture, dirt, or improper storage can dramatically shorten its lifespan. By creating dedicated storage zones within your vestibule, you shield sensitive items from rain and ground moisture while maintaining easy access.
The space efficiency benefits cannot be overstated. Camping, especially backpacking, inherently means living in confined quarters. Every square inch matters. A thoughtfully organized vestibule effectively expands your usable living space by relocating gear that would otherwise clutter your sleeping area.
Key benefits of proper vestibule organization include:
- Keeping dirty, wet items separated from clean, dry sleeping areas
- Protecting gear from rain, dew, and ground moisture
- Creating logical access patterns for frequently used items
- Establishing clear boundaries in shared camping situations
- Minimizing nighttime disruptions when accessing gear
- Reducing trip hazards around tent entrances
The extensive benefits of vestibule storage become particularly evident during extended trips or challenging weather conditions. Many experienced campers report that organized vestibules make the difference between merely enduring a rainy camping trip and actually enjoying it.
Weather protection represents another critical advantage. Your tent vestibule’s weather protection capabilities create a buffer zone that prevents rain splash, wind-driven moisture, and direct precipitation from affecting gear stored inside. This protection extends the functional life of equipment and ensures dry gear is available when needed.
Beyond practical considerations, there’s a psychological benefit to returning to an organized campsite after a long day of outdoor activities. The comfort of knowing exactly where your essentials are located—and that they’re protected from the elements—contributes significantly to camping enjoyment and stress reduction.
Evaluating Your Vestibule Storage Needs
Before investing in vestibule storage solutions, take time to assess your specific requirements. The optimal organization system depends on your typical camping style, gear collection, and environmental conditions. Consider these key factors:
Trip Duration and Style
– Weekend camping typically requires less complex organization than week-long expeditions
– Backpacking demands ultralight, compact solutions while car camping allows heavier, more elaborate systems
– Solo campers have different space allocation than group campers sharing a tent
Environmental Considerations
– How often do you camp in rainy conditions?
– Do you frequently encounter muddy terrain?
– Are extreme temperatures (hot or cold) common in your camping areas?
– Do you camp in areas with significant wildlife concerns?
Vestibule Characteristics
– What is the floor area of your vestibule(s)?
– How high is the ceiling at different points?
– Does your vestibule have a waterproof floor or just overhead coverage?
– How many entrance points does your vestibule feature?
Gear Assessment Questions
– What items consistently create storage challenges?
– Which gear requires quick, frequent access?
– What items need maximum protection from elements?
– Which gear can be stored elsewhere (vehicle, bear cache, etc.)?
Many backpacking tents with dedicated vestibules are designed with storage in mind, featuring specific attachment points, integrated pockets, or structural elements that facilitate organization. Understanding your tent’s specific vestibule design helps you select compatible storage solutions.
Once you’ve evaluated these factors, you can prioritize your storage needs based on what matters most: accessibility, protection, or space optimization. For most campers, it’s a balance of all three, but your specific priorities will guide your solution selection.
Ask yourself: Would you rather invest in systems that maximize weather protection, focus on accessibility for frequently used items, or emphasize maximizing your limited space? The answer guides your approach to the solutions presented in the following sections.
Essential Categories for Vestibule Organization
Gear Classification for Optimal Storage
Strategic vestibule organization begins with classifying your gear into logical categories based on storage suitability. This system helps determine what belongs where, ensuring both protection and accessibility.
“Must-Store” Vestibule Items:
– Hiking boots and footwear (especially when wet or muddy)
– Outer layers like rain jackets and pants after use
– Backpacks and daypacks
– Trekking poles and walking sticks
– Helmets and other bulky gear
– Gaiters and muddy items
These items benefit most from vestibule placement because they’re often dirty or wet, bulky, and needed relatively frequently. The vestibule provides the perfect middle ground—protected from direct elements but separated from your clean sleeping area.
“Good Options” for Vestibule Storage:
– Cooking equipment (with important safety caveats)
– Camp shoes or sandals
– Small camping tools and accessories
– Equipment needing ventilation after use
– Sealed water containers
Items in this category can work well in vestibules but might require additional protection like waterproof bags or raised platforms depending on conditions.
“Better Elsewhere” Items:
– Food and scented products (wildlife concerns)
– Electronics and other moisture-sensitive valuables
– Sleeping bags and primary insulation layers
– Anything irreplaceable or extremely valuable
– Fuel canisters and highly flammable items
Learning to master tent vestibule organization involves understanding not just what can be stored in vestibules, but what should be stored there. The classification system may shift depending on your camping environment—what works in arid regions might be problematic in rainforest conditions.
Remember that many items can move between categories based on weather conditions. A backpack might be fine directly on the vestibule floor during dry weather but need elevation or additional protection during rainy conditions.
The Fundamental Principles of Vestibule Organization
Effective vestibule organization relies on five core principles that apply regardless of your specific gear or tent design. Understanding these fundamentals helps you adapt to different camping situations and environments.
The Accessibility Principle: Arrange items based on frequency of use and logical sequence. Items needed most often should be closest to the entrance and easiest to reach. Consider the order of use as well—morning essentials should be grouped together and evening necessities similarly arranged.
The Weatherproofing Principle: Create layers of protection against moisture. Utilize vertical space to elevate sensitive items off the ground, employ waterproof barriers between gear and vestibule floor, and position items to avoid contact with tent walls where condensation often forms.
The Space Optimization Principle: Think three-dimensionally about your vestibule. Utilize vertical space with hanging systems, stack compatible items safely, create zones for different gear categories, and consider the full volume of the space rather than just floor area.
The Cleanliness Principle: Maintain strict separation between clean/dry and dirty/wet items. Create designated zones for muddy footwear, wet rain gear, and clean equipment. This separation prevents moisture and dirt migration that can compromise dry gear.
The Safety and Security Principle: Organize to prevent hazards like trip dangers near entrances and exits. Consider wildlife attractants (food residue, scented items) and position valuable items deeper in the vestibule away from easy access points.
These principles form the foundation of all effective vestibule organization strategies, whether you’re using commercial products or DIY solutions. Understanding how backpacking tent vestibules function in different conditions helps you apply these principles more effectively across camping environments.
Common organization mistakes include placing moisture-sensitive items directly on vestibule floors, creating chaotic “gear dumps” that make items difficult to locate, and failing to adjust storage strategies when weather conditions change. By keeping these core principles in mind, you’ll develop an intuitive sense for proper vestibule organization regardless of your specific equipment or camping location.
Commercial Vestibule Storage Solutions
Ground-Level Protection Systems
The foundation of any vestibule storage system starts with ground protection. These commercial solutions create a clean, dry base layer for your vestibule storage system.
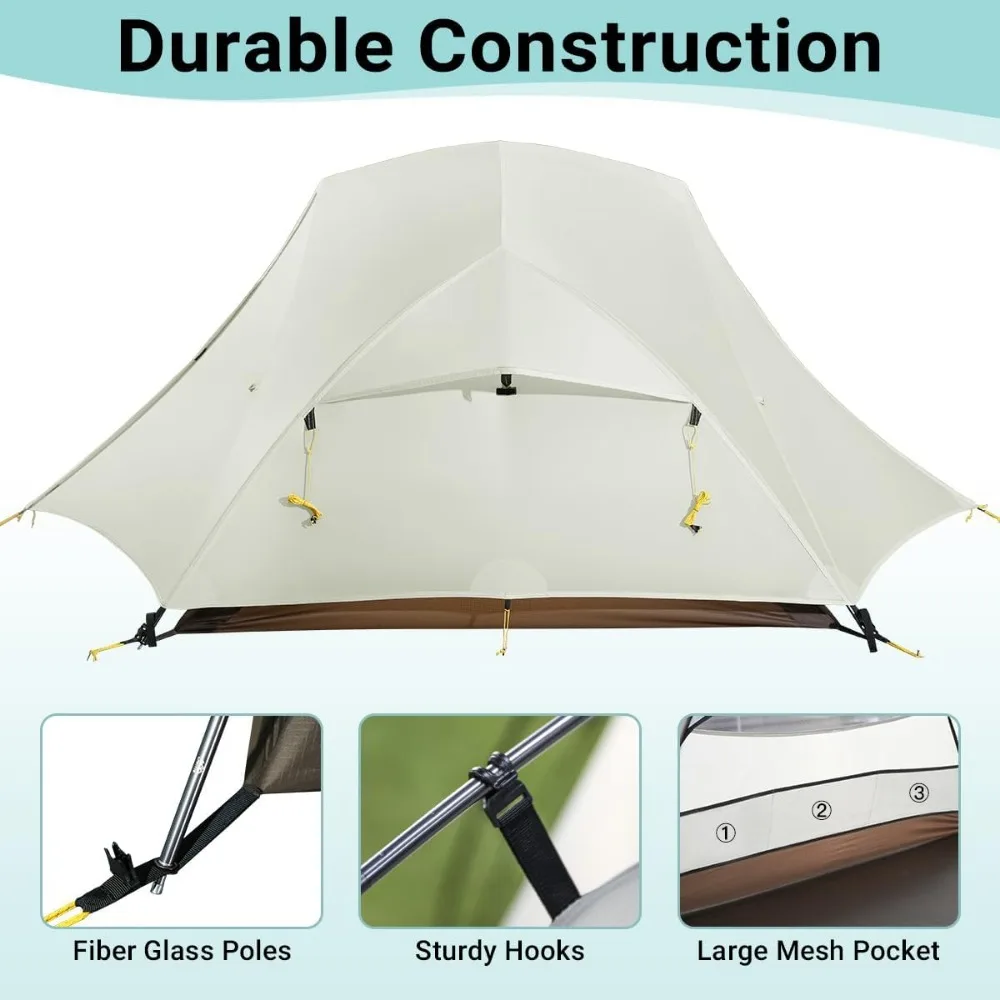
Dedicated vestibule footprints provide precisely-sized waterproof barriers designed to fit specific tent models. Unlike general-purpose tarps, these footprints feature attachment points that integrate with your tent’s design. Look for footprints made from durable ripstop nylon or silnylon that balance weight and durability.
Waterproof tarps and custom groundsheets offer more versatile options when dedicated footprints aren’t available. These range from ultralight dyneema composites weighing just 2-4 ounces to more robust options in the 5-10 ounce range. Key features to consider include:
- Waterproof rating (look for 1500mm+ for reliable protection)
- Reinforced corners that resist punctures and tearing
- Grommets or attachment points for secure positioning
- Packability relative to your overall storage space
Specialized boot trays and mats provide targeted protection for the highest-traffic vestibule area. These often feature textured surfaces that trap dirt and water away from other gear, with raised edges that contain moisture.
Material selection varies significantly based on your primary camping environment. Silnylon offers excellent waterproofing at minimal weight but less durability than heavier options. Ripstop nylon with polyurethane coating balances the variables well for most users. Waterproof camping tents often come with integrated groundsheets extending into the vestibule area, potentially reducing your need for separate ground protection.
Price points typically range from budget-friendly universal tarps ($15-25) to premium tent-specific footprints ($30-50). The investment typically correlates with durability, weight savings, and integration with your specific tent model.
Hanging Storage Systems for Vestibules
Vertical space utilization through hanging storage systems dramatically increases your vestibule’s functional capacity. These elevated solutions keep gear organized and easily accessible while protecting it from ground moisture.
Gear lofts adapted for vestibule use represent one of the most versatile options. Originally designed for tent interiors, many models can be modified for vestibule use with additional cord or attachment points. Look for:
- Adjustable corner straps that accommodate different attachment points
- Mesh construction for visibility and weight savings
- Weight capacity appropriate for your gear (typically 1-3 pounds for lightweight systems, 5+ pounds for heavy-duty options)
Hanging pocket organizers designed specifically for tent environments offer compartmentalized storage for smaller items. These typically attach to tent poles, guylines, or dedicated attachment loops and feature multiple pockets of varying sizes.
Ridgeline organizers create overhead storage by spanning the space between vestibule support points. These simple systems typically use cord or webbing with attached loops or carabiners to suspend gear above ground level.
Installation methods vary based on your tent design. Most hanging systems utilize some combination of:
– S-hooks or carabiners for quick attachment/detachment
– Adjustable webbing or cord for tension control
– Adhesive-backed attachment points for tents lacking built-in attachment options
– Tension-based systems that don’t require permanent attachment points
The packability factor is crucial for backpackers. Most quality hanging systems compress to approximately the size of a small apple and weigh 2-6 ounces, representing minimal pack weight penalties for significant organizational benefits.
Specialized Storage Containers and Bags
Purpose-built containers and bags create modular organization within your vestibule space while adding crucial protection for specific gear types.
Waterproof dry bags serve multiple purposes in vestibule storage. Beyond their obvious role in keeping contents dry, they create color-coded organization, compress bulky items, and provide defined spaces for different gear categories. When selecting dry bags for vestibule use, consider:
- Closure system (roll-top designs offer reliable waterproofing)
- Material durability versus weight trade-offs
- Transparency options for content visibility
- Size variety for different gear categories
Compression sacks maximize space efficiency by reducing the volume of compressible items like extra clothing or low-loft insulation. The best compression systems reduce volume by 30-50% without damaging contents.
Specialized containers for cooking equipment offer protection while containing food residue that might attract wildlife. Look for options with secure closures and materials that contain odors.
Backpack rain covers and protective bags prevent your pack from becoming a water reservoir during rainy conditions. These lightweight covers typically weigh 2-4 ounces but prevent pounds of water absorption in wet conditions.
Multi-purpose bins and collapsible crates provide structure for odd-shaped items. The best options for camping are those that collapse nearly flat when not in use while providing rigid protection when deployed.
Waterproof backpacking tents often feature additional waterproofing in vestibule areas, potentially reducing your need for extensive waterproof container systems in moderate conditions.
Modular and Expandable Vestibule Systems
For campers requiring substantial storage capacity, modular and expandable vestibule systems offer solutions beyond standard tent features.
Add-on vestibules attach to existing tent structures to significantly increase covered space. These products typically add 15-30 square feet of protected area—a substantial increase in storage capacity. Weight penalties range from 1-3 pounds depending on materials and construction.
Modular shelters that integrate with existing tents create hybrid systems with specialized storage areas. These range from simple awning extensions to nearly complete secondary shelters that connect to your main tent.
Attachment systems for connecting additional storage include universal adapters that work across tent brands, tent-specific connection kits, and DIY solutions using compatible materials.
Key considerations when evaluating these expansion options include:
- Setup complexity and additional time requirements
- Weather resistance compared to your main tent
- Packability and transportation logistics
- Compatibility with your existing tent design
- Weight addition to your overall load
Learning more about options for adding vestibules to existing tents helps you evaluate whether expansion systems make sense for your specific camping style and storage needs.
DIY and Budget-Friendly Vestibule Storage Solutions
Creative Tarp Hacks for Vestibule Organization
You don’t need specialized equipment to create effective vestibule storage. Simple, affordable materials can be transformed into customized solutions that rival commercial products.
Creating custom-sized ground coverings requires only basic materials and minimal skills. Options include:
- Painter’s plastic tarps: Lightweight, inexpensive (under $5), and easily cut to size. While less durable than camping-specific materials, they provide reliable moisture protection for weekend trips.
- Emergency blankets: Ultralight (typically 2-3 ounces), reflective materials that provide excellent moisture barrier while adding thermal protection for gear in cold conditions.
- Repurposed ripstop nylon: Fabric from retired gear can be cut and seam-sealed to create custom-fitted vestibule floors.
Rigging improvised hanging systems requires only cordage and basic knot knowledge. A 25-foot section of 2mm utility cord ($3-5) provides enough material to create multiple hanging points within most vestibules. Simple loops tied at strategic intervals create attachment points for gear throughout the vestibule structure.
Making removable vestibule liners involves creating simple rectangular sheets with reinforced corners. These liners can be quickly installed when setting up camp and removed/shaken out to eliminate dirt and debris before packing up. Materials cost typically runs $10-15 for DIY options.
Many lightweight backpacking tents feature minimal vestibule structures that benefit significantly from these DIY enhancements, adding functionality without significant weight penalties.
Simple Cordage and Carabiner Systems
Creating versatile hanging systems within vestibules requires minimal materials and basic techniques. With a handful of small carabiners and appropriate cordage, you can transform your vestibule into a well-organized storage space.
Tension line systems utilize the principles of physics to create stable hanging platforms without complex attachment mechanisms. A basic setup involves:
- Identifying two opposing attachment points (tent poles, guy points, etc.)
- Running cord between these points with adjustable tension
- Adding attachment loops or carabiners along the line
- Hanging gear from these suspended points
Recommended cord types include:
– 2mm utility cord for general-purpose lines (supports 75-100 lbs)
– 1.5mm dyneema cord for ultralight applications (supports 200+ lbs despite minimal weight)
– Reflective cord for improved visibility in low-light conditions
Basic knots worth mastering for these systems include the taut-line hitch for adjustable tension, the bowline for secure end connections, and the prusik knot for creating adjustable attachment points along a fixed line.
Non-damaging attachment methods preserve your tent’s integrity while providing secure connection points. Techniques include:
– Webbing loops around tent poles rather than direct connections
– Using existing guy points and stake loops
– Tension-based connections rather than clips or hooks that might damage tent fabrics
These simple systems support surprising weight capacities—typically 5-10 pounds per line when properly installed—while adding negligible weight to your pack.
Repurposed Household Items for Vestibule Storage
Some of the most effective vestibule organization solutions are everyday items repurposed for camping use. These budget-friendly alternatives often perform comparably to expensive camping-specific products.
Hanging shoe organizers transform into multi-pocket vestibule storage systems when cut to appropriate sizes. The clear plastic versions offer visibility of contents while providing water resistance. A $10 organizer typically yields two or three camping-friendly sections.
Mesh produce bags create perfect storage for items needing ventilation. These ultralight bags (often free from grocery purchases) allow air circulation while containing small items that might otherwise get lost in vestibule corners.
Shower caddies with hanging hooks function as excellent organizers for toiletries and small accessories. Soft-sided versions pack flat when not in use while providing structured storage when deployed.
Binder clips serve as improvised hooks, gear organizers, and closure devices throughout your vestibule. Their strong grip and minimal weight make them surprisingly versatile camping tools.
Magnetic hooks provide non-damaging attachment points for lightweight gear on metal tent poles. These inexpensive hooks (typically under $5 for several) support items up to 1-2 pounds without any modification to your tent.
The creative repurposing approach offers significant cost savings while often reducing weight compared to dedicated camping products. The key limitation is typically durability in extreme conditions—household items rarely match the weather resistance of specialized outdoor equipment.
No-Sew and Simple Sewing Projects
For campers willing to undertake basic craft projects, custom storage solutions offer perfect-fit organization tailored to specific gear and tent designs.
Basic fabric organizers requiring minimal or no sewing represent the entry point for DIY storage projects. Simple pocket organizers can be created by folding ripstop nylon and using fabric tape for seams instead of stitching. Materials for these projects typically cost $10-15 and require less than an hour to complete.
Simple hanging pocket systems require slightly more involvement but yield professional-looking results. Materials to consider include:
– Ripstop nylon (durable and water-resistant)
– Mesh fabric (visibility and ventilation)
– Grosgrain ribbon or webbing for attachment points
– Hook-and-loop fasteners for closures
Boot and shoe bags from waterproof fabrics solve one of the most common vestibule storage challenges. A basic design uses:
– Waterproof or highly water-resistant material
– Drawstring or roll-top closure
– Reinforced bottom panel for durability
– Optional hanging loop for vertical storage
Customizable storage solutions tailored to specific gear needs represent the ultimate DIY approach. By evaluating your particular storage challenges, you can design precisely what you need rather than adapting commercial products.
Many ultralight backpacking tents benefit significantly from these customized lightweight solutions, as every ounce saved in storage systems means less weight in your pack.
Expert Strategies for Vestibule Management
Pre-Trip Planning for Efficient Vestibule Use
Effective vestibule organization begins before you leave home. Thoughtful pre-trip planning dramatically improves your camping experience by anticipating storage needs and potential challenges.
Start by categorizing gear into logical access groups based on when and how often you’ll need each item. Common categories include:
– Immediate access (headlamps, snacks, water bottles)
– Morning essentials (stove, coffee kit, breakfast supplies)
– Evening necessities (lighting, dinner preparation tools)
– Weather-dependent gear (rain protection, sun hats)
– Emergency items (first aid kit, repair supplies)
Pre-pack items into appropriate containers before your trip. Color-coding storage bags or using distinctive containers helps you instantly identify contents without rummaging. This system proves particularly valuable during nighttime or poor weather conditions.
Space allocation planning becomes critical for shared tents. Establish clear boundaries and storage zones for each camper to avoid conflicts and confusion. Dedicated areas for communal gear versus personal items simplify access and organization.
Include contingency planning for weather changes in your preparation. Pack extra protection for gear if the forecast suggests precipitation, and consider how changing conditions might affect your storage strategy. Having versatile options ensures you can adapt to whatever weather you encounter.
Trekking pole backpacking tents offer particularly versatile vestibule configurations that benefit from thoughtful pre-trip planning to maximize their adaptable designs.
Optimal Setup Techniques for Weather Protection
The effectiveness of your vestibule storage system depends significantly on your tent’s initial setup. Proper positioning and tension create the foundation for successful weather protection.
Site selection fundamentally impacts vestibule functionality. Look for:
– Slight natural drainage away from the tent/vestibule
– Protection from prevailing winds when possible
– Level ground that won’t collect water
– Positioning that accounts for morning sun/afternoon shade preferences
Proper staking and guying techniques dramatically improve vestibule performance. Key principles include:
– Stake vestibule corners at 45° angles from the tent for maximum volume
– Apply even tension across all attachment points
– Use additional guy lines in windy conditions
– Adjust vestibule doors/openings based on wind direction

Lightweight Backpacking Tent, Ultralight Backpacking Tent, Ultralight Bivy Tent
Ultralight Single Person Camping Tent with Aluminum Poles for 3-Season Backpacking Waterproof DesignPrice range: $94.88 through $326.82 Select options This product has multiple variants. The options may be chosen on the product page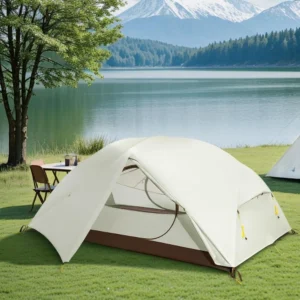
Lightweight Backpacking Tent, Ultralight Backpacking Tent, Waterproof Backpacking Tent
$391.05 Select options This product has multiple variants. The options may be chosen on the product page
Heavy Duty 4 Season Tent, Mountaineering Tent, Winter Camping Tent
$870.40 Select options This product has multiple variants. The options may be chosen on the product page
Compact Backpacking Tent, Lightweight Backpacking Tent, Waterproof Camping Tent
$335.52 Select options This product has multiple variants. The options may be chosen on the product page
Ultralight Backpacking Tent, Ultralight Dome Tent, Winter Camping Tent
Price range: $369.63 through $370.07 Select options This product has multiple variants. The options may be chosen on the product page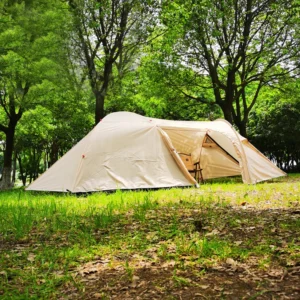
Camping Tent with Vestibule, Waterproof Camping Tent
Price range: $407.89 through $479.48 Select options This product has multiple variants. The options may be chosen on the product page
Creating proper drainage around the vestibule prevents water infiltration during rain. Simple techniques include:
– Small trenches directing water away from critical areas (if permitted by local regulations)
– Strategic placement of rocks or sticks to divert water flow
– Slight elevation of the vestibule floor using natural materials or additional groundsheets
Regular tension adjustments accommodate changing conditions. Materials expand and contract with temperature and humidity changes, requiring occasional readjustment for optimal protection. Morning and evening checks ensure consistent performance.
Moisture and Condensation Management
Managing moisture represents one of the greatest challenges in vestibule storage. Understanding condensation mechanics helps you prevent problems before they develop.
Condensation in vestibules occurs when warm, moisture-laden air contacts cooler surfaces like tent walls or rainfly material. This natural process happens most frequently during:
– Temperature drops in evening hours
– Cooking or boiling water in confined spaces
– Drying wet gear inside the vestibule
– Breathing in enclosed vestibules during cold conditions
Ventilation strategies significantly reduce condensation problems. Techniques include:
– Positioning doors/vents to create air circulation
– Maintaining appropriate gap between rainfly and ground
– Opening upper vents while keeping lower areas protected
– Creating cross-ventilation when weather permits
Ground moisture barriers provide critical protection against one of the primary moisture sources. Multiple barrier layers prove more effective than single thick layers. Consider:
– Base layer of waterproof groundsheet/footprint
– Secondary layers under specific gear categories
– Elevated platforms for extremely sensitive items
Drying techniques for damp gear in vestibules require balancing airflow with protection. Position wet items:
– Away from dry gear to prevent moisture transfer
– Where air circulation can reach all surfaces
– Suspended rather than in direct contact with ground or walls
– Rotated periodically to expose different surfaces
Many winter camping tents feature specialized ventilation systems designed specifically to manage the extreme condensation challenges of cold-weather camping.
Wildlife and Security Considerations
Proper vestibule organization must account for both wildlife interaction and human security concerns. These considerations affect what you store in vestibules and how you organize it.
The foremost wildlife consideration involves food storage—specifically keeping it out of your vestibule. Even sealed food containers can attract wildlife through scent transmission. Instead:
– Use proper food storage containers (bear canisters, bear bags)
– Store food away from your sleeping area according to local regulations
– Clean cooking equipment thoroughly before storing
– Keep scented items (toiletries, flavored drinks) with food, not in vestibules
Small critter deterrent strategies help protect gear from mice, squirrels, and other small animals attracted to salt (from sweat) or residues on equipment. Techniques include:
– Storing boots upside down or elevated
– Shaking out clothing before storing
– Using sealed containers for items with residual scents
– Applying natural deterrents like mint oil to problem areas
While theft concerns vary by location, basic security practices include:
– Positioning valuable items deeper in the vestibule, away from entrances
– Using small combination locks on zippers in higher-risk areas
– Arranging gear so disturbances would be noticeable
– Creating noise-makers (like stacked cook pots) that alert to movement
In established campgrounds, noise reduction for gear stored in vestibules shows consideration for neighbors. Secure loose items that might flap or rattle in nighttime winds, and organize for silent access to items you might need overnight.
Adapting Solutions to Your Camping Style
The ideal vestibule storage system varies significantly based on your specific camping activity and style. What works perfectly for ultralight backpacking might prove frustrating for family car camping.
For backpackers focused on minimizing weight, prioritize:
– Multi-function items that serve storage and other purposes
– Ultralight materials like dyneema and silnylon
– Weight distribution across multiple small solutions rather than few heavy ones
– Collapsible or compressible storage options
– Systems that attach to gear you’re already carrying (like trekking poles)
Car camping allows more substantial, comfort-focused solutions:
– Durability over weight considerations
– Larger, structured containers and organizers
– Heavy-duty materials that withstand repeated use
– Enhanced features like waterproof zippers and reinforced construction
– Semi-permanent modifications that improve functionality
Family camping organization requires strategies for multiple users:
– Color-coded systems for different family members
– Clear zones for shared versus personal items
– Child-accessible storage for appropriate gear
– Simplified systems that all family members can maintain
– Redundancy for commonly needed items
Extended trip considerations emphasize durability and adaptability:
– Repair options for storage systems
– Modular components that can be reconfigured as needs change
– Backup solutions for critical storage needs
– Weather-adaptable systems for changing conditions
The best tents with gear storage vestibules provide great starting points, but most campers benefit from customizing these built-in features with additional solutions tailored to their specific needs.
Seasonal adjustments maintain effectiveness throughout the year:
– Summer: Emphasis on ventilation and sun protection
– Fall/Spring: Adaptability for temperature and precipitation changes
– Winter: Insulation considerations and snow management
For those focused on long-distance hiking, lightweight tents for long treks paired with equally lightweight storage systems optimize both protection and weight considerations.
Special Considerations for Challenging Environments
Extreme environments demand specialized approaches to vestibule organization. Standard solutions may fail under challenging conditions, requiring adaptation or specialized equipment.
Extreme Wet Weather Management
Persistent rain and high humidity create the most common vestibule challenges. Effective strategies include:
- Double-barrier systems for critical gear (waterproof bag inside elevated platform)
- Microfiber cloths for wiping down wet items before storage
- Absorbent layers between groundsheet and gear
- Strategic positioning to utilize natural tent ventilation
- Regular repositioning of gear to prevent saturation
- Vapor barriers for extremely sensitive equipment
Success in these conditions requires vigilance—checking gear regularly and adjusting positioning as conditions change. What works during light rain may fail in sustained downpours.
Desert Camping Considerations
Desert environments present opposite yet equally challenging conditions:
- Sand management through elevated storage and sealed containers
- Protection from extreme temperature fluctuations
- Shade considerations for temperature-sensitive items
- Static electricity management through grounding techniques
- Additional UV protection for materials that degrade in intense sunlight
Frequent cleaning of attachment points and zippers prevents sand-based abrasion and system failures in desert conditions.
Winter Camping and Snow Management
Cold-weather camping creates unique storage challenges:
- Prevention of freezing for moisture-sensitive gear
- Management of snow introduction into vestibule areas
- Techniques for preventing snow melt from soaking gear
- Insulating layers between cold ground and temperature-sensitive equipment
- Vestibule reinforcement for snow loading on tent structures
Four-season winter tents feature more robust vestibules specifically designed to handle snow loading and provide stable storage in winter conditions.
High Wind Considerations
Wind dramatically affects vestibule functionality and requires:
- Lower profile storage arrangements
- Additional securing of loose items
- Strategic positioning of gear to buttress tent structure
- Wind-direction-based organization of vestibule openings
- Regular readjustment as wind conditions change
The most successful high-wind vestibule management involves integrating your gear storage into the overall structural integrity of your shelter system.
Supplementary Content: Advanced Vestibule Customization
For experienced campers seeking to optimize their vestibule storage beyond standard solutions, targeted modifications can dramatically improve functionality.
Can I modify my tent vestibule for better storage?
Most tents accept moderate customization without compromising structural integrity or warranties. Simple, non-permanent modifications include:
- Adding adhesive-backed webbing loops for additional attachment points
- Installing small carabiner clips at key junction points
- Adding lightweight accessory sleeves along tent poles
- Creating custom ground anchors for specific terrains
More advanced projects might include:
– Sewing additional pockets into vestibule walls
– Adding lightweight mesh panels for gear drying
– Installing flexible rod systems for structured organization
– Creating custom dividers for multi-function vestibules
Material recommendations for these modifications emphasize lightweight, durable options like:
– Grosgrain webbing for attachment points (superior strength-to-weight ratio)
– YKK zipper components for any closure additions
– Ripstop nylon matching your tent’s denier rating
– UV-resistant thread for any stitching projects
Always test modifications on non-critical gear first, and consider making temporary versions before permanent installations. The most successful modifications typically address specific, recurring challenges you’ve experienced across multiple camping trips.
Tents with expanded vestibules provide excellent inspiration for customization ideas that maximize storage potential while maintaining weather protection.
Supplementary Content: Is a Gear Shed Better Than a Vestibule?
Many campers eventually wonder whether upgrading to a dedicated gear shed makes more sense than optimizing vestibule storage. This comparison helps evaluate your options:
| Feature | Vestibule | Gear Shed |
|---|---|---|
| Weight | Minimal addition (0-2 lbs) | Substantial (3-7+ lbs) |
| Setup Time | Integrated with tent | Separate setup required |
| Weather Protection | Good to excellent | Excellent |
| Space Efficiency | Limited by tent design | Highly customizable |
| Accessibility | Immediate tent access | May require exiting shelter |
| Versatility | Limited by design | Can be used independently |
| Cost | Included with tent | Additional investment |
Gear sheds excel for:
– Extended base camping
– Group camping with shared equipment
– Activities with substantial equipment (fishing, climbing)
– Situations requiring protected cooking space
Vestibules remain superior for:
– Backpacking and weight-conscious activities
– Quick setup and breakdown needs
– Solo campers with moderate gear volume
– Budget-conscious options
Hybrid approaches often provide the best solution, using vestibule storage for immediate-need items while employing small gear sheds for larger or shared equipment. Some innovative tent designs now incorporate vestibule-shed hybrids that offer expanded storage without the setup complexity of separate structures.
Supplementary Content: Can You Cook Safely in a Tent Vestibule?
The question of cooking in vestibules requires careful consideration of serious safety risks balanced against practical needs in challenging conditions.
Carbon monoxide risk represents the most serious danger. This odorless, colorless gas produced by combustion can reach lethal concentrations in enclosed spaces with minimal warning. No tent vestibule, regardless of ventilation, can guarantee safe dispersal of carbon monoxide.
Fire hazards present another critical concern. Modern tent materials ignite easily and burn extremely rapidly. Most tent fabrics can melt and cause severe burns even without catching fire. Manufacturer warnings against vestibule cooking exist for valid safety reasons.
If extreme conditions absolutely necessitate vestibule cooking, these minimum safety requirements must be met:
– Maximum possible ventilation (multiple open points)
– Carbon monoxide detector properly positioned
– Fire extinguishing capability immediately available
– Stove placed on stable, non-flammable surface
– Continuous monitoring throughout operation
– Maximum distance from tent fabric
Safer alternatives include:
– Ultralight cooking shelters (2-8 oz dedicated options exist)
– Natural shelters supplemented with minimal tarps
– Quick-setup cooking areas separate from sleeping areas
– No-cook meal options eliminating the need for flame
In regions with frequent extreme weather, consider durable tents for all seasons that include features like extended vestibules or cooking bays specifically designed for safer food preparation.
The expert consensus remains clear: cooking inside or immediately adjacent to tents introduces serious risks that are rarely justified by convenience. The safest approach separates cooking activities from sleeping areas entirely.