
Understanding the Tent Vestibule: A Camper’s Extra Room
A tent vestibule is a covered area outside the main sleeping compartment of your tent, typically created by an extended rainfly or additional fabric that provides a protected transition space between the outdoors and your tent interior. Think of it as your tent’s front porch or mudroom—a practical space that serves multiple purposes while keeping your sleeping area comfortable and organized.
Modern tent designs often integrate vestibules directly into their structure, with the rainfly extending beyond the tent body to create this sheltered zone. Depending on the tent design, vestibules can be located at the front entrance, along the sides, or in multiple positions for larger tents. They aren’t just random additions but carefully designed elements that address specific needs campers face in the outdoors.
The concept resembles the mudroom in your home—a transition area where you can remove dirty shoes and wet clothing before entering cleaner living spaces. A typical tent vestibule adds approximately 5-15 square feet (0.5-1.4 square meters) of covered space, significantly extending your tent’s functional area without increasing the sleeping footprint.
Vestibules have evolved substantially from the early days of camping. While traditional canvas tents rarely featured them, modern lightweight designs have embraced vestibules as essential components that enhance the overall camping experience by addressing storage challenges, weather protection, and space limitations that outdoor enthusiasts frequently encounter.
Understanding the full potential of tent vestibule storage can transform your camping experience from merely adequate to truly comfortable. As we explore further, you’ll discover how these seemingly simple extensions deliver key benefits of tent vestibules that many campers consider indispensable for successful outdoor adventures.
Key Benefits of Having a Tent Vestibule
Gear Storage That Keeps Your Sleeping Area Clutter-Free
A tent vestibule serves as a dedicated storage area that helps maintain organization and maximizes the usable space inside your sleeping compartment. This becomes particularly valuable when you consider that a typical 2-person tent might only have about 30 square feet (2.8 square meters) of interior space—with backpacks alone potentially consuming up to 25% of that area.
In your vestibule, you can conveniently store:
– Hiking boots, trail shoes, and camp footwear
– Backpacks and daypacks
– Dirty or wet clothing
– Camp chairs and other bulky equipment
– Cooking gear and food containers (securely stored from wildlife)
Effective vestibule organization strategies can transform this space from a simple storage area into a well-arranged extension of your tent. For backpackers especially, tents with well-designed vestibules provide critical space efficiency that makes longer trips more comfortable without adding significant weight.
Weather Protection: A Buffer Zone Against the Elements
Vestibules create a protective buffer that shields against rain, snow, and wind, significantly improving your camping comfort in challenging conditions. This transition zone reduces your exposure when entering or exiting the tent during inclement weather, helping you stay dry when it matters most.
During heavy rainstorms, your vestibule provides a crucial space where you can shake off water from rain jackets or umbrellas before entering the sleeping area. Additionally, many campers find that vestibules can reduce wind exposure at the tent entrance by up to 50%, creating a more comfortable microclimate that extends the habitable space of your shelter.
The weather protection capabilities of vestibules become especially valuable during extended camping trips when prolonged exposure to the elements would otherwise make tent living uncomfortable or even unsafe.
The “Mudroom Effect”: Maintaining a Clean Interior
Much like a home’s mudroom, your tent vestibule creates a transition space where you can remove muddy or wet footwear and clothing before entering the main sleeping area. This separation significantly improves tent cleanliness, comfort, and helps extend the life of your gear.
The vestibule creates a practical boundary between the often-messy outdoors and your dry, clean sleeping space—particularly valuable after hiking through muddy trails, morning dew, or persistent rain. Without this transition area, keeping your sleeping space clean becomes a constant challenge that detracts from the camping experience.
For those who regularly camp in wet conditions, understanding how to manage moisture is crucial. Additional tips for staying dry while backpacking can complement your vestibule’s functionality, creating a comprehensive approach to comfort in challenging weather.
Expanded Livable Space for Better Comfort
By effectively adding 20-40% more usable area to your tent system, vestibules significantly expand your livable space without adding much weight. This extended footprint improves overall comfort, particularly during extended stays or when weather keeps you tent-bound.
Beyond simple storage, creative campers find numerous uses for their vestibules:
– A sheltered spot for reading or journaling during light rain
– A protected area for removing and putting on layers during changing weather
– Additional covered space for gear maintenance and organization
– A buffer zone that adds insulation against extreme temperatures
This expanded living space transforms how you experience camping, allowing for better organization, increased comfort, and improved functionality that makes longer trips more sustainable and enjoyable.
Common Uses: Maximizing Your Vestibule’s Potential
Organized Gear Storage Systems
Creating an efficient storage system in your vestibule maximizes its utility while keeping gear accessible and protected. With thoughtful organization, even a modest vestibule can accommodate surprising amounts of equipment.
Consider these organizational approaches:
– Place frequently accessed items near the door for easy retrieval
– Store boots and shoes with soles facing outward to keep dirt away from the tent
– Use the vestibule’s highest points for hanging wet clothing to dry
– Position backpacks against the outer wall to maximize floor space
– Create zones for different users if sharing a tent with multiple people
Many camping tents with vestibules include features specifically designed for organization, such as small pockets, attachment points, or adjustable heights that enhance storage options. Taking full advantage of both horizontal and vertical space transforms your vestibule from a simple covered area into a functional extension of your living space.
Wet Weather Management Strategies
Effectively managing wet gear in your vestibule helps maintain comfort while preventing moisture from entering your sleeping area. Strategic placement of wet items can allow them to dry while keeping your main tent dry and comfortable.
When dealing with wet conditions:
– Hang rain jackets and outer layers from the vestibule ceiling to drip dry
– Position wet items on the outer edges of the vestibule away from the tent door
– Create a slight slope in the vestibule floor (during setup) to direct water away
– Consider using a small pack towel to absorb excess water from gear
– Shake off as much water as possible before placing items in the vestibule
For extended wet conditions, waterproof tents with generous vestibules provide greater separation between wet and dry areas, making moisture management significantly more effective. This becomes particularly important during multi-day trips when drying opportunities may be limited.
Cooking in a Vestibule: Safety Critical Considerations
⚠️ WARNING: Cooking in a vestibule carries serious safety risks that can be life-threatening ⚠️
While some campers consider cooking in vestibules during bad weather, this practice involves significant dangers:
– Carbon monoxide poisoning: This odorless, colorless gas from stoves can accumulate in the semi-enclosed space and can be fatal
– Fire hazards: Most tent materials can ignite quickly and burn completely in under a minute
– Melting damage: Even without flames, heat can melt or damage tent fabrics
– Food smells: Cooking odors can attract wildlife to your tent, creating additional hazards
If you absolutely must cook near your tent in extreme conditions:
– Always ensure maximum ventilation by opening vestibule doors completely
– Position stoves at the outermost edge of the vestibule, as far from tent fabric as possible
– Never leave cooking equipment unattended
– Use a carbon monoxide detector designed for camping
– Consider safer alternatives like no-cook meals or quick-heating options
For most situations, cooking away from your tent or using appropriate camping setups that keep heat sources separate from sleeping areas represents the safest approach. Many experienced backpackers prepare separate cooking shelters or use natural features for protection instead of risking vestibule cooking.
Types of Vestibules: Understanding Your Options
Integrated vs. Add-On Vestibules
Tent vestibules generally fall into two main categories: those integrated into the original tent design and those available as separate add-on components.
| Feature | Integrated Vestibules | Add-On Vestibules |
|---|---|---|
| Weight Efficiency | Often lighter overall (8-12 oz / 230-340g) | Adds extra weight (12-20 oz / 340-570g) |
| Setup Complexity | Single setup process with the tent | Requires separate attachment steps |
| Weatherproofing | Seamless integration with rainfly | Potential gaps at connection points |
| Cost | Included in tent price | Additional purchase expense |
| Versatility | Fixed to the specific tent design | Can be used with different compatible tents |
| Replacement | Often requires replacing entire rainfly | Can be replaced independently |
For tents without built-in vestibules, adding a vestibule may still be possible with aftermarket options that attach to existing rainfly edges or tent poles. These solutions provide flexibility but typically don’t integrate as seamlessly as factory-designed options.
Location-Based Types: Front, Side, and Multiple Vestibules
The positioning of vestibules significantly impacts their functionality and suitability for different camping scenarios.
Front Vestibules typically provide 8-15 square feet (0.7-1.4 square meters) of covered space directly outside the main entrance. These are the most common design and offer:
– Straightforward access and intuitive use
– Protection for the primary tent entrance
– Simplified setup with fewer stakes and guylines
– Typically more headroom near the door area
Side Vestibules run along tent walls and offer:
– Individual storage areas for multi-person tents
– Better separation of wet gear from entrances
– Often slightly smaller footprints (5-10 square feet / 0.5-0.9 square meters)
– Improved privacy when entering/exiting
Multiple Vestibule Designs incorporate covered areas at various points around the tent:
– Provide separate storage areas for each camper
– Create multiple protected entrance/exit options
– Offer greater flexibility for different weather conditions
– Particularly valuable for family or group camping tents with multiple occupants

The best configuration depends on your specific camping style, typical group size, and the environmental conditions you frequently encounter.
Influences of Tent Design on Vestibule Style
Various tent architectures naturally incorporate different vestibule configurations based on their structural elements and intended use:
Dome Tents typically feature arched vestibules that follow the curved profile of the tent body. The dome structure creates natural stability but sometimes limits vestibule size due to the curved pole configuration. These vestibules often offer good headroom near the door with gradually decreasing height toward the outer edge.
Tunnel Tents generally provide more spacious, uniformly-shaped vestibules thanks to their parallel pole design. These vestibules maintain consistent height throughout their length, creating excellent usable space but sometimes requiring more careful staking in windy conditions.
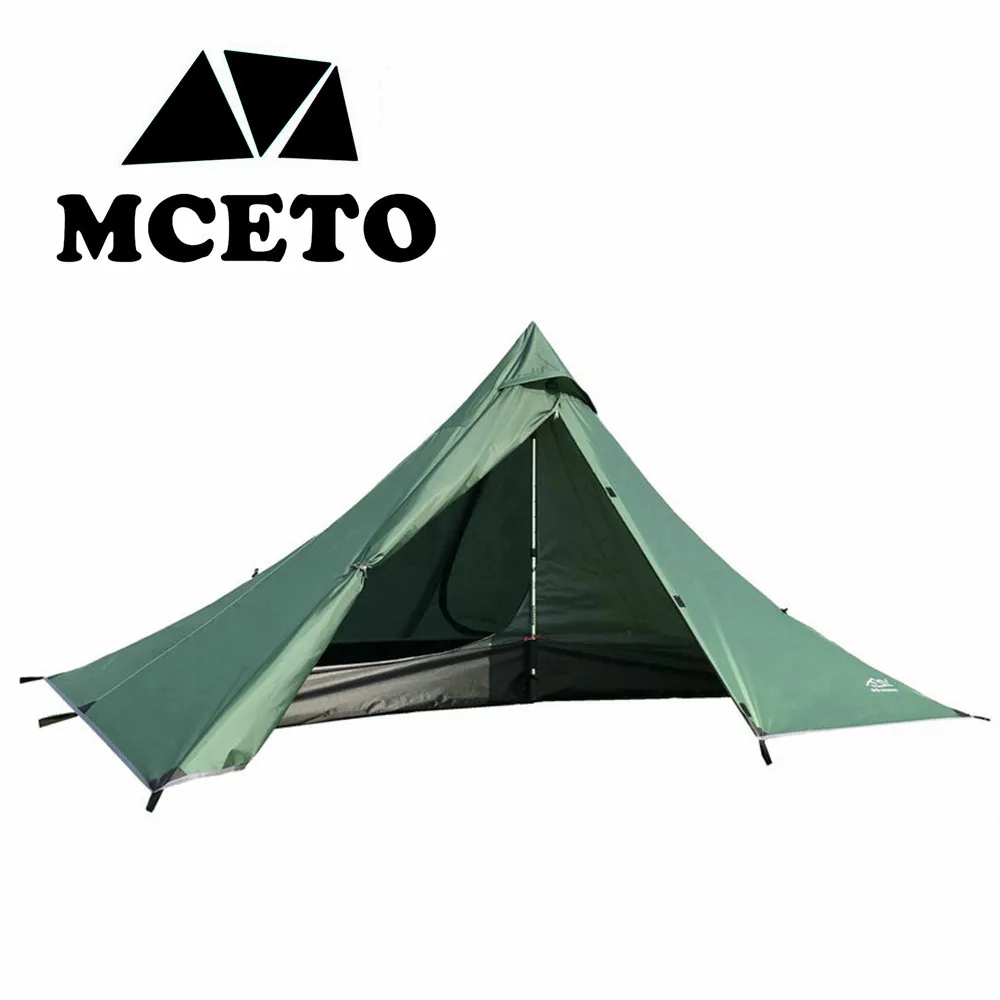
Ultralight Tents incorporate minimalist vestibules that balance protection with weight savings. These designs often use trekking poles or minimal additional supports to create covered areas while keeping weight below 2-3 pounds (0.9-1.4 kg) for the entire shelter system.
Expedition Tents feature robust vestibules designed for extended use in harsh conditions. These often include reinforced anchor points, steeper walls for snow shedding, and larger covered areas (up to 20+ square feet / 1.9+ square meters) to accommodate extended stays and substantial gear storage needs.
Setting Up Your Vestibule for Maximum Effectiveness
Basic Setup Principles for Weather Resistance
Proper vestibule setup significantly impacts its performance, particularly in challenging weather conditions. Following these principles helps ensure maximum protection:
- Stake positioning: Place stakes at approximately 45° angles away from the tent for optimal tension and stability
- Guyline tensioning: Adjust lines to create a taut, wrinkle-free surface that sheds water effectively
- Height adjustment: Position the outer edge at an appropriate height—lower in windy conditions, higher for better ventilation
- Drainage consideration: Ensure the ground slopes away from the tent entrance to prevent water pooling
- Reinforcement in severe weather: Add additional stakes or guylines (typically every 6-8 inches / 15-20 cm) when expecting strong winds
Avoid common errors like insufficient tension (causing water pooling), improper angles that catch wind, or positioning that directs runoff toward the tent entrance. Understanding windproof tent principles helps inform better vestibule setup decisions, particularly regarding orientation and secure anchoring.
Optimizing Your Vestibule Space
Strategic organization transforms your vestibule from simple covered storage into a highly functional extension of your living space:
- Utilize vertical space by hanging lightweight items from the ceiling or using collapsible organizers
- Maintain a clear path to the tent door for easy access, especially important at night
- Create ventilation gaps of 2-4 inches (5-10 cm) at the bottom edge to reduce condensation
- Position moisture-sensitive items toward the inner portion of the vestibule away from potential drips
- Adapt configuration based on weather conditions—more enclosed during rain, more open during fair weather
Tents with expanded vestibules provide additional flexibility for organization but require thoughtful planning to maximize their benefits. Even in smaller vestibules, vertical organization and clear access paths significantly improve functionality without compromising protection.

Tall / Stand Up Camping Tent, Two Room Camping Tent
$407.93 Select options This product has multiple variants. The options may be chosen on the product page
Compact Backpacking Tent, Lightweight Backpacking Tent, Waterproof Camping Tent
$335.52 Select options This product has multiple variants. The options may be chosen on the product page
Camping Tent with Vestibule, Waterproof Camping Tent
Price range: $407.89 through $479.48 Select options This product has multiple variants. The options may be chosen on the product page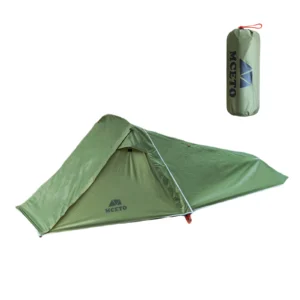
Backpacking Tent with Vestibule, Freestanding Backpacking Tent, Lightweight Backpacking Tent
Price range: $446.89 through $447.22 Select options This product has multiple variants. The options may be chosen on the product page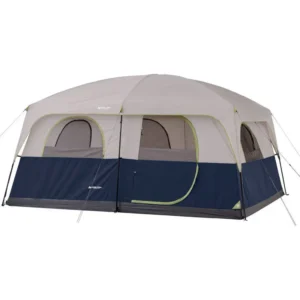 $476.52 Select options This product has multiple variants. The options may be chosen on the product page
 $1,221.93 Select options This product has multiple variants. The options may be chosen on the product page
Do You Need a Vestibule? Making the Right Choice
When a Vestibule Is Most Valuable
Certain scenarios make vestibules particularly valuable additions to your camping setup:
Extended Weather Exposure significantly increases a vestibule’s value. For trips longer than a weekend or in regions with frequent precipitation, vestibules provide crucial protected space for gear management and tent entry. This becomes especially important when camping in the same location for multiple days without the opportunity to dry equipment.
Gear-Intensive Activities like mountaineering, fishing, or winter camping involve bulky equipment that benefits from protected external storage. Technical adventures often require specialized gear that would consume excessive interior tent space, making vestibules practically essential.
Longer Trips (typically 3+ days) benefit tremendously from the organizational advantages vestibules provide. As trip duration increases, the value of efficient storage and protected space grows proportionally, enhancing comfort and functionality.
Group Camping situations where multiple people share a tent create greater demands for storage space and protected entry/exit areas. Tents with well-designed vestibules help manage the increased gear volume and traffic that comes with group adventures.
When You Might Skip the Vestibule
While vestibules offer significant benefits, they aren’t always essential for every camping scenario:
Ultralight Backpacking trips where every ounce matters might justify foregoing a vestibule to save 8-16 ounces (230-450 grams). Minimalist ultralight tent designs often reduce or eliminate vestibules to achieve their remarkably low weights below 2 pounds (0.9 kg).
Fair-Weather Camping in reliable climates with minimal precipitation reduces the need for protected transition spaces. Desert camping or summer trips in consistently dry regions may function perfectly well without vestibules.
Alternative Protection Systems can sometimes substitute for dedicated vestibules:
– Separate tarps can create cooking and storage areas
– Pack covers provide temporary gear protection
– Tree cover or natural features might offer sufficient shelter in some environments
Short Overnight Trips with minimal gear requirements and favorable weather forecasts may not justify the additional weight and setup complexity of vestibule systems.
Maintaining Your Vestibule for Longevity
Proper maintenance ensures your vestibule continues performing effectively throughout its lifespan:
Cleaning Techniques:
– Gently clean dirt and debris with a soft brush or sponge
– Use mild soap and clean water for stubborn stains
– Never machine wash or use harsh detergents that can damage waterproof coatings
– Always ensure complete drying before storage to prevent mildew
Storage Practices:
– Store loosely packed in a cool, dry place
– Avoid compression for extended periods
– Keep away from direct sunlight when not in use
– Use a breathable storage bag rather than the tight original stuff sack
Regular Inspections:
– Check seam sealing annually and reapply when necessary
– Examine stake points for stretching or tearing
– Test zippers for smooth operation and clean with a soft brush
– Monitor the waterproof rating performance as materials age
Repair Options:
– Use appropriate patch kits for small tears
– Apply seam sealer to failing seams
– Replace damaged zippers or slider pulls
– Consider professional repair for significant damage
Regular maintenance not only extends your equipment’s life but also ensures it performs reliably when you need it most—during challenging outdoor conditions when protection matters most.
Frequently Asked Questions About Tent Vestibules
Can You Sleep in a Tent Vestibule?
While technically possible in emergency situations, tent vestibules are not designed as primary sleeping areas. Most vestibules lack floors, offering minimal protection from ground moisture and insects. Their primarily purpose is gear storage and creating a transition zone.
If absolutely necessary in unexpected circumstances, sleeping in a vestibule requires a waterproof ground sheet, additional insulation from the ground, and awareness that you’ll have less protection from insects and wildlife than in the main tent body. For expanded sleeping capacity, a larger tent or separate shelter represents a much better solution than attempting to use a vestibule as sleeping quarters.
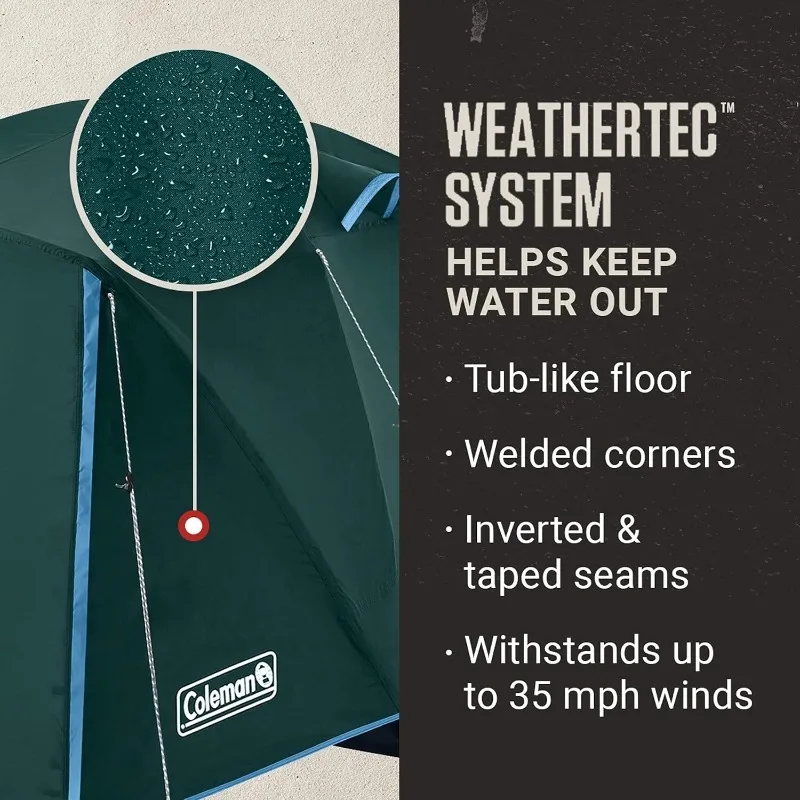
Are Tent Vestibules Waterproof?
Tent vestibules are typically made from the same waterproof materials as rainflies, with waterproof ratings usually between 1,500-3,000mm hydrostatic head. This makes them highly water-resistant under most conditions, but not necessarily 100% waterproof in all circumstances.
Potential weak points include seams, attachment points, and zippers, which may allow some moisture penetration during prolonged or severe storms. Proper setup with good tension and appropriate angles significantly improves water resistance. Regular maintenance, including reapplying seam sealer and waterproofing treatments as needed, helps maintain water resistance throughout the vestibule’s lifespan.
How Do You Reduce Condensation in a Vestibule?
Condensation forms in vestibules when warm, moist air (often from your breath or wet gear) contacts the cooler vestibule material. To minimize this common issue:
- Maintain ventilation gaps of 2-4 inches (5-10 cm) at the bottom edges
- Position the vestibule door to allow airflow when conditions permit
- Avoid bringing extremely wet items into enclosed vestibules if possible
- Choose camping locations with natural airflow rather than stagnant air pockets
- Consider using a small pack towel to wipe down condensation in the morning
Additional factors like relative humidity, temperature differences, and campsite selection all influence condensation levels. Managing these variables helps keep your vestibule and gear drier.
Can You Add a Vestibule to Any Tent?
Not all tents can accept add-on vestibules. Compatibility depends primarily on the tent’s design features:
- Tents with external pole structures often accommodate universal add-on vestibules
- Many manufacturers offer model-specific vestibule additions for their tent lines
- Attachment mechanisms vary widely (clips, velcro, zippers, sleeves) affecting compatibility
- Single-wall tents typically have fewer options for vestibule additions than double-wall designs
If your tent wasn’t designed with vestibule attachment points, alternatives include separate tarps configured as sheltered areas, awning attachments that provide partial coverage, or freestanding shelter additions that can be positioned near tent entrances. These options provide many of the same benefits without requiring direct integration with your existing tent.