
Introduction: Why Your Winter Shelter Matters
Winter camping presents challenges that summer adventurers rarely encounter. When temperatures plummet below freezing, heavy snow accumulates on your shelter, and winds howl through your campsite, the difference between an adequate tent and an exceptional one becomes more than a matter of comfort—it becomes one of safety.
A truly “snow-ready” tent isn’t just any shelter with winter marketing. It requires specific structural integrity to withstand snow loads (where just a few inches of wet snow can add 20+ pounds of weight), materials that remain flexible at subzero temperatures, and designs that shed wind and precipitation while managing internal condensation.
At Explore Elements, we’ve tested dozens of specialized winter shelters for two people in temperatures as low as -20°F with winds exceeding 40 mph. This practical experience informs every recommendation in this guide.
Understanding whether a 2-person tent actually provides enough space becomes even more critical in winter conditions, when bulky gear and extended time indoors make proper sizing essential.
In this guide, you’ll discover:
– What features truly make a tent “snow-ready”
– Different tent architectures and how they perform in winter conditions
– Critical material and construction elements that withstand extreme environments
– How to manage condensation in freezing temperatures
– Our top recommendations based on actual field testing
– Essential accessories and maintenance practices for winter camping success
Your winter shelter choice forms the foundation of a safe, comfortable cold-weather adventure. Let’s ensure you make the right one.
Understanding Snow-Ready Features: What Sets Winter Tents Apart
Not all tents marketed for winter use are truly designed to handle harsh snow conditions. Understanding the fundamental differences between true 4-season tents and enhanced 3-season models can save you from a dangerous situation in backcountry winter conditions.
Structural Foundations
True snow-ready tents feature robust pole structures that simply don’t exist in lighter models. While a typical 3-season tent might use 8.5mm diameter poles, genuine winter tents employ 9-10mm poles, often with additional crossing points to create more stable geometric patterns.
Heavy-duty 4-season tents incorporate additional reinforcement points and pole intersections that distribute snow loads and wind forces across the entire structure rather than concentrating stress on a few key points.
Material Demands of Winter
Winter tent fabrics must perform under much more demanding conditions:
- Higher denier ratings: Winter tents typically use 40-70D fabrics compared to the 15-30D materials found in lightweight summer models
- Enhanced waterproofing: While a typical backpacking tent might have 1200-1500mm hydrostatic head ratings, waterproof camping tents built for snow need at least 3000mm ratings to handle the pressure of melting snow
- Cold-resistant coatings: Specialized silicone and polyurethane treatments that remain flexible at subzero temperatures prevent cracking and failure
Snow-Specific Design Elements
True winter tents incorporate features specifically designed for snow conditions:
- Snow skirts: Extended fabric panels that can be buried in snow to prevent drafts and blowing snow from entering
- Steeper wall angles: To shed snow accumulation rather than allowing it to build up
- Reinforced guy points: Multiple attachment points positioned specifically to counter snow loads and high winds
- Protected ventilation: Covered venting systems that allow airflow while preventing snow entry
Wind Resistance Engineering
Winter tents must withstand wind forces that would flatten standard camping tents:
- Aerodynamic profiles: Lower, more rounded shapes that deflect rather than catch wind
- Strategic guyline placement: Attachment points positioned to counter specific directional forces
- Reduced fabric flutter: Tighter pole sleeves and additional attachment points to minimize noisy, damaging fabric movement
Understanding these foundational differences helps explain why proper winter tents command premium prices—the engineering, materials, and construction demands are significantly higher than those of warm-weather shelters.
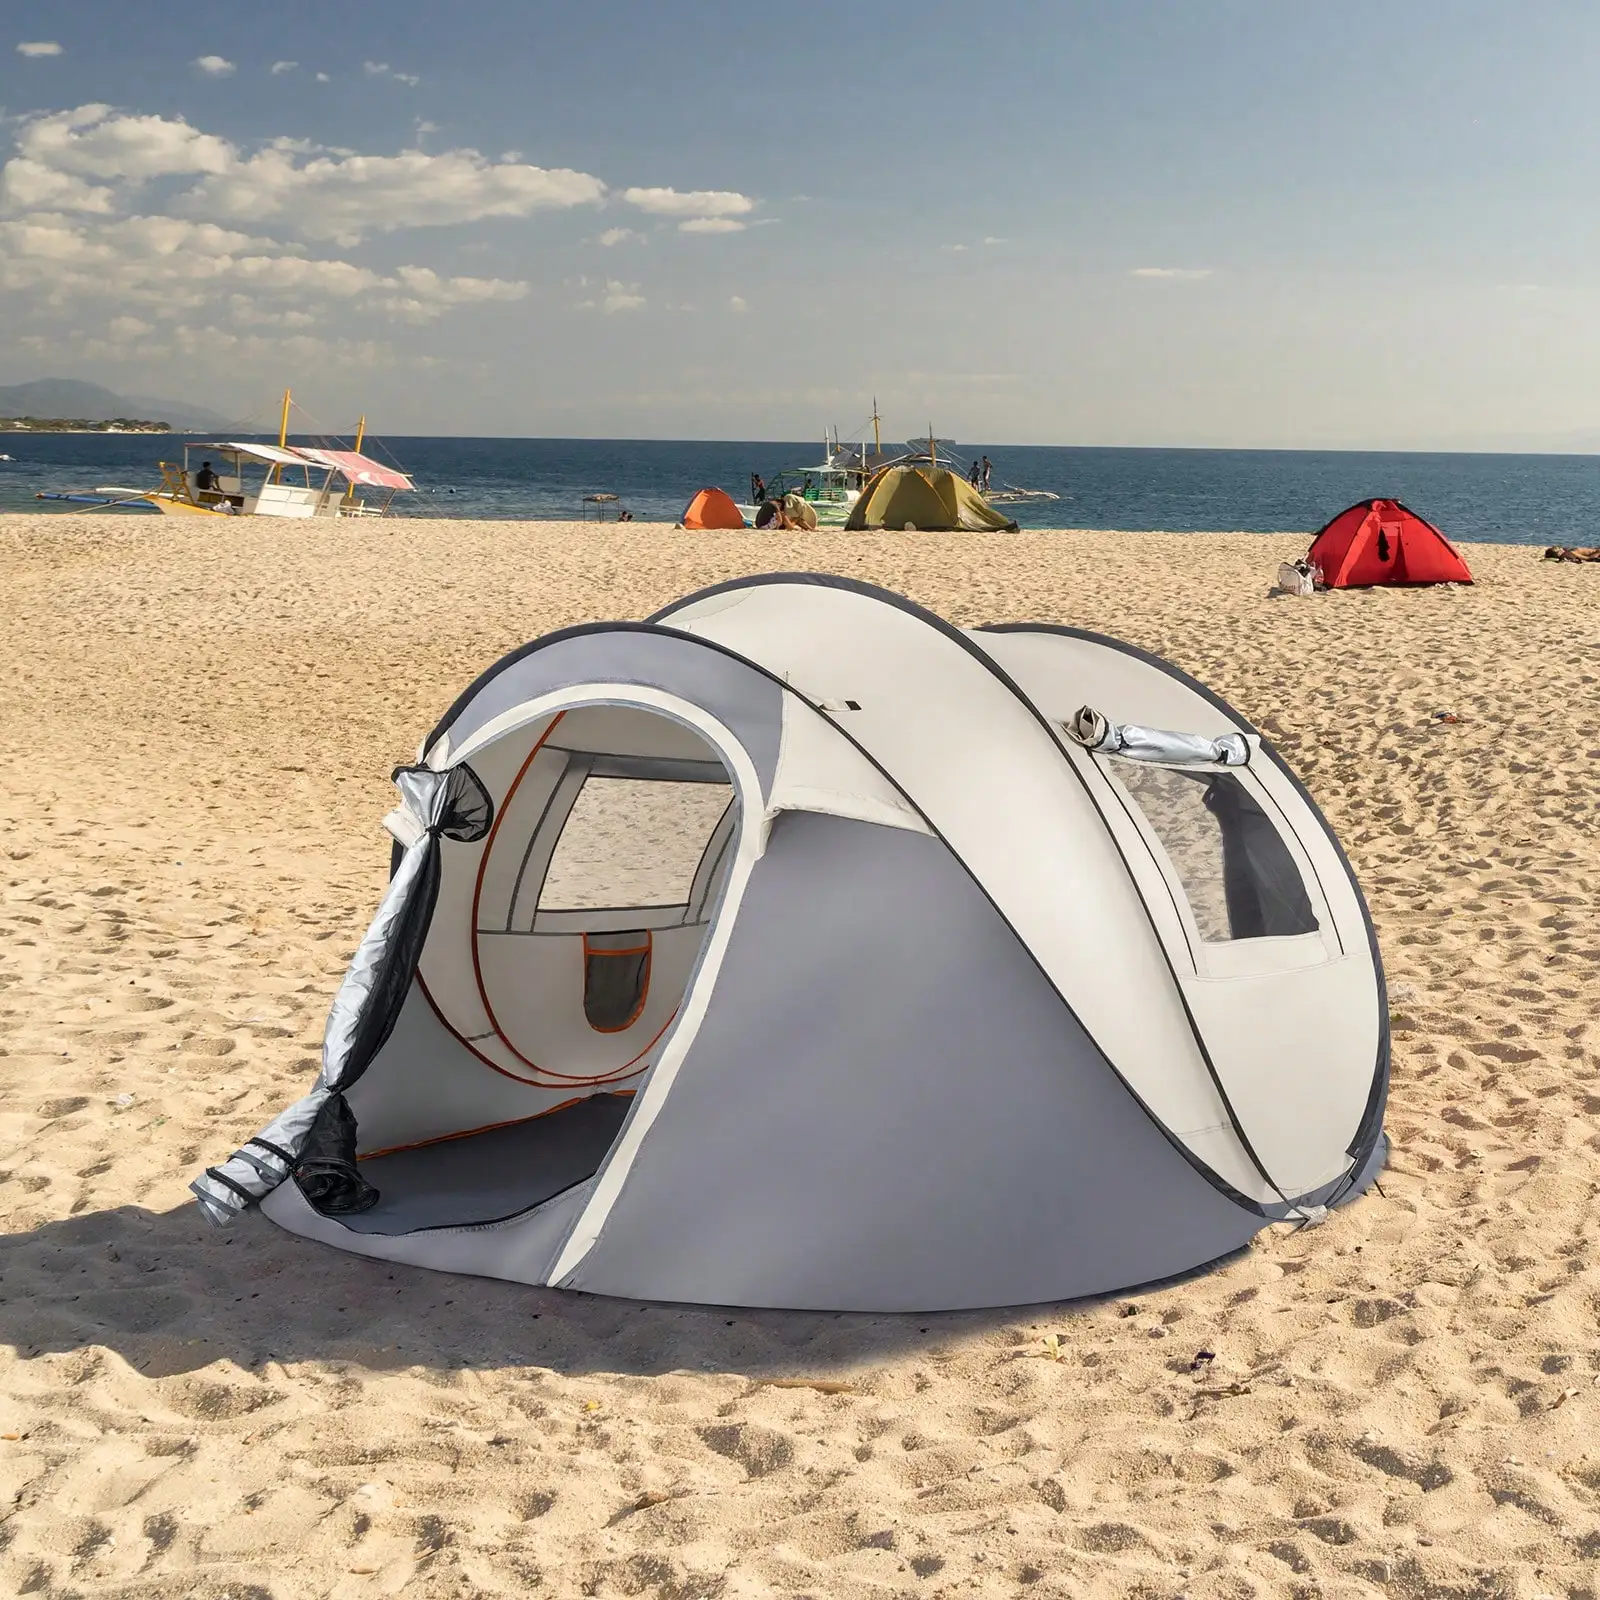
Winter Tent Architecture: Designs That Stand Up to Snow
The architectural design of a winter tent directly determines how it will perform in harsh conditions. Different structures offer varying advantages in snow load capacity, wind resistance, interior space, and ease of setup.
Geodesic and Semi-Geodesic Designs
Dome camping tents with geodesic designs represent the gold standard for winter performance, particularly in exposed areas:
- Full geodesic designs feature 5+ poles that cross at multiple points, creating triangulated shapes for maximum strength and snow load distribution
- Semi-geodesic models use 3-4 poles with strategic crossing points, offering an excellent balance of strength and weight
- Pole intersection benefits: Each crossing point creates a stronger structural node, allowing the tent to resist deformation under pressure
The dome architecture excels in omnidirectional wind resistance, making it ideal for exposed campsites where wind direction may shift throughout the night.
However, this strength comes with trade-offs. Compared to other designs, geodesic tents typically offer less interior space relative to their weight and footprint. For winter camping pairs who need to optimize their space-saving tent for two, this can mean making difficult compromises.
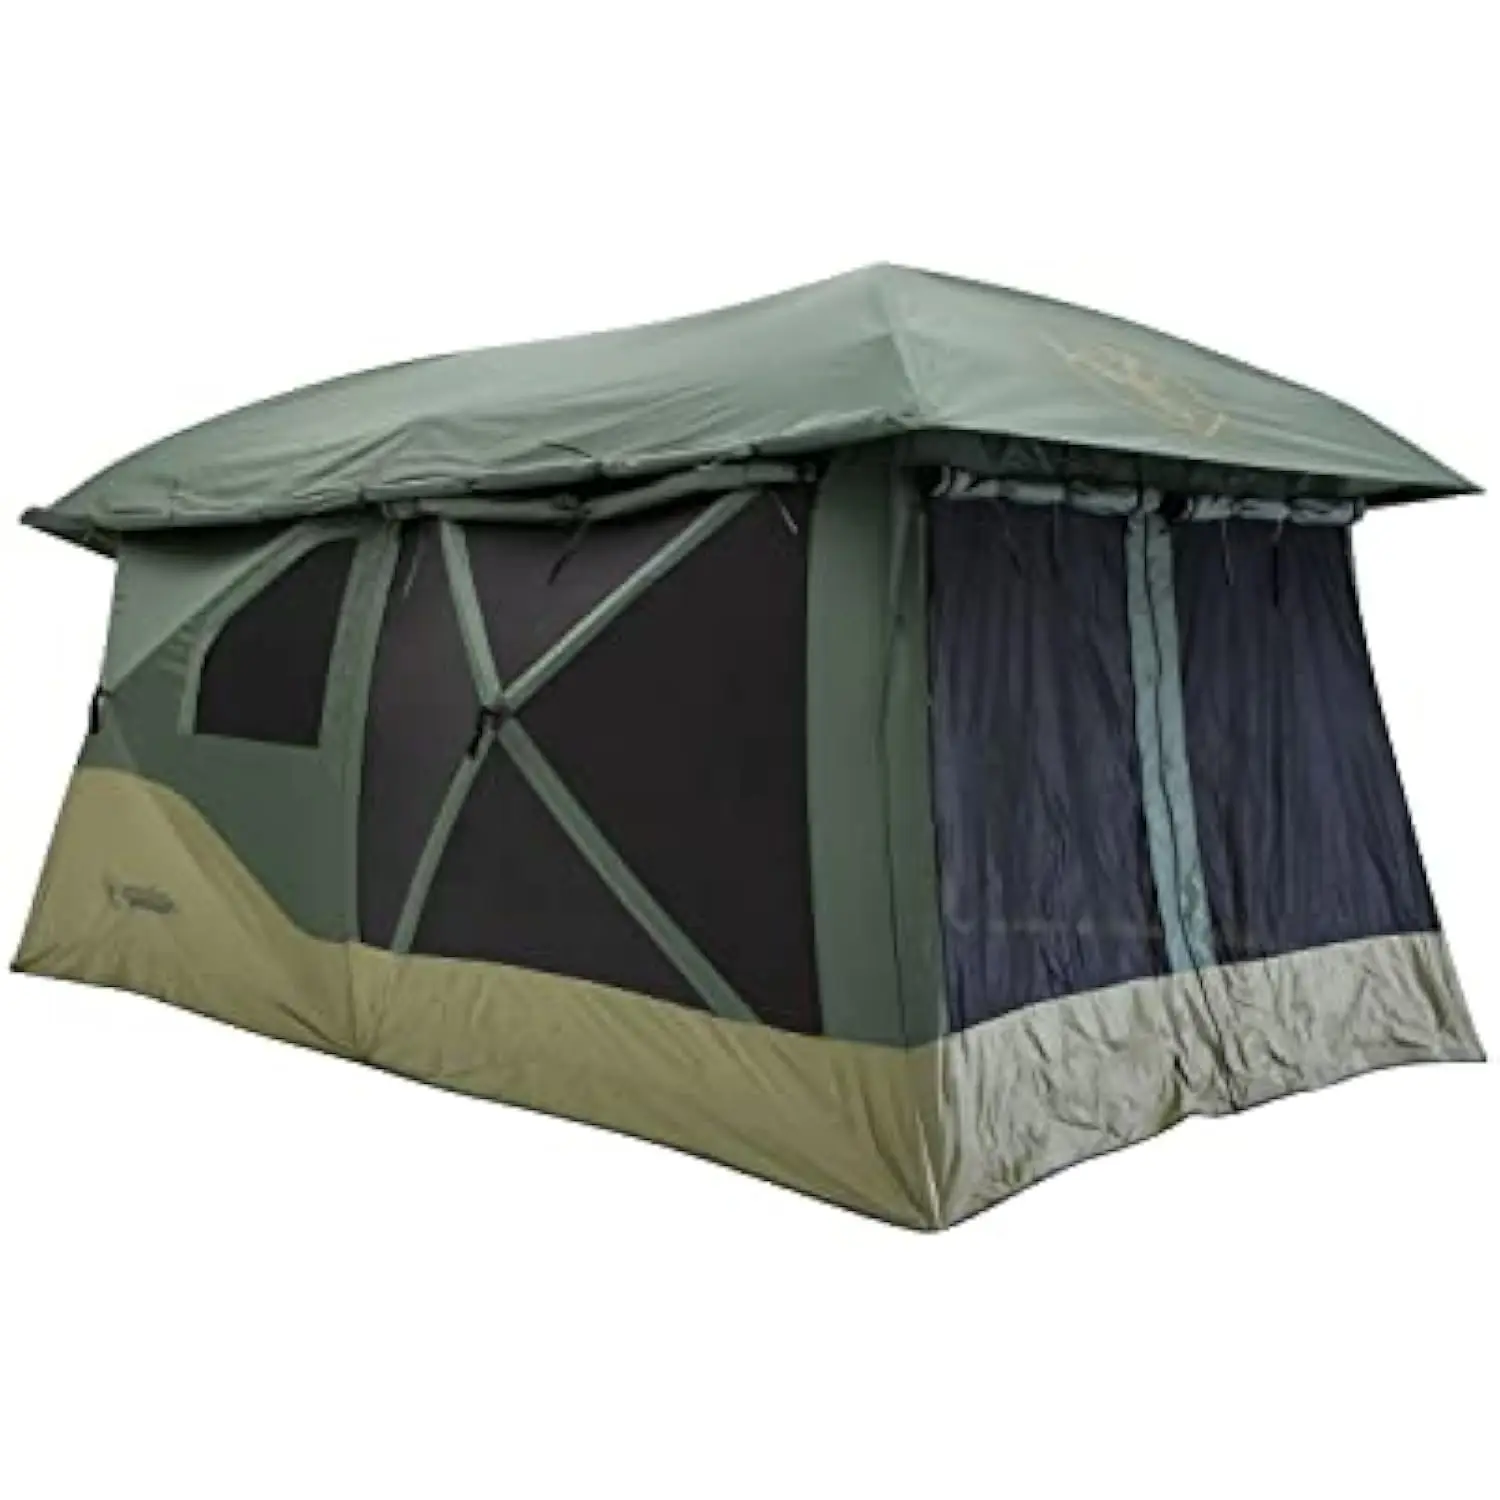
Tunnel Tent Architecture
Tunnel tents present an alternative architecture with distinctive winter performance characteristics:
- Directional strength: Exceptional resistance to winds coming from either end, but potentially vulnerable to side winds
- Superior space-to-weight ratio: More usable interior volume per pound of tent weight
- Snow-shedding potential: When oriented correctly, their curved designs naturally shed snow from the roof
Tunnel designs typically offer more livable space and often feature larger vestibules, which can be invaluable for winter gear storage and cooking in protected spaces.
Modified A-Frame and Hybrid Designs
Some specialized winter tents utilize modified traditional designs:
- A-frame hybrids: Combining the simplicity and snow-shedding capability of classic A-frames with modern pole technology for improved stability
- Extended pyramid designs: Using central pole structures with extended guy lines for exceptional snow load capacity with minimal weight
- Supported single-wall systems: Employing external pole structures to maximize interior space while minimizing weight
Each architecture creates different internal living spaces. While a geodesic design might provide more headroom in the center, tunnel tents often offer more usable floor space and better end-to-end volume that accommodates two sleepers plus their extensive winter gear.
Critical Materials and Construction for Winter Performance
The materials and construction methods used in winter tents directly impact their performance, durability, and reliability in harsh conditions. Understanding these elements helps you evaluate the true quality of a snow-ready shelter.
Fabric Technology
Winter tent body materials must balance strength, weight, and cold-weather performance:
- Ripstop nylon: Premium winter tents use 40-70D ripstop nylon with specialized weave patterns that prevent tears from spreading
- Polyester alternatives: Some models use polyester for its dimensional stability and resistance to UV degradation and moisture absorption
- Coating technologies: Silicon impregnation (silnylon) provides superior tear strength and weather resistance, while polyurethane coatings offer reliable waterproofing
The best winter tents use fabrics with hydrostatic head ratings of 3000mm for fly materials and 5000-10000mm for floor fabrics—significantly higher than summer tents—to handle the extended pressure of melting snow.
Pole Systems
Pole materials dramatically impact a tent’s structural integrity in snow conditions:
- Aluminum alloys: High-end winter tents use specialized aluminum alloys like DAC Featherlite NSL or comparable 7000-series aluminum
- Diameter matters: While summer tents may use 8.5mm poles, winter-ready designs employ 9-10mm poles for dramatically improved strength
- Connection systems: Insertion sleeves provide more stability than clips in high winds, though they make setup more challenging in cold conditions
Many ultralight dome tents sacrifice pole strength to save weight, making them unsuitable for genuine winter conditions despite their dome shape.
Critical Construction Details
Beyond materials, the construction methods employed determine how these materials perform together:
- Seam sealing techniques: Factory-taped seams with additional liquid-sealed reinforcement prevent water entry at stitching points
- Reinforcement zones: Strategic reinforcement at high-stress areas like guy points, pole insertions, and corners prevent failure under load
- Connection quality: Heavy-duty zippers with protective flaps, tensioned webbing, and cold-resistant hardware ensure functionality in freezing conditions
The quality of a tent’s construction often reveals itself in the details—the consistency of stitching, the reinforcement at stress points, and the thoughtfulness of the overall design. These elements become much more important when facing harsh winter conditions than in more forgiving summer environments.
Managing Condensation: Ventilation Systems for Winter Tents
Condensation management becomes critically important in winter tents, where temperature differentials between the warm interior and frigid exterior can create significant moisture problems. A single camper can produce up to 1-2 pints of moisture through respiration overnight—multiply that by two people, and proper ventilation becomes essential.
The Double-Wall Advantage
Most premium winter tents use double-wall construction for good reason:
- Thermal barrier: The air gap between inner tent and fly creates insulation while allowing moisture to escape
- Targeted breathability: Inner tent bodies use breathable fabrics that allow water vapor to pass through while the waterproof fly protects from exterior moisture
- Condensation collection: The fly intercepts condensation before it can drip onto sleepers
While single-wall designs save weight, they typically struggle with condensation management in winter conditions, making them suitable only for specific alpine missions where weight savings outweigh comfort.
Strategic Vent Placement
The best winter tents feature sophisticated ventilation systems:
- High/low ventilation: Vents positioned at different heights create natural convection airflow that pulls moisture out
- Adjustable openings: The ability to fine-tune ventilation based on conditions without exposing the interior to precipitation
- Protected design: Vent hoods that allow airflow while preventing snow entry
Camping tent vestibules play a crucial role in winter ventilation systems. Well-designed vestibules create a buffer zone where moisture can escape and temperature can moderate before reaching the main sleeping area.
Material Breathability Balance
Winter tent materials must balance waterproofing with breathability:
- Breathable panels: Strategic placement of more breathable materials in areas less exposed to precipitation
- Moisture-wicking interior: Inner tent materials that don’t absorb condensation but help channel it away from living spaces
- Anti-drip surfaces: Textured interior fly surfaces that hold condensation rather than allowing it to drip onto occupants
Managing condensation requires both proper tent design and correct user behavior. Even the best-designed winter tent will develop condensation problems if used incorrectly—cooking inside without ventilation, bringing snow-covered gear inside, or completely sealing off airflow in an attempt to retain heat.
Our Top Picks: Best Snow-Ready Tents for Two
After extensive field testing in harsh winter conditions, we’ve identified the standout performers in various categories of two-person winter shelters. Each recommendation balances strength, livability, and specific use-case functionality.
Best Overall Two-Person Snow Tent: Mountain Hardwear Trango 2
This legendary mountaineering tent represents the ideal balance of bombproof construction, reasonable weight, and livable design for winter adventures.
Specifications:
– Trail Weight: 8 lbs 9.7 oz (3.9 kg)
– Floor Area: 40 sq ft (3.7 sq m)
– Peak Height: 38 inches (96.5 cm)
– Vestibule Area: 12 sq ft (1.1 sq m)
– Poles: DAC Featherlite NSL aluminum
– Fabric: 70D nylon with 10,000mm floor rating
Pros:
– Exceptional stability in high winds and heavy snow loads
– Logical interior design with ample headroom
– Bathtub floor extends high for superior snow protection
– Dual vestibules for gear storage and cooking options
– Proven reliability in extreme conditions
Cons:
– Relatively heavy compared to less robust options
– Premium price point
– Somewhat complex setup in challenging conditions
– Can feel tight for two large campers with extensive gear
Best for Extreme Conditions: Black Diamond Fitzroy
When facing the harshest winter environments, this single-wall design provides unmatched strength-to-weight performance.
Specifications:
– Trail Weight: 7 lbs 1 oz (3.2 kg)
– Floor Area: 36 sq ft (3.3 sq m)
– Peak Height: 40 inches (102 cm)
– Vestibule: Optional, not included
– Poles: DAC aluminum with reinforced hub system
– Fabric: ToddTex single-wall with breathable waterproof membrane
Pros:
– Exceptional wind stability tested to 80+ mph
– Faster setup than double-wall alternatives
– Superior strength-to-weight ratio
– Excellent ventilation system for a single-wall design
– More spacious than it appears from outside
Cons:
– Single-wall design requires more condensation management
– High price point
– Limited storage without optional vestibule
– Less versatile across temperature ranges
Best Lightweight Winter Option: MSR Access 2
For winter backpackers who need to balance snow-worthiness with portability, this lighter option makes smart compromises.
Specifications:
– Trail Weight: 4 lbs 1 oz (1.8 kg)
– Floor Area: 29 sq ft (2.7 sq m)
– Peak Height: 42 inches (107 cm)
– Vestibule Area: 17.5 sq ft (1.6 sq m)
– Poles: Easton Syclone composite
– Fabric: 20D ripstop nylon with 10,000mm floor rating
Pros:
– Significantly lighter than traditional winter tents
– Excellent balance of strength and portability
– Surprisingly sturdy in moderate winter conditions
– More versatile across seasons than heavier options
– Easy setup with color-coded poles
Cons:
– Not suitable for extreme mountaineering conditions
– Less durable fabrics require more careful handling
– Tighter interior space than heavier alternatives
– Limited for extended winter living
Best Value Option: REI Co-op Arete ASL 2
This tent delivers genuine winter performance at a more accessible price point without compromising essential safety features.
Specifications:
– Trail Weight: 6 lbs 5 oz (2.9 kg)
– Floor Area: 32.9 sq ft (3.1 sq m)
– Peak Height: 43 inches (109 cm)
– Vestibule Area: 8.7 sq ft (0.8 sq m)
– Poles: Aluminum with hybrid sleeve/clip design
– Fabric: 40D ripstop nylon with 5000mm floor rating
Pros:
– Excellent value proposition for genuine winter capability
– Functional design with appropriate snow-shedding angles
– Good ventilation with adjustable top vent
– Versatile across shoulder seasons and mild winter conditions
– Impressive strength-to-price ratio
Cons:
– Single vestibule limits storage and entry/exit options
– Heavier than premium options with similar protection
– Less refined details than higher-priced competitors
– Moderate performance in extreme conditions
Most Livable Winter Shelter: Hilleberg Nammatj 2
For extended winter camping where comfort matters, this tunnel tent offers unmatched livable space and vestibule functionality.
Specifications:
– Trail Weight: 6 lbs 2 oz (2.8 kg)
– Floor Area: 30.1 sq ft (2.8 sq m)
– Peak Height: 37 inches (94 cm)
– Vestibule Area: 13.5 sq ft (1.25 sq m)
– Poles: 10mm DAC aluminum
– Fabric: Kerlon 1800 with 5000mm+ rating
Pros:
– Extended tunnel design creates superior living space
– Exceptional vestibule functionality for gear and cooking
– Among the best wind stability when properly oriented
– Single-piece pitching saves time in adverse conditions
– Incredible durability and longevity
Cons:
– Premium price represents significant investment
– Requires skilled setup for optimal performance
– Directional design needs proper orientation to wind
– Heavier than some geodesic alternatives


Heavy Duty 4 Season Tent, Mountaineering Tent, Winter Camping Tent
$870.40 Select options This product has multiple variants. The options may be chosen on the product page
Compact Backpacking Tent, Lightweight Backpacking Tent, Waterproof Camping Tent
$335.52 Select options This product has multiple variants. The options may be chosen on the product page
Ultralight Backpacking Tent, Ultralight Dome Tent, Winter Camping Tent
Price range: $369.63 through $370.07 Select options This product has multiple variants. The options may be chosen on the product page
Camping Tent with Vestibule, Waterproof Camping Tent
Price range: $407.89 through $479.48 Select options This product has multiple variants. The options may be chosen on the product page
Heavy Duty 4 Season Tent, Ultralight Freestanding Tent, Winter Camping Tent
$3,722.66 Select options This product has multiple variants. The options may be chosen on the product page
Backpacking Tent with Vestibule, Trekking Pole Backpacking Tent, Waterproof Camping Tent
Price range: $271.99 through $519.52 Select options This product has multiple variants. The options may be chosen on the product page
Side-by-Side Comparison: Finding Your Perfect Winter Shelter
This direct comparison highlights the key differences between our top recommendations to help you identify which tent best matches your specific winter camping needs.
| Tent Model | Weight | Price Range | Snow Load | Wind Rating | Setup Complexity | Interior Space | Ventilation | Best For |
|---|---|---|---|---|---|---|---|---|
| Mountain Hardwear Trango 2 | 8 lbs 10 oz (3.9 kg) | $$$$ | Excellent | Excellent | Moderate | Good | Excellent | All-around winter use |
| Black Diamond Fitzroy | 7 lbs 1 oz (3.2 kg) | $$$$ | Excellent | Excellent | Simple | Moderate | Good | Extreme conditions |
| MSR Access 2 | 4 lbs 1 oz (1.8 kg) | $$$ | Good | Good | Simple | Limited | Good | Weight-conscious trips |
| REI Co-op Arete ASL 2 | 6 lbs 5 oz (2.9 kg) | $$ | Good | Moderate | Simple | Moderate | Good | Value-oriented campers |
| Hilleberg Nammatj 2 | 6 lbs 2 oz (2.8 kg) | $$$$ | Very Good | Excellent* | Moderate | Excellent | Very Good | Extended winter living |
*When properly oriented to wind direction
Finding your perfect winter camping tent requires balancing these factors against your typical winter activities, environments, and personal preferences. The right choice provides a secure home base that enables your winter adventures rather than limiting them.
Winter Tent Buying Guide: Matching Features to Your Needs
Selecting the ideal snow-ready tent requires aligning tent features with your specific winter camping style and environments. Follow this framework to narrow your options to the models that truly meet your needs.
Activity-Specific Considerations
Different winter activities demand different tent priorities:
- Mountaineering: Prioritize strength-to-weight ratio, wind resistance, and rapid setup features
- Ski Touring: Balance weight with sufficient space for wet gear and simple setup while wearing gloves
- Winter Backpacking: Consider versatility across conditions and reasonable carrying weight
- Base Camping: Emphasize comfort, interior volume, and extended livability features
For serious alpine pursuits, dedicated mountaineering tents offer specialized features that may be overkill for more moderate winter camping.
Space Requirements for Winter Conditions
Winter demands more interior space than summer camping:
- Calculate minimum of 15-20 square feet per person (compared to 10-12 for summer camping)
- Consider peak height that accommodates sitting up in winter layers
- Evaluate vestibule space for gear storage, cooking, and transitions
- Remember that appropriate tent size for two people increases substantially with winter gear
Weather Protection Priorities
Different winter environments require different protective features:
- High precipitation areas: Prioritize waterproofing ratings, seam quality, and snow-shedding design
- High wind environments: Focus on pole strength, aerodynamic profiles, and guy-out points
- Extreme cold conditions: Consider double-wall construction, reduced mesh, and draft protection
- Mixed conditions: Seek versatile ventilation systems and adaptable setups
Budget Considerations and Value Assessment
Winter tents represent significant investments that correlate directly with capability:
- Entry-level winter tents ($300-500): Suitable for occasional use in moderate conditions
- Mid-range options ($500-700): Good balance for regular winter backpacking in typical conditions
- Premium models ($700-1000+): Necessary for extreme environments or frequent/extended usage
When evaluating value, consider:
– Warranty terms and repair policies
– Expected lifespan (premium winter tents often last 10+ years with proper care)
– Versatility across conditions and seasons
– Availability of replacement parts
Features worth the extra investment include superior pole systems, reinforced stress points, and thoughtful ventilation design. Areas where budget models often compromise include vestibule size, interior space, and fabric durability.
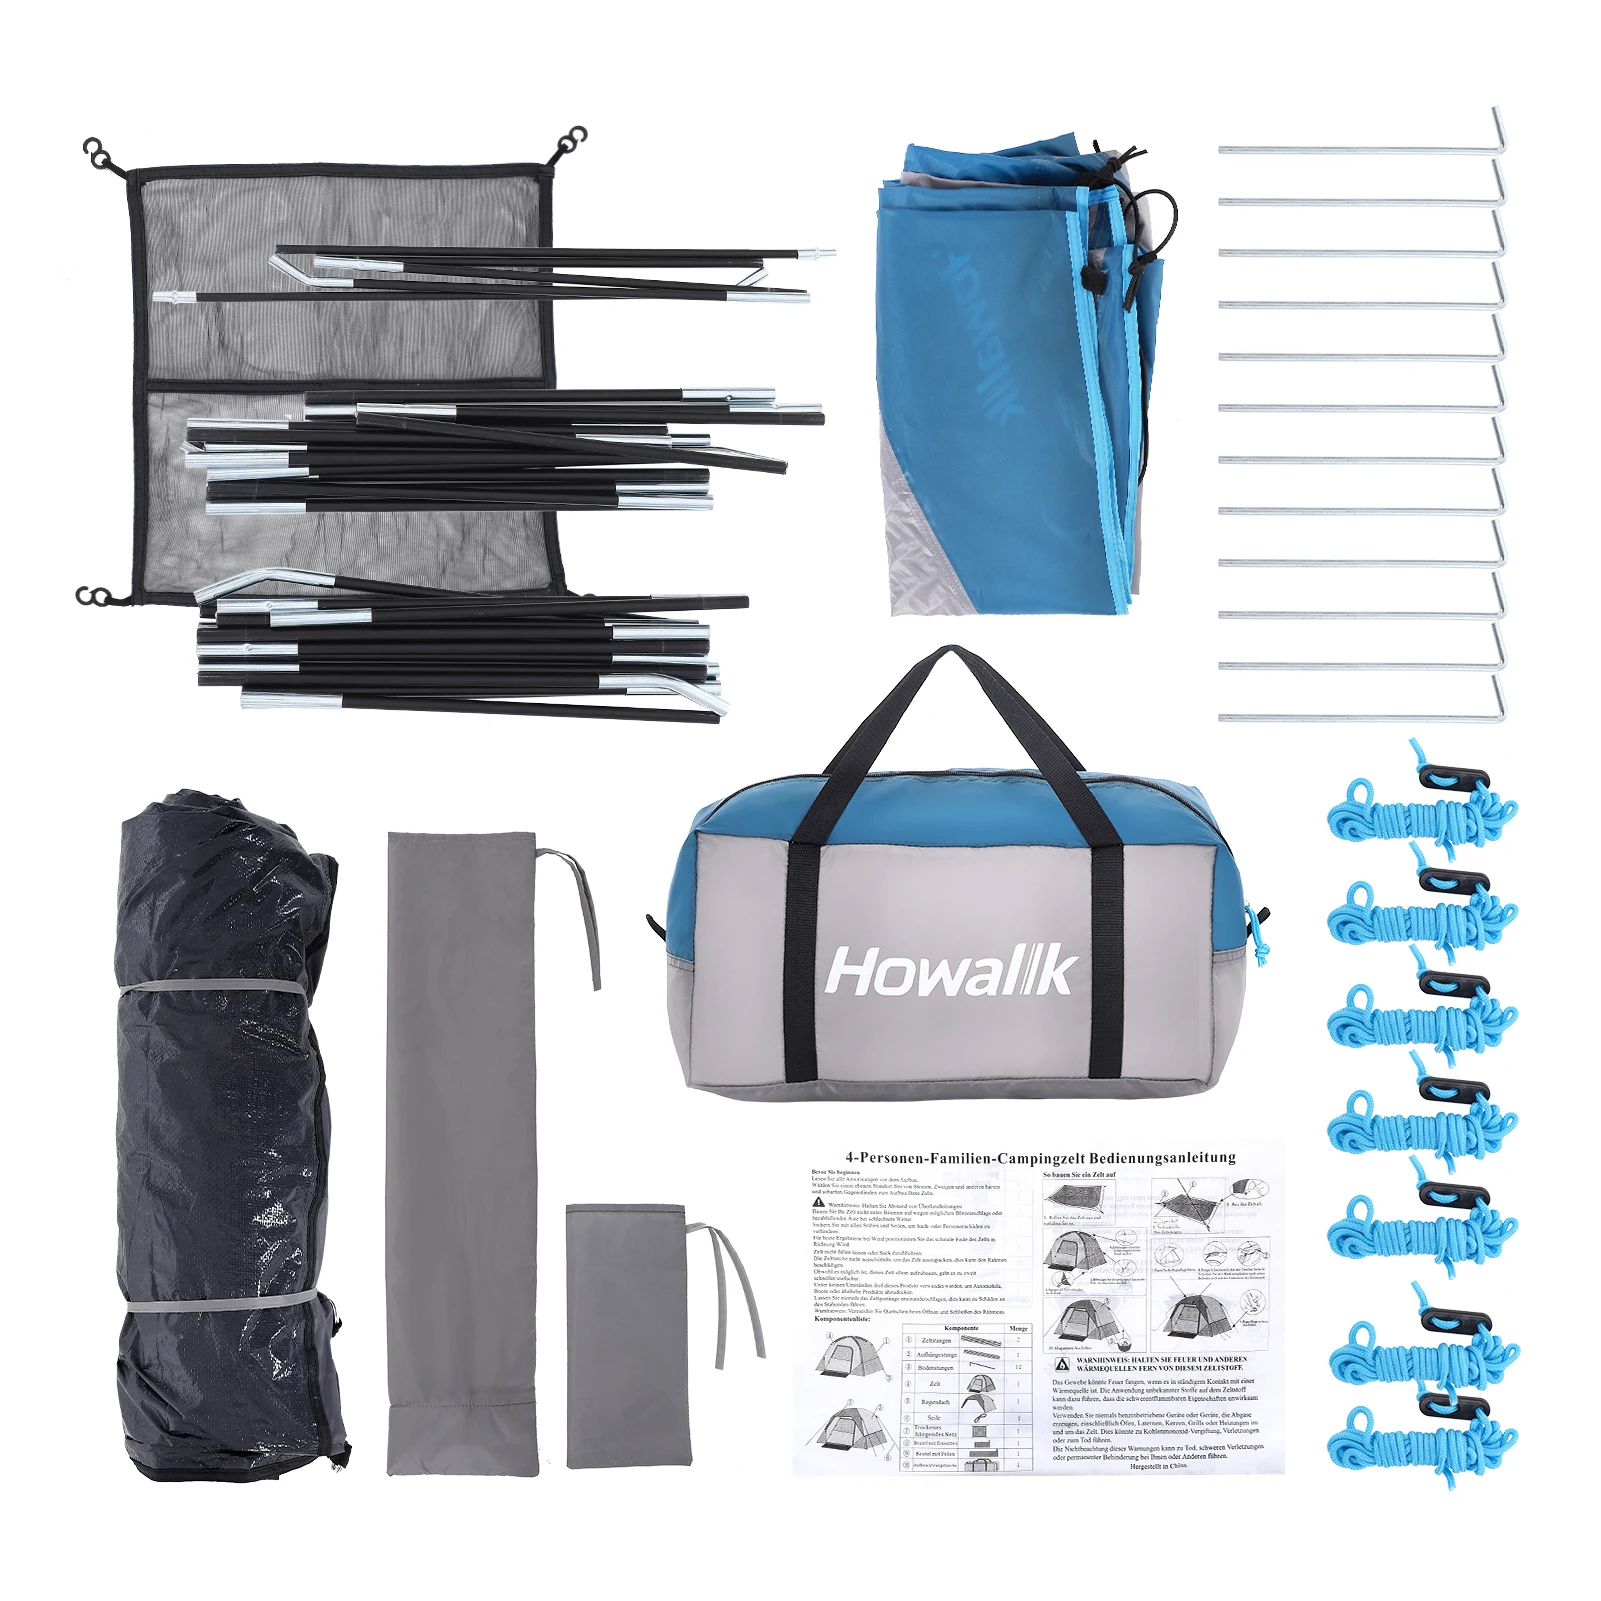
Essential Accessories for Your Snow-Ready Tent System
A complete winter shelter system extends beyond just the tent itself. These essential accessories enhance functionality, durability, and comfort in snow conditions.
Snow-Specific Anchoring Systems
Standard tent stakes prove nearly useless in snow conditions. Instead, invest in:
- Snow stakes: Broad, lightweight aluminum stakes designed specifically for snow
- Snow anchors/deadmen: Fabric bags or dedicated plastic devices that can be buried in snow
- Cord systems: Pre-cut sections of lightweight cord for creating adjustable snow anchors
Proper anchoring techniques dramatically improve tent stability. For deep snow, bury anchors perpendicular to the expected pull direction and compact the snow after placement.
Winter-Specific Ground Protection
Protecting your tent floor becomes even more important in harsh winter conditions:
- Custom-fitted footprints: Add insulation while protecting against abrasion and moisture
- Supplemental insulation: Closed-cell foam sections that add thermal barrier beneath sleeping areas
- Repair materials: Silicone-based adhesives and patches that work in cold conditions
These protective measures not only enhance comfort by adding insulation but also extend your tent’s lifespan by preventing damage from rough, frozen ground and sharp ice crystals.
Condensation Management Tools
Active moisture management improves comfort in winter camping:
- Absorbent cloths: Microfiber towels for wiping down interior surfaces
- Vapor barrier liners: For sleeping bags and clothing to reduce moisture from respiration
- Interior clotheslines: Lightweight cord for hanging damp items away from tent walls
Proper tent packing techniques help manage moisture between setup and takedown, preventing mold and mildew development that can permanently damage tent fabrics.
Organization Systems
Extended time in a confined tent demands thoughtful organization:
- Hanging mesh pockets: Keep essential items accessible without floor clutter
- Gear lofts: Utilize overhead space for clothing and equipment storage
- Vestibule organization: Systems for keeping boots, wet gear, and cooking equipment arranged
These organization tools maximize usable space and prevent condensation issues by keeping gear away from tent walls where moisture tends to collect.
Maintaining Your Winter Tent: Prolonging Life and Performance
Proper maintenance significantly extends the life of your winter tent investment while ensuring reliable performance when you need it most.
Pre-Trip Inspection Protocols
Before heading into winter conditions, perform these critical checks:
- Inspect all seams for separation or peeling seam tape
- Check pole sections for hairline cracks or corrosion
- Verify all zippers operate smoothly with no catching or separation
- Test guylines and tensioners for wear or UV damage
- Confirm stakes and anchors are complete and undamaged
Addressing minor issues before your trip prevents major failures in the field.
Field Maintenance in Snow Conditions
Proper care during your winter camping trip preserves tent integrity:
- Regularly remove snow accumulation before weight becomes significant
- Brush snow from zippers before operation to prevent damage
- Avoid touching tent walls during precipitation to prevent leakage
- Keep vestibule areas clear of snow buildup that can restrict ventilation
- Use gloves when handling cold metal components to prevent fabric tears from cold-stiffened hands
Learning to properly set up your lightweight tent with good site selection and appropriate tensioning dramatically reduces stress on materials and extends tent life.
Post-Trip Care and Storage
The most critical maintenance occurs after your trip:
- Thorough drying: Set up tent completely at home until 100% dry (12-24 hours minimum)
- Gentle cleaning: Remove dirt with mild soap and soft cloth, never machine wash
- Inspection: Identify any damage points that need repair before next use
- Loose storage: Store in larger bag than provided to avoid cracking coatings
- Cool, dry location: Keep away from heat sources, UV exposure, and dampness
Many winter tent failures result from improper storage between trips rather than actual field damage. Taking the time to properly dry and store your tent dramatically extends its usable lifespan.
Safety First: Winter Camping Considerations
Winter camping introduces safety concerns that summer campers rarely encounter. Understanding these risks helps ensure your snow-ready tent becomes a safety asset rather than a liability.
Carbon Monoxide Awareness
The combination of enclosed spaces and winter cooking creates serious risks:
- Never cook entirely inside a tent: Use vestibules with maximum ventilation instead
- Consider carbon monoxide detectors: Small, lightweight devices that provide crucial warnings
- Recognize symptoms: Headaches, dizziness, confusion can indicate dangerous CO levels
- Ventilation discipline: Maintain airflow even in extreme weather conditions
This invisible danger causes multiple winter camping fatalities annually and deserves serious attention.
Site Selection Safety
Where you place your tent dramatically affects winter safety:
- Avalanche awareness: Position camps away from potential avalanche paths and runout zones
- Tree hazard assessment: Avoid camping under snow-loaded branches or trees with heavy snow buildup
- Wind exposure evaluation: Balance protection from wind with avoiding dangerous snow accumulation zones
- Emergency exit planning: Orient tent doors for quick exit if needed
Understanding these site selection principles complements the performance features of durable tents for all seasons to create a truly safe winter shelter system.
Emergency Preparedness
Winter camping requires heightened emergency readiness:
- Communication devices: Carry reliable methods of communication appropriate to your location
- Backup shelter options: Know how to create emergency snow shelters if tent fails
- Temperature monitoring: Use thermometers to monitor both ambient and body temperatures
- Exit strategy: Always have a plan for reaching safety if conditions deteriorate
Winter margins for error are much smaller than in summer conditions. Proper preparation creates safety buffers that can prove essential when conditions worsen unexpectedly.
Frequently Asked Questions About Snow-Ready Tents
Can I use my 3-season tent for light winter camping?
While 3-season tents can sometimes handle very mild winter conditions with light snow, they have serious limitations. Standard 3-season tents typically can’t support snow loads, have excessive mesh that allows heat loss, and use pole structures not designed for winter winds. For temperatures below freezing or any significant snowfall, a proper 4-season tent provides necessary safety margins.
How much should I expect to spend on a quality winter tent?
Quality two-person winter tents typically range from $500-1000, with specialized mountaineering models reaching $1200+. While this represents a significant investment, premium winter shelters often last 10+ years with proper care, making their annual cost relatively reasonable. Budget options around $300-400 exist but usually compromise on vital winter-specific features.
How do I prevent condensation in a small winter tent?
Managing condensation requires a systematic approach:
1. Maximize ventilation appropriate to conditions
2. Use vapor barrier liners in sleeping systems
3. Minimize cooking inside the tent
4. Remove snow from boots and gear before bringing inside
5. Wipe down interior surfaces in the morning
6. Choose double-wall tents for better moisture management
These techniques can reduce interior moisture by 60-80% compared to poor condensation management.
What’s the best way to secure a tent in deep snow?
For secure anchoring in deep snow:
1. Use dedicated snow stakes or make deadmen anchors with sticks/gear
2. Bury anchors 8-12 inches deep perpendicular to the pull direction
3. Compact snow firmly after placement
4. Allow 15-30 minutes for anchors to “set” by sintering (snow crystals bonding)
5. Maintain appropriate tension to prevent snow buildup
Properly placed snow anchors can hold more securely than standard stakes in soil.
Are inflatable winter tents reliable in very cold temperatures?
Modern camping shelter options for two include some inflatable designs, but these require careful consideration for winter use. Quality inflatable winter tents use specialized materials that remain flexible in cold, with redundant chambers for safety. They offer faster setup but typically weigh more than pole designs and have more potential failure points. For remote winter camping, traditional pole designs generally provide better reliability in extreme conditions.
Your Winter Camping Journey: Beyond the Tent
Selecting the right snow-ready tent forms just one crucial element of a rewarding winter camping experience. With your shelter solution in place, new possibilities for winter adventure open up before you.
A properly designed winter tent doesn’t just protect you from the elements—it creates a comfortable base camp from which to explore winter’s unique beauty. The confidence that comes from knowing your shelter can withstand whatever conditions arise allows you to fully immerse yourself in the peaceful solitude of snow-covered landscapes.
As you develop your winter camping skills, consider how your tent selection complements other aspects of your cold-weather system. The knowledge you’ve gained about winter shelter design applies to other equipment choices as well. Many enthusiasts find that the principles of winter tent selection transfer effectively when choosing compact camping shelters for forest hiking and other specialized environments.
Winter camping opens up familiar destinations in entirely new ways. Popular summer areas transform into serene winter wonderlands with solitude rarely experienced in warmer months. Your carefully selected snow-ready tent becomes the enabling technology that makes these experiences possible.
Remember that winter camping skills develop progressively. Consider starting with accessible destinations that offer both beautiful winter experiences and relatively straightforward bail-out options. As your confidence and experience grow, gradually tackle more remote and challenging environments.
The winter landscape offers unique rewards to those properly equipped to experience it safely. Your journey into snow camping has just begun—embrace it with the right gear, proper knowledge, and respect for winter’s power and beauty.