
1. Introduction: Why Tent Shape Matters for Winter Camping
When venturing into winter landscapes, your tent becomes more than just a place to sleep—it’s your life-saving shelter against harsh elements. The shape of your tent plays a crucial role in how effectively it handles snow accumulation, which directly impacts your safety and comfort.
Snow buildup on a tent creates several serious risks:
– Structural failure due to excessive weight
– Blocked entrances making it difficult or impossible to exit
– Compromised insulation as snow compresses the fabric
– Reduced interior space as walls sag under pressure
Understanding snow-shedding tent design isn’t just about convenience; it’s about survival. A cubic foot of wet snow can weigh up to 20 pounds—imagine several cubic feet accumulating on your tent during the night. The right tent shape can mean the difference between a comfortable winter camping experience and a dangerous situation.
Throughout this guide, you’ll discover:
– Which tent shapes naturally resist snow accumulation
– The science behind snow loading and why it matters
– Essential design features that enhance snow shedding
– Practical strategies for managing snow around any tent
Whether you’re planning high-altitude mountaineering or casual winter camping, selecting a tent shape that effectively sheds snow is fundamental to creating a safe winter camping environment. The principles in this guide also apply to shelter options for two campers who need protection in snowy conditions.
2. The Science of Snow Load: Understanding What Your Tent Must Withstand
Before diving into specific tent shapes, it’s essential to understand what your shelter is up against during snowfall. Snow’s impact on a tent varies dramatically based on its type, accumulation pattern, and the physics involved.
Types of Snow and Their Weight Differences
Not all snow creates equal pressure on your tent:
- Powder Snow: With approximately 7% water content, powder snow weighs about 7 lbs per cubic foot (112 kg/m³)
- Packed Snow: More dense and compressed, weighing 15-20 lbs per cubic foot (240-320 kg/m³)
- Wet Snow: The heaviest type, weighing up to 20 lbs per cubic foot (320 kg/m³) or more
The difference between light powder and heavy wet snow can mean your tent faces three times more weight during identical snowfall depths.
How Snow Accumulates Based on Tent Shape
Snow accumulation doesn’t happen uniformly. Several factors influence where and how snow builds up:
- Angle of surfaces: Steeper angles naturally shed snow as gravity pulls it downward
- Surface texture: Slicker surfaces allow snow to slide off more easily
- Wind patterns: Wind creates pressure differentials around a tent, depositing snow in predictable patterns
Flat areas on tents become natural collection points for snow, while steep surfaces resist accumulation. This fundamental principle explains why certain tent shapes perform better than others in winter conditions.
The Progressive Danger of Snow Buildup
Snow accumulation creates a dangerous cycle:
1. Initial snow sticks to tent fabric
2. This snow slightly deforms the tent shape
3. Deformation creates flatter areas
4. Flatter areas collect more snow
5. Additional weight causes more deformation
6. The cycle accelerates until potential collapse
Understanding these principles helps explain why effectively managing snow tent ventilation and condensation control becomes essential during winter camping. Proper ventilation prevents internal moisture from freezing, while proper tent design prevents external snow from accumulating.
3. Top Tent Shapes for Superior Snow Shedding
3.1 Geodesic and Semi-Geodesic Domes
Geodesic dome tents represent perhaps the most technically advanced design for shedding snow. Their structure consists of multiple poles that intersect at strategic points, creating triangular segments across the tent surface.
What makes them effective for snow:
– Multiple intersection points distribute snow load evenly across the structure
– Curved surfaces naturally resist snow accumulation
– Limited flat areas prevent snow from finding places to settle
– Robust pole structure maintains integrity under pressure
Geodesic designs are particularly valuable because they maintain their shape under snow loads. While a 3-season tent might collapse under just a few inches of wet snow, a properly designed geodesic dome can withstand significant accumulation while maintaining structural integrity.
Dome camping tents offer excellent performance in snowy conditions due to their inherent stability and snow-shedding capability. Semi-geodesic designs, which use fewer pole intersections, provide many of the same benefits with slightly less weight and complexity.
Potential limitations:
– Typically heavier than simpler tent designs
– More complex and time-consuming to set up
– Sometimes offer less usable interior space due to sloped walls
– Generally more expensive than simpler designs
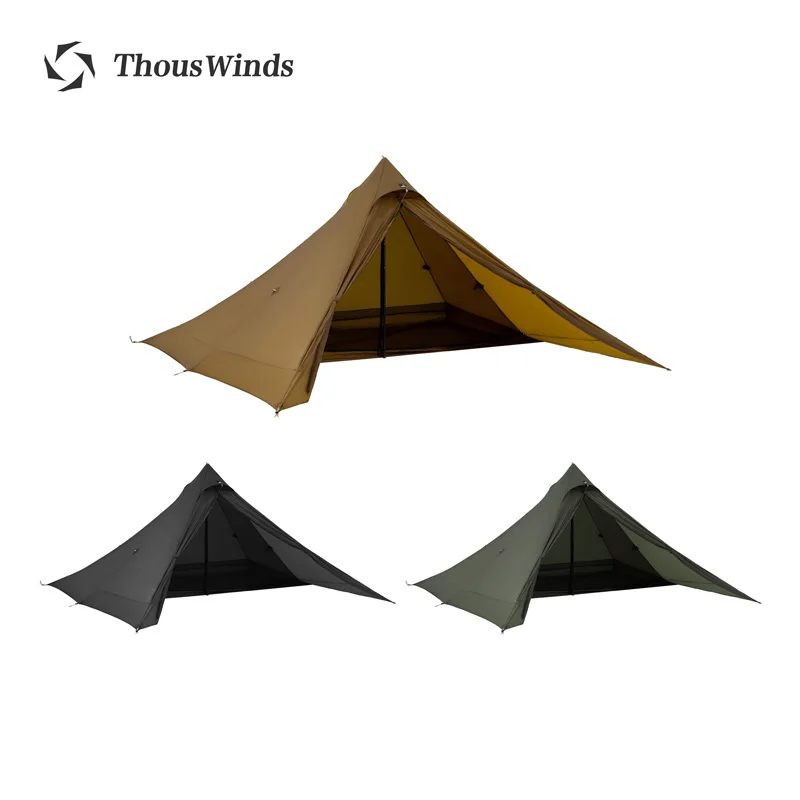
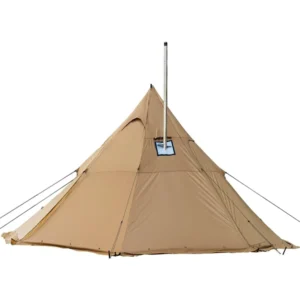
3.2 Pyramid and Tipi-Style Tents
Pyramid tents represent one of the oldest and most effective designs for shedding snow. Their simple shape features exceptionally steep walls that naturally prevent snow accumulation.
What makes them effective for snow:
– Extremely steep wall angles (often 60° or more) naturally shed snow
– Simple design with minimal flat areas
– Single central pole creates a strong structure
– Large footprint-to-height ratio provides stability in winds
Many winter campers prefer pyramid designs for base camps because they offer an excellent balance of interior space and snow-shedding capability. Modern materials have made these traditional designs lighter and more versatile than their historical counterparts.
Potential limitations:
– Sloped walls reduce usable interior space
– Central pole can interfere with sleeping arrangements
– Require careful site selection for optimal performance
– Sometimes challenging to achieve proper tension
3.3 Tunnel Tents
Tunnel tents feature a series of arched poles creating a long, rounded structure. When properly oriented, they can be highly effective at shedding snow.
What makes them effective for snow:
– Curved top surface allows snow to slide off sides
– Strong arched design resists collapse when properly tensioned
– Excellent space-to-weight ratio
– Good performance in directional winds when properly oriented
The key to a tunnel tent’s snow-shedding ability lies in proper setup. The tent must be tightly tensioned to prevent any sagging areas where snow might accumulate. Additionally, orienting the tent with its narrower end facing the prevailing wind helps minimize snow buildup.
Potential limitations:
– Require more careful tensioning than freestanding designs
– Performance depends heavily on orientation relative to wind
– Can be vulnerable if improperly staked out
– May require more maintenance during heavy, ongoing snowfall
3.4 A-Frame and Modified A-Frame Tents
The classic A-frame design features steeply pitched sides that naturally encourage snow to slide off rather than accumulate. Though less common in modern lightweight camping, the A-frame principle continues to influence winter tent design.
What makes them effective for snow:
– Steep side walls (typically 45-60°) naturally shed snow
– Simple, time-tested design principles
– Good performance in directional winds when properly oriented
– Excellent headroom along the center line
Modern modifications to the traditional A-frame have addressed some of its historical limitations. Contemporary designs often incorporate curved elements that enhance stability while maintaining the steep wall angles necessary for effective snow shedding.
Potential limitations:
– Traditional designs offer limited interior space
– Less effective in heavy crosswinds
– Simple designs may require additional guy lines for stability
– Often heavier than more modern designs for comparable space
Understanding the principles of dome tent shapes and stability can help you make an informed decision about which design best suits your winter camping needs.
4. Critical Design Features That Enhance Snow Shedding
4.1 Wall Angle and Surface Design
The most fundamental factor in a tent’s snow-shedding ability is the angle of its walls. Physics dictates that snow begins to slide off surfaces when:
- The angle exceeds the coefficient of friction between snow and the tent material
- Gravity’s pull on the snow overcomes its adhesion to the fabric
Generally, walls steeper than 45° effectively shed most types of snow, with angles of 60° or more being ideal. However, it’s not just about the overall shape—avoiding flat spots is equally important. Even small depressions can collect snow that then builds up and creates larger flat areas.
Manufacturers often incorporate subtle design elements to enhance snow shedding:
– Slight outward curves that prevent snow buildup
– Reinforced panels that maintain tension and proper angles
– Strategic seam placement that avoids creating collection points
4.2 Pole Structure and Materials
A tent’s framework determines whether it maintains its snow-shedding shape under pressure. Critical factors include:
- Pole quantity and arrangement: More crossing points generally create stronger structures
- Pole diameter: Thicker poles resist bending under snow loads
- Material selection: Aluminum alloys provide the best combination of strength and flexibility in cold conditions
- Connection points: How poles attach to the tent body affects load distribution
Winter-specific tents typically use stronger poles than their three-season counterparts. Premium aluminum alloys like DAC Featherlite NSL or equivalent materials offer superior strength-to-weight ratios and maintain flexibility even in sub-freezing temperatures.
4-season winter 2-person tents incorporate these enhanced pole structures specifically to handle snow loads effectively.
4.3 Fabric Selection and Treatments
The tent’s fabric plays a crucial role in how effectively it sheds snow:
- Surface slickness: Silicone-treated fabrics generally shed snow better than polyurethane-coated materials
- Fabric tension: Tightly woven fabrics with good tensile strength maintain their shape
- Water resistance: Highly water-resistant fabrics prevent snow from melting and refreezing on the tent surface
Premium winter tents often use silnylon (silicone-treated nylon) or similar materials that provide an optimal balance of weight, strength, and snow-shedding capability. These fabrics maintain their performance characteristics even when wet or subjected to freeze-thaw cycles.
4.4 Guy Lines, Anchoring Systems, and Snow Valances
The peripheral features of a tent significantly impact its snow-handling capability:
- Multiple guy-out points: Allow tension to be maintained from multiple angles
- Reinforced attachment points: Prevent tearing when under snow load
- Snow valances/skirts: Block drafts and prevent snow from drifting underneath the tent
- Adjustable tensioning systems: Allow for adaptation as snow conditions change
Proper tensioning through guy lines maintains the tent’s optimal shape. Without adequate tension, even the best-designed tent will develop flat areas that collect snow. Winter-specific tents typically include additional guy points specifically to maintain shape integrity under snow loads.
5. Four-Season vs. Three-Season: Essential Differences for Snow Conditions
Many campers mistakenly believe their three-season tent is adequate for winter use. Understanding the critical differences between true four-season tents and standard three-season models can prevent dangerous situations.
| Feature | Four-Season Tent | Three-Season Tent |
|---|---|---|
| Pole Structure | Heavier, stronger poles; more crossing points | Lighter poles; fewer intersections |
| Wall Design | Steeper walls; minimal mesh | More vertical walls; extensive mesh panels |
| Fabric Weight | Heavier, more durable materials | Lighter materials optimized for weight |
| Snow Valances | Integrated snow skirts | Usually absent |
| Guy Points | Numerous reinforced attachment points | Minimal guy points |
| Vestibules | Larger, designed for gear storage in winter | Smaller, primarily for weather protection |
| Ventilation | Strategic vents designed to prevent condensation while limiting heat loss | Focused on maximizing airflow |
The distinction goes beyond marketing terminology. True four-season tents are engineered specifically for snow loads, with features like:
- Reinforced pole sleeves that prevent tearing under pressure
- Strategic interior supports that maintain tent volume
- Reduced mesh to prevent heat loss and snow entry
- Hook-and-loop tabs that attach fabric directly to pole structure
These design elements contribute significantly to snow-shedding capability and cannot be easily replicated or retrofitted to three-season tents. Understanding how snow tents differ from regular models helps clarify why specialized equipment is necessary for safe winter camping.
6. Practical Snow Management Strategies for Any Tent
6.1 Strategic Campsite Selection
Where you place your tent significantly affects how much snow it will need to shed:
- Seek natural windbreaks that block direct snowfall while avoiding areas where snow might drift
- Identify high ground to prevent meltwater issues during temperature fluctuations
- Look for terrain features that divert wind around rather than over your campsite
- Avoid areas beneath snow-loaded tree branches or slopes that might shed snow onto your tent
The perfect winter campsite balances protection from direct snowfall with enough airflow to prevent excessive condensation. Remember that depressions collect both cold air and snow—setting up on slightly elevated ground often provides better overall performance.
6.2 Expert Pitching Techniques for Snow Conditions
Proper setup dramatically enhances any tent’s snow-handling capability:
- Create a packed platform by walking or skiing over your intended site
- Dig down slightly if setting up during heavy snowfall to create wind protection
Use snow anchors instead of traditional stakes:
– Buried stuff sacks filled with snow (“deadman anchors”)
– Snow stakes designed specifically for winter use
– Trekking poles or ice axes in firm snowTension the tent correctly from all attachment points
- Create snow walls on the windward side for additional protection
The principles for mastering winter and snow tent setup apply regardless of your tent design. Even a tent with moderate snow-shedding capability can perform better when properly pitched and maintained.
6.3 Proactive Snow Removal Methods
Even the best snow-shedding tents benefit from regular maintenance during heavy snowfall:
- Gently tap tent walls from inside to dislodge accumulating snow before it builds up
- Use a soft brush or gloved hand to sweep snow from exterior surfaces
- Remove snow more frequently during heavy snowfall rather than waiting for significant accumulation
- Pay special attention to areas where fabric meets poles as these often collect more snow
Never use sharp objects to remove snow, as they can damage tent fabric. When brushing off snow from outside, move with the fabric’s natural direction to avoid putting stress on seams or attachment points.
Winter camping tents often include design features that make snow removal easier, but regular maintenance remains essential during active snowfall.
7. Is Your Current Tent Suitable for Snowy Conditions?
If you’re considering using an existing tent for winter camping, ask yourself these key questions:
- Does the tent have a steep enough roof angle to shed snow? (Minimum 30°, ideally 45°+)
- How strong are the poles compared to dedicated winter tents? (Winter poles are typically 20-30% stronger)
- Are there sufficient guy points to maintain tension under snow load?
- Can the fabric withstand the weight of wet snow without stretching or tearing?
- Does the tent design eliminate flat spots where snow might collect?
Warning signs that your tent isn’t suitable for snow include:
– Visible bending of poles under light snow loads
– Fabric sagging between attachment points
– Difficulty maintaining tension with guy lines
– Previous tears or repairs near pole attachment points
Possible modifications to improve snow handling (with limitations):
– Add additional guy lines to maintain tension
– Use trekking poles to provide additional support at critical points
– Create external snow barriers to direct snow away from the tent
– Set up in locations with natural wind protection
Remember that modifications have limited effectiveness—they can’t fundamentally change a tent’s design limitations. When substantial snowfall is expected, investing in proper equipment is always safer than improvising.


Heavy Duty 4 Season Tent, Mountaineering Tent, Winter Camping Tent
$870.40 Select options This product has multiple variants. The options may be chosen on the product page
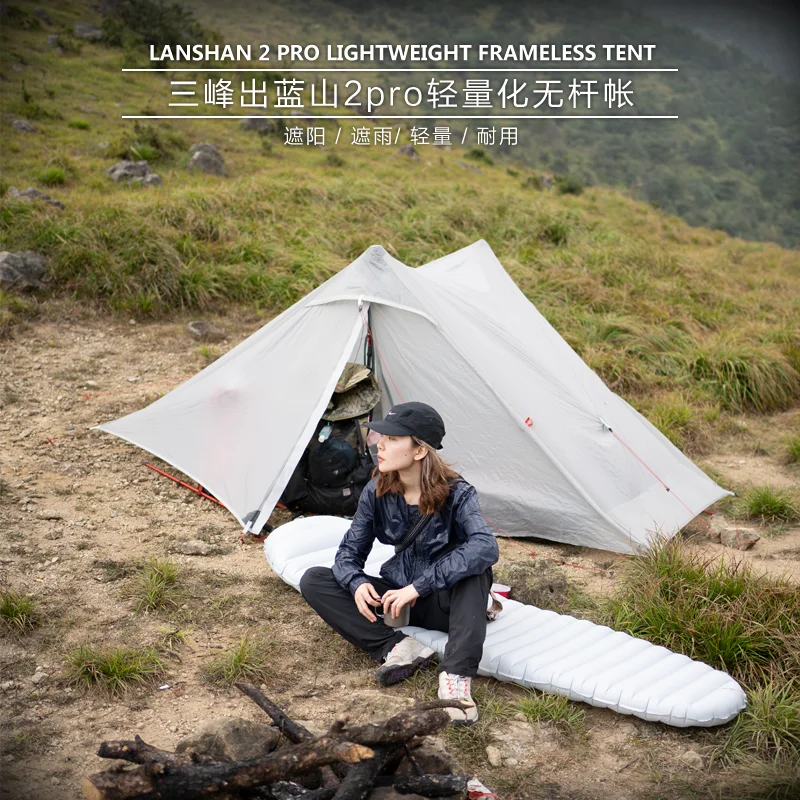
Ultralight Backpacking Tent, Ultralight Dome Tent, Winter Camping Tent
Price range: $369.63 through $370.07 Select options This product has multiple variants. The options may be chosen on the product page
Heavy Duty 4 Season Tent, Ultralight Freestanding Tent, Winter Camping Tent
$3,722.66 Select options This product has multiple variants. The options may be chosen on the product page
Heavy Duty 4 Season Tent, Winter Camping Tent
$638.69 Select options This product has multiple variants. The options may be chosen on the product page
Heavy Duty 4 Season Tent, Winter Camping Tent
$5,109.59 Select options This product has multiple variants. The options may be chosen on the product page
8. How Different Snow Types Require Different Tent Considerations
Not all snow creates the same challenges for tent design. Regional and climate variations produce distinct snow types that behave differently on tent surfaces:
| Snow Type | Characteristics | Tent Design Considerations |
|---|---|---|
| Dry Continental Snow | Light, powdery, low moisture content | Less weight concern; focus on preventing drift accumulation |
| Wet Maritime Snow | Heavy, high moisture content | Maximum structural strength needed; steeper angles essential |
| Wind-Driven Snow | Compacted, forms drifts | Strong wind resistance; aerodynamic shape; extra guy lines |
| Spring Snow | Wet during day, freezes at night | Excellent moisture management; resistance to freeze/thaw cycles |
The snow conditions in the Rocky Mountains (dry, light powder) create different challenges than those found in the Pacific Northwest or Northeast (wetter, heavier snow). Understanding your destination’s typical snow characteristics helps you select appropriate tent features.
Temperature fluctuations compound these challenges—snow that partially melts during the day and refreezes at night can create particularly challenging conditions as it bonds more strongly to tent surfaces. These considerations become especially important when evaluating camping shelter options for two people in winter conditions.
9. Conclusion: Selecting the Right Snow-Shedding Tent for Your Adventures
The perfect snow-shedding tent balances several factors based on your specific winter camping needs:
For basecamp-style winter camping where weight is less critical, pyramid or geodesic designs offer exceptional snow-shedding performance and interior space. For those covering distance in winter conditions, tunnel or semi-geodesic designs provide a better balance of weight and snow protection.
Remember that tent shape is just one component of winter camping safety. Even the best snow-shedding tent requires proper setup, regular maintenance during snowfall, and good judgment about when conditions exceed your equipment’s capabilities.
When selecting a winter tent, prioritize:
– Steep wall angles that naturally shed snow
– Strong, flexible pole structures that maintain shape under load
– Quality materials designed specifically for cold weather
– Adequate ventilation to manage condensation
– Sufficient interior space for winter gear
By understanding the principles that make certain tent shapes effective at shedding snow, you can make informed decisions about which design best suits your winter adventures. The right tent becomes an essential partner in creating safe, comfortable experiences in winter’s most beautiful landscapes.
10. Understanding Wind-Driven Snow: A Critical Factor in Tent Placement
Wind transforms how snow interacts with your tent, creating patterns of accumulation that can either help or hinder your camping experience.
How Wind Creates Snow Drifts
Wind-driven snow follows predictable patterns based on airflow physics:
– Snow particles travel until they encounter an obstacle
– As wind speed decreases behind obstacles, snow drops out of the airstream
– Accumulation happens fastest in “wind shadow” areas
– Smooth airflow over curved surfaces prevents deposition
This means tent shape interacts directly with wind patterns to create unique deposition zones. A tent oriented correctly can use wind to keep itself relatively clear of snow, while poor orientation can result in massive drifts forming against tent walls.
Optimal Orientation by Tent Shape
Different tent designs require specific orientations relative to wind:
- Tunnel tents: Narrower end facing into the wind creates an aerodynamic profile
- Dome tents: No specific orientation required but guy lines should be tensioned on the windward side
- Pyramid tents: Door typically positioned away from prevailing wind
- A-frame tents: Narrow end into the wind reduces surface area exposed to direct pressure
Using natural terrain features amplifies these benefits. Setting up behind small ridges or using vegetation as windbreaks changes airflow patterns in ways that can significantly reduce snow accumulation on your tent.
Understanding these principles allows you to make strategic decisions about four-season tent features and benefits to maximize performance in specific winter conditions.
11. Can You Safely Use a 3-Season Tent in Snow?
While dedicated winter tents provide the best protection, there are limited scenarios where a 3-season tent might suffice in snowy conditions:
Potentially acceptable situations:
– Light, infrequent snowfall (less than 1 inch or 2.5cm accumulated)
– Protected campsites with minimal wind exposure
– Trips where you can monitor and clear snow continually
– Emergency situations when no alternative is available
Critical limitations to understand:
– Standard 3-season tents typically collapse under 2-4 inches (5-10cm) of wet snow
– Mesh panels allow spindrift to enter and heat to escape
– Guy lines and attachment points are rarely strong enough for winter conditions
– Pole structures aren’t designed to withstand asymmetrical snow loading
If you must use a 3-season tent in unexpected snow, emergency reinforcement techniques include:
– Adding central support using trekking poles
– Clearing snow every 1-2 hours throughout the night
– Creating external snow walls to block wind-driven snow
– Reinforcing guy lines with additional cordage
Signs requiring immediate action include visible pole bending, fabric stretching beyond normal tension, or creaking sounds from the frame. Never ignore these warning signs, as collapse typically happens suddenly once a critical threshold is reached.
For reliable winter performance, heavy-duty 4-season tents provide purpose-built protection against snow accumulation.
12. FAQ: Common Questions About Tents and Snow
How much snow can a winter tent safely hold?
This varies dramatically by design and quality. Well-designed geodesic tents can support 1-2 feet (30-60cm) of fresh snow before requiring clearing, while basic winter tents might handle 6-12 inches (15-30cm). Always clear snow before these limits are reached.
Should you knock snow off from inside or outside the tent?
For light snow, gently tapping from inside works well. For heavier accumulation, carefully brushing from outside prevents excessive stress on the tent structure. Avoid sharp implements that could damage fabric.
Can you use snow instead of stakes to secure a tent?
Yes, snow anchors are often more effective than traditional stakes. “Deadman” anchors (buried objects like stuff sacks filled with snow) provide excellent holding power. Snow stakes, which are wider than regular tent stakes, also work well in compacted snow.
What’s the best way to prevent condensation freezing inside a tent?
Maintain adequate ventilation even in cold conditions. Keep vents partially open, avoid cooking inside, and store wet gear in vestibules rather than the sleeping area. Wiping down interior walls before condensation freezes also helps manage moisture.
How do you know if your tent is about to collapse from snow?
Warning signs include visible bending of poles, unusual tensioning of fabric (either too tight or too loose), difficulty opening doors or zippers, and creaking or popping sounds from the frame. Address these signs immediately by clearing snow and reinforcing the structure.
By understanding these principles and selecting the right tent shape for your winter adventures, you’ll be better prepared to enjoy safe, comfortable camping experiences even when the snow is falling. Remember that proper planning, equipment selection, and maintenance are the keys to successful winter camping.