
Introduction: Understanding Tent Vestibules
Every camper has experienced that moment of frustration when rain starts pouring and there’s nowhere to store wet gear except inside your sleeping area. Or perhaps you’ve wished for just a bit more protected space to organize equipment without cramming everything into your tent. These common camping challenges highlight why many outdoor enthusiasts wonder about expanding their shelter space.
Yes, you absolutely can add a vestibule to most tents through several effective methods. A vestibule is essentially a covered area attached to your tent’s entrance that provides protected space without taking up room in your sleeping quarters. This additional sheltered area serves as a buffer between the interior of your tent and the outside elements.
There are two primary approaches to adding a vestibule: purchasing manufacturer-designed or universal add-ons specifically made for this purpose, or creating your own DIY solution using readily available materials. Both options offer significant benefits that enhance your camping experience by providing extra space for gear storage, weather protection, and improved functionality.
At Explore Elements, we’ve tested countless tent configurations across diverse environments, giving us unique insights into effective vestibule solutions for various camping situations. This comprehensive guide will walk you through everything you need to know about expanding your tent’s functionality with additional covered space.
Benefits of Adding a Vestibule to Your Tent
Before diving into the “how” of adding a vestibule, let’s explore why campers consistently seek this tent enhancement. Understanding the ultimate guide to tent vestibule storage helps campers maximize their shelter efficiency. Vestibules transform your camping experience by creating additional functional space without requiring a larger or heavier tent.
Enhanced Gear Storage and Organization
A vestibule dramatically improves your ability to store and organize camping equipment. With dedicated storage space outside your sleeping quarters, you can:
- Keep bulky backpacks, boots, and equipment protected from the elements
- Maintain a cleaner sleeping area by separating dirty or wet gear
- Create organized zones for cooking equipment, hiking gear, and personal items
- Access frequently used items without disturbing the main tent interior
The ability to properly master tent vestibule organization significantly enhances your camping experience, especially during extended trips when gear management becomes increasingly important. A well-organized vestibule allows you to find what you need quickly without creating chaos in your sleeping space.
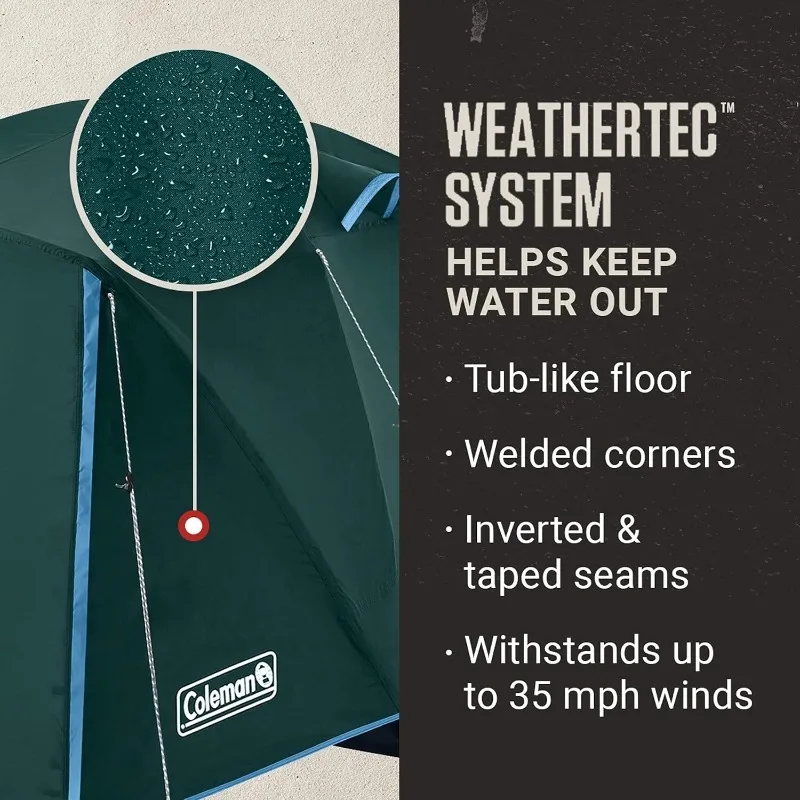
Weather Protection and Shelter
Vestibules create a valuable buffer zone against the elements, offering protection that transforms your camping experience in challenging conditions. They provide:
- Shelter from rain, snow, and wind for both gear and people
- A protected area to shake off rain gear before entering your sleeping quarters
- Reduced exposure to elements when entering or exiting the tent
- Extended protection for tent doors and entrances, keeping interior moisture at a minimum
Understanding comprehensive weather protection through tent vestibules becomes particularly valuable during unexpected weather changes or camping in temperamental environments where conditions can shift rapidly throughout the day.
Creating a Transition Zone/Mudroom
One of the most practical benefits of adding a vestibule is establishing a clean transition zone between the outdoors and your sleeping area. This “mudroom” concept:
- Prevents tracking dirt, mud, and debris into your sleeping area
- Provides space to remove and store dirty footwear and wet clothing
- Creates a buffer that helps maintain interior cleanliness throughout your trip
- Reduces the time spent cleaning your tent after your camping adventure
This transition functionality is especially important for family camping or extended trips where maintaining cleanliness becomes increasingly challenging. Understanding weather resistance in fast-pitch tents complements your vestibule’s effectiveness in creating this protective buffer zone.
Vestibules for Cooking (Safety Considerations)
While some campers use vestibules as sheltered cooking areas during inclement weather, this practice requires careful consideration of safety factors:
IMPORTANT SAFETY WARNING: Cooking in enclosed or partially enclosed spaces creates serious carbon monoxide poisoning and fire risks. Always prioritize proper ventilation and safe distance from tent materials when considering cooking in vestibule areas.
When cooking near vestibules:
– Ensure maximum ventilation with open sides when possible
– Maintain safe distance between heat sources and all tent materials
– Consider fuel type and associated risks (liquid fuels vs. canister stoves)
– Always have a fire management strategy and never leave cooking equipment unattended
Whenever possible, cooking outside away from your tent remains the safest option, using vestibules for cooking only in extreme weather situations when absolutely necessary and with proper safety protocols in place.
Types of Add-On Vestibules
When considering adding a vestibule to your tent, you’ll encounter two primary commercial options: manufacturer-specific designs created for particular tent models and universal options designed to work across different tent styles. Each offers distinct advantages depending on your specific needs and tent configuration.
The attachment mechanisms vary between products, including dedicated pole sleeves, velcro fasteners, clips, or zippered connections. Material quality also differs significantly between options, affecting durability, weight, and weather resistance. Understanding these differences helps you select the option that best matches your camping style and environment.
Manufacturer-Specific Vestibule Add-Ons
Manufacturer-designed vestibules offer the most seamless integration with your existing tent. These purpose-built additions are engineered specifically for compatibility with particular tent models and deliver several distinct advantages:
Advantages:
– Perfect fit and seamless integration with your tent’s design
– Matching materials, colors, and construction quality
– Pre-configured attachment points that align precisely with your tent
– Optimized for your tent’s specific structure and stability needs
– Often include dedicated poles designed for your tent’s architecture
Potential Drawbacks:
– Higher cost compared to universal or DIY options
– Limited availability, especially for older or discontinued tent models
– Less flexibility when upgrading to different tent models in the future
When exploring camping tent options with built-in vestibules, you’ll notice that many high-quality tents offer compatible add-on vestibules designed specifically to expand their functionality. Finding the right manufacturer-specific option requires identifying your exact tent model and checking whether the manufacturer produces compatible vestibule additions.
Universal Vestibule Options
Universal vestibules offer greater flexibility by accommodating various tent models through adjustable attachment systems. These versatile options provide solutions for campers whose tents might not have manufacturer-specific add-ons available.
Advantages:
– Adaptability across multiple tent models and styles
– Generally more affordable than manufacturer-specific options
– Availability even for discontinued or less common tent models
– Can often be transferred to new tents when upgrading gear
– Typically available through multiple retailers
Potential Drawbacks:
– May not integrate as seamlessly with your specific tent
– Sometimes require additional modifications for optimal fit
– May not match your tent’s aesthetic or material quality
– Could have compatibility limitations with certain tent designs
When selecting universal options, focus on attachment versatility, material quality, and sizing compatibility. Many universal vestibules work particularly well with waterproof camping tent designs that feature standard door configurations and pole structures.
DIY Tent Vestibule Solutions
For campers seeking customized solutions or working within budget constraints, creating your own vestibule offers unmatched flexibility and cost savings. DIY vestibules allow you to tailor dimensions, materials, and features precisely to your needs while often saving significantly compared to commercial options.
The DIY approach provides several key benefits:
– Complete customization of size, shape, and features
– Substantial cost savings compared to commercial products
– Lightweight options for backpackers concerned about pack weight
– Ability to modify and improve design based on experience
– Opportunity to repurpose materials you may already own
Creating custom vestibules works particularly well with dome camping tent designs that offer straightforward attachment points and compatible geometries for add-on structures.
Material Selection for DIY Vestibules
Choosing the right materials significantly impacts your DIY vestibule’s performance, weight, and durability. Consider these common options and their characteristics:
| Material | Weight | Waterproofness | Durability | Cost | Ease of Use |
|---|---|---|---|---|---|
| Polyethylene Tarp | Medium | Excellent | High | Low | Very Easy |
| Silnylon/Silpoly | Light | Very Good | Good | Medium | Moderate |
| Dyneema/Cuben Fiber | Ultra-Light | Excellent | Medium | Very High | Challenging |
| Canvas | Heavy | Good (treated) | Excellent | Medium | Moderate |
| Ripstop Nylon | Light-Medium | Variable | Good | Medium | Moderate |
For ultralight backpacking, silnylon or Dyneema composite fabrics offer the best weight-to-performance ratio despite higher costs. Car campers might prefer more durable polyethylene tarps or canvas options that prioritize longevity over weight considerations. Budget-conscious campers often find that standard polyethylene tarps offer excellent value and simplicity.
Understanding the most durable tent material options helps inform your choices when selecting fabrics for DIY projects, ensuring your vestibule withstands your typical camping conditions.
DIY Vestibule Attachment Methods
Securing your DIY vestibule effectively requires thoughtful connection to your existing tent structure. Consider these attachment strategies:
- Existing Tent Features: Utilize guy-out points, loops, or pole ends already present on your tent
- Added Attachment Points: Install grommets, webbing loops, or tie-out points on your vestibule material
- Quick-Connect Systems: Use carabiners, cord locks, or toggle systems for easy setup and removal
- Weatherproof Connections: Employ seam sealing, overlap techniques, or protected connection points to prevent water entry
For no-sew options, consider using:
– Adhesive repair tape designed for outdoor fabrics
– Cord and cord locks that tension around existing features
– Binder clips (temporary solution for light conditions)
– Purpose-made tarp clips that grip material without puncturing
Effective pole arrangements for DIY vestibules include using adjustable trekking poles, dedicated vestibule poles, or creating a structure that leverages your tent’s existing poles through extension sleeves or connection points.
Basic DIY Vestibule Design Examples
Here are three popular DIY vestibule configurations that offer distinct advantages for different camping situations:
1. Simple Tarp Lean-to Design
This straightforward approach uses a rectangular tarp attached to your tent entrance, supported by trekking poles or dedicated poles at the outer edge.
– Materials: Rectangular tarp, two poles, guy lines, stakes
– Setup: Attach upper edge to tent above door, support outer edge with poles, stake corners
– Ideal for: Quick setup, side entry tents, moderate weather conditions
– Challenge: Less protection in heavy wind or driving rain
2. A-Frame Extension Vestibule
This triangular design creates a more stable structure that handles wind better than flat configurations.
– Materials: Rectangular or shaped tarp, ridge line cord, stakes, guy lines
– Setup: Create ridge line from tent to ground or tree, drape material over line, stake sides
– Ideal for: Better weather protection, front entry tents, versatile configurations
– Challenge: Requires secure ridge line attachment point
3. Wraparound Side Vestibule
This design extends protection around the side of your tent for additional coverage and stability.
– Materials: Larger tarp or shaped material, multiple attachment points, poles
– Setup: Attach along tent side with multiple connection points, support outer edges with poles
– Ideal for: Maximum protected space, longer trips, family camping
– Challenge: More complex setup and material requirements
Freestanding backpacking tents often work particularly well with these DIY solutions due to their stable pole structure that can support additional attachments without compromising stability.
Critical Considerations Before Adding a Vestibule
Before investing time and resources into adding a vestibule to your tent, carefully evaluate several critical factors that will influence success. Proper planning prevents potential problems and ensures your vestibule enhancement actually improves your camping experience rather than creating new challenges.
Consider these key factors before proceeding:
– Whether your tent structure can properly support additional components
– Material compatibility between your tent and vestibule addition
– How added weight will impact your overall pack load for backpacking
– Ventilation requirements to prevent condensation buildup
– How entrances and exits will function with the added structure
– Additional setup complexity and time requirements
– Storage space needed for the vestibule components when packed
Tent Structural Compatibility
Different tent designs accommodate vestibule additions with varying degrees of success. Understanding your tent’s architecture helps determine the best approach:
Dome Tents: Generally accept vestibule additions well due to their stable, freestanding structure. Look for attachment points near the door area where the vestibule can connect without compromising stability.
Tunnel Tents: May require additional support for vestibules since their non-freestanding design already relies on tension. Vestibules typically work best when aligned with the tunnel orientation.
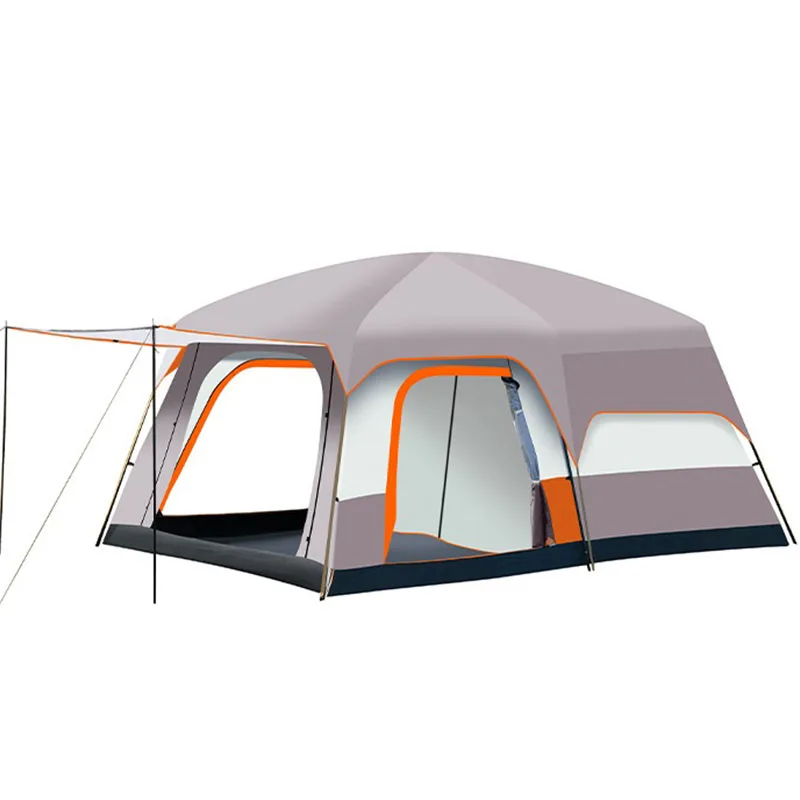
Cabin-Style Tents: Offer excellent vestibule compatibility due to their vertical walls and sturdy pole structure. Their height provides good coverage options for larger vestibules.
Ultralight/Minimalist Shelters: Require careful consideration as they often lack structure for supporting additions. Consider freestanding vestibule designs that don’t rely heavily on the tent for structural integrity.
Evaluate whether your tent can handle additional wind load and weight stress, particularly at connection points. Mastering space with expanded vestibules requires understanding how your specific tent design accommodates structural modifications.
Weather Considerations and Stability
Vestibules alter your tent’s wind profile and can affect overall stability in challenging conditions. Consider these weather-related factors:
- Position vestibules with consideration of prevailing wind direction (typically with narrower profiles facing wind)
- Add extra guy lines and stakes to compensate for increased wind resistance
- Use lower, more aerodynamic profiles in high-wind environments
- Ensure all connection points are reinforced to handle additional stress
- Consider seasonal adaptations such as steeper angles for snow shedding or additional ventilation for summer conditions
Proper waterproofing at connection points is critical to prevent leakage. Employ seam sealing, overlapping materials, or protective flaps at all junction points between your tent and vestibule. Understanding what makes tents truly windproof helps you design vestibule additions that preserve rather than compromise your shelter’s weather resistance.


Compact Backpacking Tent, Lightweight Backpacking Tent, Waterproof Camping Tent
$335.52 Select options This product has multiple variants. The options may be chosen on the product page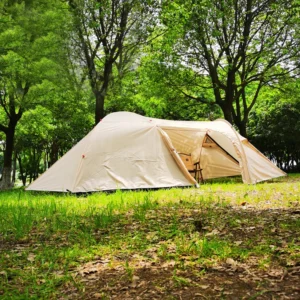
Camping Tent with Vestibule, Waterproof Camping Tent
Price range: $407.89 through $479.48 Select options This product has multiple variants. The options may be chosen on the product page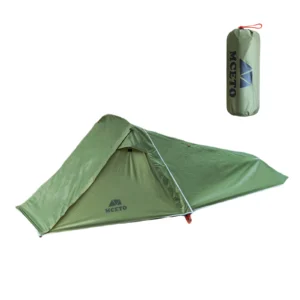
Backpacking Tent with Vestibule, Freestanding Backpacking Tent, Lightweight Backpacking Tent
Price range: $446.89 through $447.22 Select options This product has multiple variants. The options may be chosen on the product page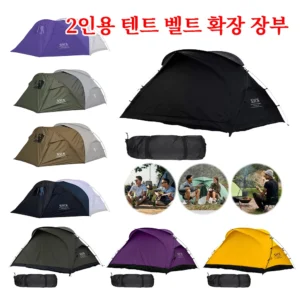
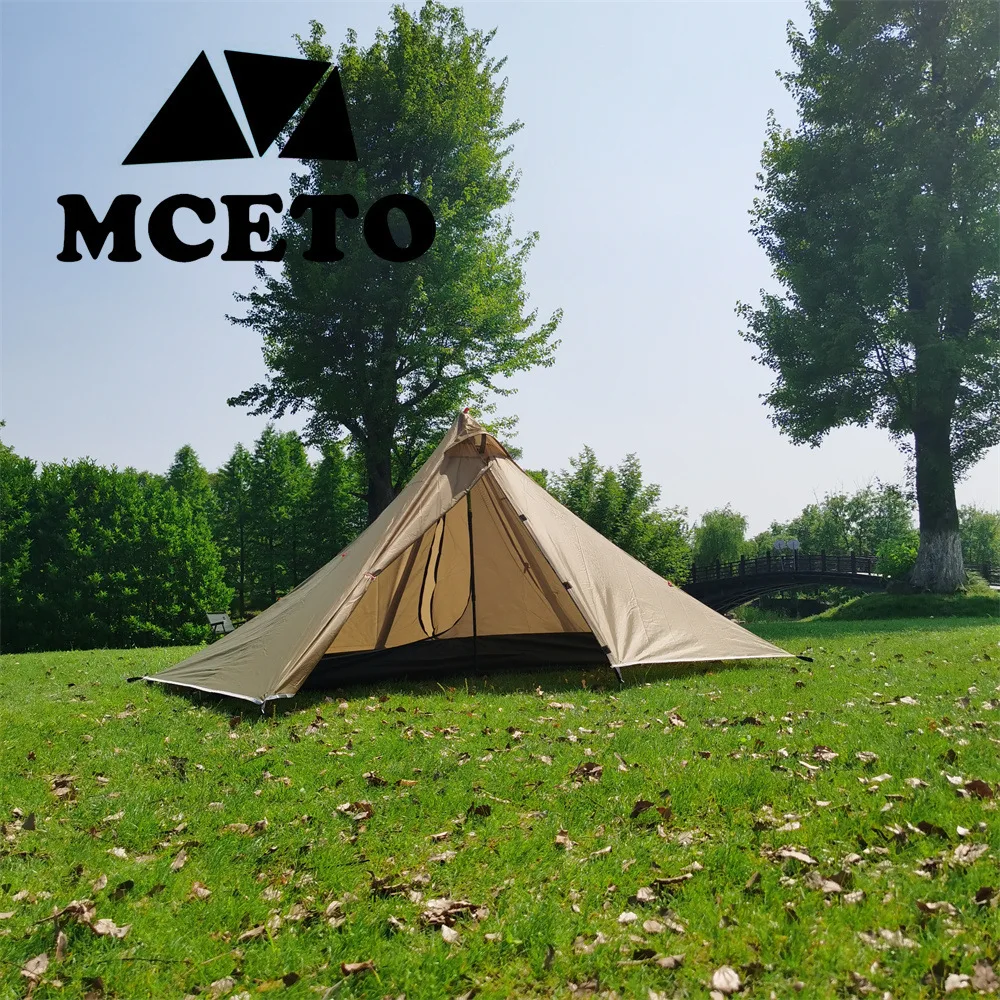
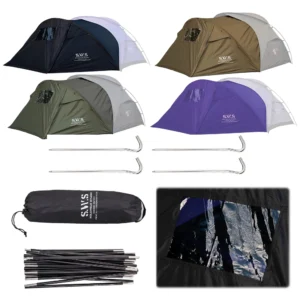
Backpacking Tent with Vestibule, Trekking Pole Backpacking Tent, Waterproof Camping Tent
Price range: $271.99 through $519.52 Select options This product has multiple variants. The options may be chosen on the product page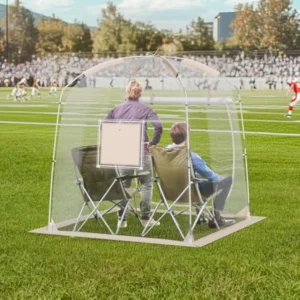
Lightweight Backpacking Tent, Trekking Pole Backpacking Tent, Waterproof Camping Tent
Price range: $89.64 through $188.40 Select options This product has multiple variants. The options may be chosen on the product page
Vestibule Setup Best Practices
Regardless of whether you choose a commercial or DIY vestibule solution, proper setup significantly impacts functionality and durability. Follow these best practices to maximize your vestibule’s performance:
- Position your tent entrance and vestibule with consideration of terrain slope (avoid water flow paths)
- Align vestibules considering sun exposure and prevailing winds
- Establish proper tension throughout the structure to prevent sagging
- Create appropriate drainage paths to direct water away from entrances
- Adjust setup based on current and anticipated weather conditions
- Leave adequate ventilation gaps to minimize condensation buildup
Understanding tent vestibules in diverse camping contexts helps you adapt your setup approach to specific environments and conditions.
Proper Staking and Tensioning
Effective staking and tensioning techniques make the difference between a functional vestibule and a frustrating camping experience:
- Use appropriate stake types for your ground conditions (sand, rocky soil, soft ground)
- Place stakes at slight outward angles (away from the tent) for better holding power
- Create consistent tension throughout the structure, eliminating wrinkles and sags
- Implement adjustable tensioners (line locks, truckers hitches) for quick adjustments as materials stretch
- Check and adjust tension periodically, especially after rain or temperature changes
- Consider additional guy lines for stability in windy conditions
Remember that proper tensioning prevents water pooling, reduces flapping in wind, and extends the lifespan of your vestibule materials by minimizing stress on fabric and attachment points.
Troubleshooting Common Vestibule Issues
Even well-designed vestibules sometimes present challenges. Here are solutions to common problems:
Water Leakage at Connection Points
– Apply seam sealer to all stitched connections
– Create overlapping “shingle effect” with materials
– Install small drainage channels or drip lines
– Adjust angles to promote water runoff away from vulnerable areas
Condensation Buildup
– Increase ventilation gaps, especially at high and low points
– Avoid cooking in vestibule areas when possible
– Leave doors partially open when conditions permit
– Consider adding small vents in strategic locations
Sagging Materials
– Improve initial tensioning during setup
– Add additional guy points to distribute tension
– Use elastic tensioners that maintain pressure as materials stretch
– Re-adjust tension after rain or significant temperature changes
Wind Instability
– Lower overall profile in high winds
– Add additional guy lines to critical support points
– Orient narrower profiles into prevailing winds
– Consider temporary storm guy lines during extreme conditions
Difficult Entry/Exit
– Redesign door configuration for better access
– Add defined door toggles or ties to secure open doors
– Create wider entrance pathways
– Consider adding small “welcome mat” area with ground cloth
Condensation Management
Condensation represents one of the most common challenges with vestibule areas due to the temperature differential between protected and unprotected spaces. Effective management includes:
- Understanding that condensation occurs when warm, moist air contacts cooler surfaces
- Creating strategic ventilation that allows moisture to escape without compromising weather protection
- Selecting materials with appropriate breathability for your typical conditions
- Implementing morning routines that include wiping down condensation before it drips onto gear
- Positioning gear within the vestibule to avoid contact with areas prone to condensation
For winter camping, condensation management becomes even more critical. 4-season tents implement specific condensation management features that can be adapted to vestibule designs for cold-weather performance.
Frequently Asked Questions About Tent Vestibules
Can any tent have a vestibule added?
While most tents can accommodate some form of vestibule addition, success depends on your tent’s design. Freestanding dome tents typically offer the most versatile options, while ultralight minimalist shelters may require more creative solutions. Always evaluate attachment points and structural stability before proceeding.
Is it better to buy or DIY a vestibule?
This depends on your priorities. Commercial vestibules offer convenience and optimized design but at higher cost. DIY options provide customization and significant cost savings but require time and some skill to implement. Frequent backpackers might prefer lightweight commercial options, while occasional campers often find DIY solutions perfectly adequate.
How much weight will a vestibule add?
Commercial vestibules typically add 1-3 pounds to your pack weight, while DIY options vary widely from as little as 8 ounces (using ultralight materials) to 2+ pounds for more robust solutions. Always factor this additional weight into your backpacking load calculations.
Can I use a vestibule in winter conditions?
Yes, vestibules work excellently in winter, providing protected space for gear and snow management. For winter use, consider steeper angles for snow shedding, stronger materials for snow load, and proper ventilation to manage increased condensation from the temperature differential.
How do I properly waterproof connection points?
Apply seam sealer to all stitched connections, use waterproof tape on non-stitched junctions, create overlapping material “shingles” that direct water downward, and position connections away from areas of high water flow whenever possible.
Will adding a vestibule void my tent warranty?
This varies by manufacturer. Permanent modifications like drilling holes or altering original components typically void warranties. However, using existing attachment points or manufacturer-approved accessories generally doesn’t affect warranty coverage. Check your specific tent’s warranty terms before making permanent modifications.
When Is Adding a Vestibule Not Recommended?
While vestibules offer numerous benefits, certain situations make them less practical or even problematic:
Ultralight Backpacking: When every ounce matters for long-distance hiking, the added weight of a vestibule might outweigh its benefits. Consider alternatives like strategic tarp positioning or ultralight bivy extensions.
Structurally Limited Tents: Some minimalist shelters lack the structural integrity to support additional components without compromising their stability or creating stress points that lead to damage.
Extremely High Wind Environments: In consistently high-wind locations, vestibules can create additional wind resistance that compromises overall tent stability, potentially creating more problems than solutions.
Very Short Trips in Good Weather: For quick overnight stays in favorable conditions, the added setup time and complexity might not justify the benefits gained from a vestibule.
Alternative solutions worth considering include:
– Weather-protected cook shelters separate from your sleeping tent
– Lightweight tarps set up as independent shelters rather than attached vestibules
– Larger volume backpacks with integrated waterproof compartments for gear storage
– “Gear shed” style tents that incorporate generous storage areas in their design
Consider whether transforming your tent’s living space might be better achieved through a different approach based on your specific camping style and environmental conditions.
Conclusion
Adding a vestibule to your tent represents one of the most effective ways to expand functionality and comfort while camping. Whether you choose a manufacturer-specific add-on, a universal option, or a DIY creation, the additional protected space transforms your outdoor living arrangement by providing valuable storage, transition areas, and weather protection.
Before proceeding, carefully evaluate your tent’s compatibility with vestibule additions and consider the specific environmental conditions you typically encounter. Select materials and designs appropriate for your camping style, balancing weight considerations with durability and weather resistance requirements.
With proper planning, appropriate materials, and attention to setup details, a well-designed vestibule addition will significantly enhance your camping experience across a wide range of environments and conditions. The extra effort invested in expanding your shelter pays dividends through improved organization, cleanliness, and protection from the elements.