
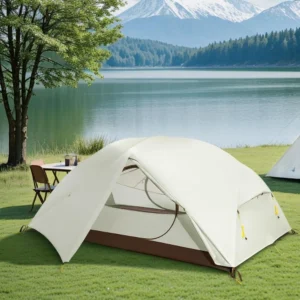
When venturing into the great outdoors, few things are as important as reliable shelter. At Explore Elements, we understand that a truly waterproof tent isn’t just a luxury—it’s essential protection that can make or break your adventure. Behind every premium waterproof tent lies thoughtful engineering and design elements that work together to keep you dry, comfortable, and safe, regardless of what Mother Nature throws your way.
Understanding Waterproof Ratings: The Science Behind Staying Dry
Before diving into specific design features, it’s crucial to understand what “waterproof” actually means in tent terminology. Unlike water-resistant fabrics that can handle light moisture, truly waterproof materials create an effective barrier between you and precipitation.
The industry standard for measuring waterproofing is the Hydrostatic Head (HH) rating. This rating indicates how much water pressure a fabric can withstand before leaking. The test is simple but telling: a fabric tube is filled with water, and the height of the water column (measured in millimeters) before leakage occurs becomes its HH rating.
| HH Rating | Protection Level | Suitable Conditions |
|---|---|---|
| 1000-1500mm | Basic | Light rain, brief showers |
| 2000-3000mm | Standard | Moderate rainfall, typical 3-season use |
| 4000-5000mm | Heavy-duty | Sustained downpours, windy conditions |
| 8000mm+ | Extreme | Severe weather, snow load, extended exposure |
While higher ratings offer better protection, they often come with trade-offs. Fabrics with extremely high HH ratings may be heavier, less breathable, or more expensive. The key is finding the right balance for your particular needs.
Understanding tent waterproof ratings helps you make informed decisions about which tent will serve you best. Many campers wonder if 3000mm waterproof rating is enough for their adventures—for most three-season camping in moderate conditions, it provides reliable protection while balancing other important factors like weight and cost.
Critical Tent Fabric Technologies for Weather Protection
The foundation of any waterproof tent is its fabric technology. Different materials offer varying levels of protection, durability, and comfort:
Polyester:
– Minimal stretch when wet
– Excellent UV resistance
– Affordable and widely used
– Slower drying than some alternatives
Nylon:
– Superior strength-to-weight ratio
– Stretches when wet (requires proper tensioning)
– Often used in lightweight backpacking tents
– May degrade faster with UV exposure
Ripstop Variations:
– Reinforced grid pattern prevents tears from spreading
– Available in both polyester and nylon
– Slightly heavier but significantly more durable
– Worth the weight penalty for extended use
Silicone-Coated Fabrics (Silnylon, Silpoly):
– Premium waterproofing solution
– Extremely water repellent
– Longer lifespan than PU coatings
– Often found in high-end tents
Dyneema/Cuben Fiber:
– Ultralight waterproof solution
– Incredibly strong for its weight
– No stretch when wet
– Very expensive but worth it for weight-conscious adventurers
Polycotton/Canvas:
– Natural fibers swell when wet to create waterproof barrier
– Excellent breathability
– Heavier than synthetic options
– Traditionally used in luxury glamping and expedition tents
Waterproof coatings add another layer of protection to these base fabrics. Polyurethane (PU) coatings are common and affordable but can break down over time. Silicone coatings offer superior durability and performance but at a higher price point. Many modern tents use hybrid PU/silicone solutions to balance performance and cost.
The thickness of tent fabric, measured in denier, also impacts waterproofing. Higher denier fabrics (70D-150D) offer better puncture resistance and longevity but add weight. Understanding these various materials used in waterproof hiking gear helps you select the right balance for your specific needs.
Seam Engineering: Preventing Water’s Most Common Entry Point
Even the most waterproof fabric becomes vulnerable at its seams—the points where separate panels are joined together. Without proper sealing, these needle holes and connections quickly become the primary entry point for water.
Factory seam-sealing methods include:
Tape-sealed seams: Waterproof tape is heat-bonded over stitched seams, creating a waterproof barrier. This is the most common method in quality tents.
Welded seams: Using ultrasonic or radio frequency welding to join fabrics without stitching holes. This creates an exceptionally waterproof connection but is more expensive to produce.
Critical seam sealing: Some manufacturers only seal the most exposed seams (typically rainfly and floor). This reduces costs but may leave vulnerable points in heavy rain.
Thread quality and stitch patterns also impact waterproofing effectiveness. Look for tents with tight, consistent stitching using treated, waterproof thread. Felled seams (where fabric edges are folded over before stitching) provide greater strength and water resistance than simple lap seams.
Warning signs of potential seam failure include:
– Loose or uneven stitching
– Missing or peeling seam tape
– Visible needle holes
– Thread that looks different from surrounding areas
Regular inspection and maintenance of tent seams is crucial for long-term waterproof performance. Understanding proper waterproof gear care ensures your tent maintains its protective abilities throughout its lifespan.
Rainfly Architecture: Your First Defense Against Precipitation
The rainfly serves as your tent’s primary shield against precipitation. Its design is critical to overall waterproof performance and directly impacts how effectively water is channeled away from your shelter.
Full-coverage vs. Partial-coverage Designs:
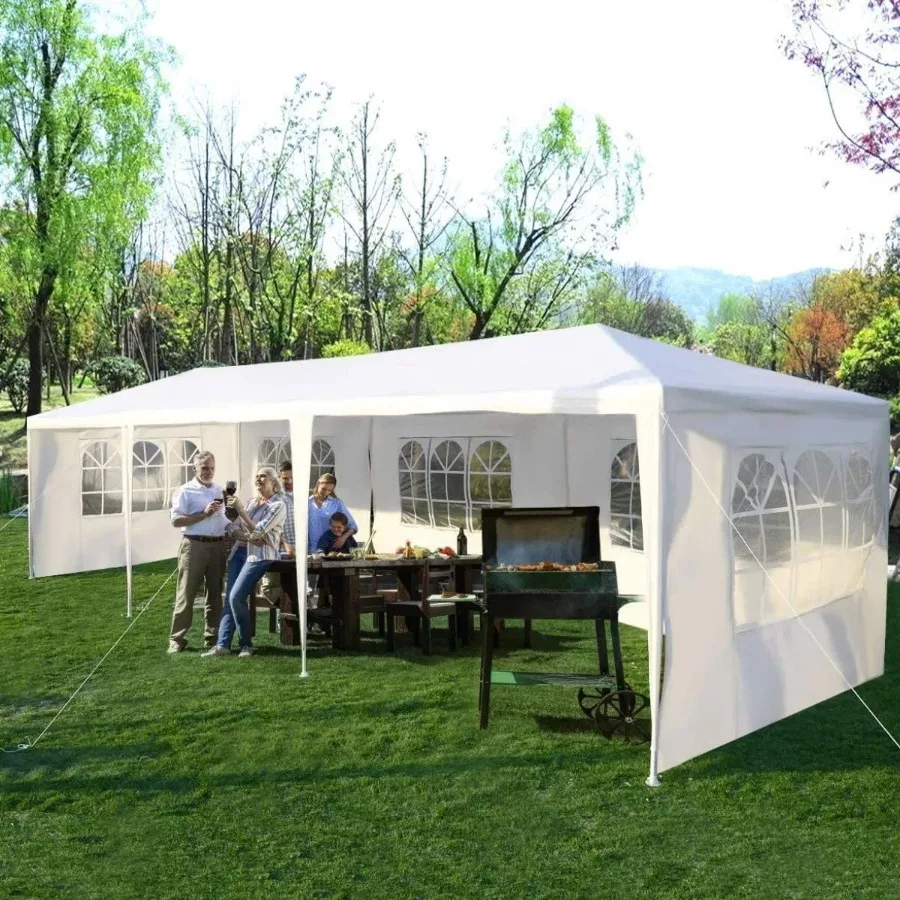
Full-coverage rainflies extend nearly to the ground on all sides, providing maximum protection in harsh conditions. They’re essential for unpredictable weather but reduce ventilation and add weight.
Partial-coverage rainflies leave portions of the inner tent exposed, typically with waterproof panels only on the roof and weather-facing sides. These designs prioritize ventilation and weight savings over maximum protection, making them suitable for mild conditions but risky in severe weather.
Optimal Rainfly Design Elements:
- Steep angles: Pitching angles of at least 45° allow water to run off quickly rather than pooling
- Strategic tensioning systems: Multiple adjustment points ensure proper tautness in varying conditions
- Adequate overhang: 3-5 inches minimum beyond tent body walls prevents splash-back
- Proper drip line: Ensures water drops clear of tent body and ground stakes
Guy-out Point Placement:
Quality waterproof tents feature multiple guy-out points that serve several crucial functions:
– Maintain structural integrity in wind
– Create and maintain an air gap between fly and tent body (preventing contact condensation)
– Allow for tension adjustments as fabric stretches when wet
– Channel water along defined paths away from doors and vents
The tent vestibule design is another critical rainfly component, creating a transitional space that allows for gear storage and protected entry/exit without bringing moisture into the sleeping area.
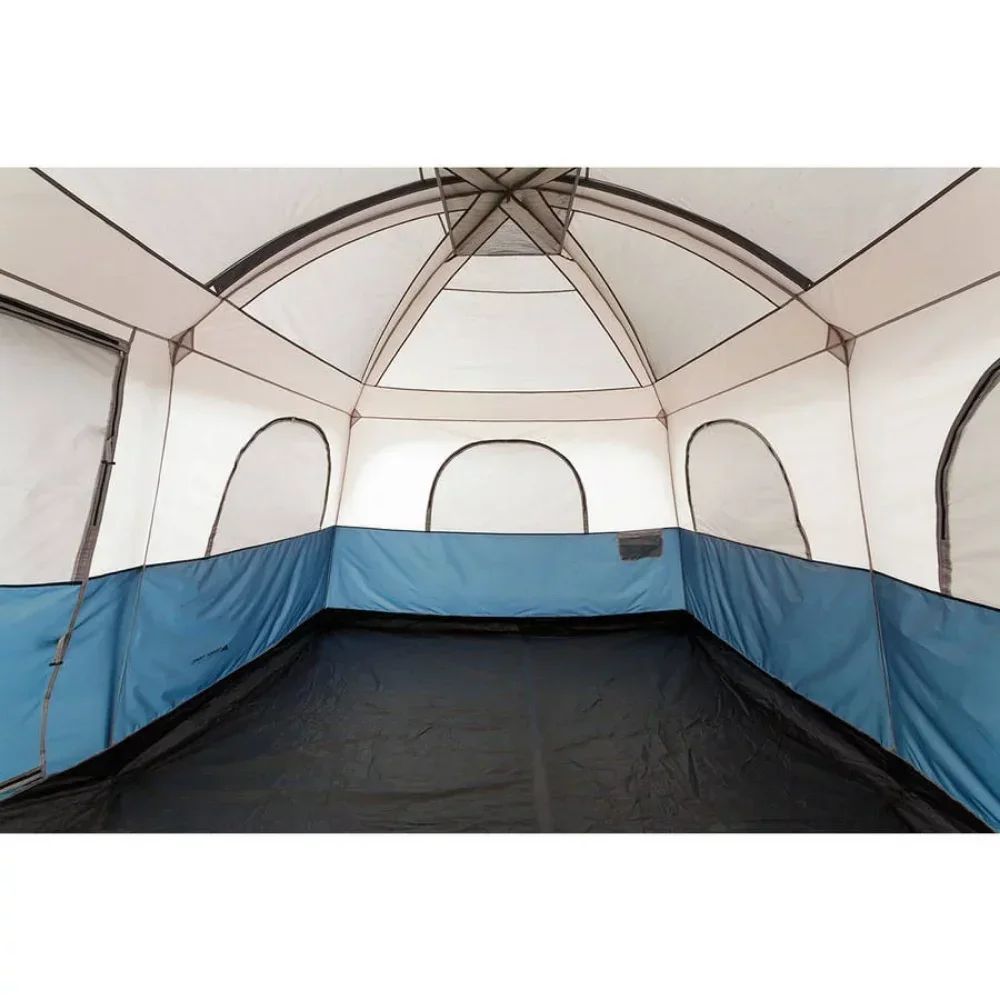
Floor Design: The Foundation of Waterproof Performance
A tent’s floor is constantly in contact with potentially wet ground, making its design crucial to overall waterproof performance. The “bathtub floor” construction represents the gold standard in waterproof protection—the floor material extends several inches up the tent walls before connecting to the main body fabric.
This raised perimeter creates a waterproof tub that prevents ground water from seeping in, even during heavy rain or on saturated ground. Quality tents feature bathtub floors with corners at least 3-5 inches high, while expedition models may extend 8+ inches up the walls.
Floor materials typically feature higher HH ratings than walls or rainflies—often 5000-10000mm—and use heavier denier fabrics to resist punctures and abrasion. This is one area where additional weight is usually worth the protection provided.
Groundsheets or footprints provide additional protection by:
– Creating a sacrificial layer to absorb ground abrasion
– Adding an extra moisture barrier
– Protecting the tent floor from sharp objects
– Extending the usable life of your tent
Proper groundsheet sizing is critical—they should be slightly smaller than your tent floor to prevent them from collecting and channeling water underneath your shelter.
When selecting a tent, understanding different shelter options for two campers helps you balance floor space needs with overall weather protection. The most waterproof design elements must work in concert with appropriate sizing for your group and gear.
Vulnerable Points: Waterproofing Zippers, Doors, and Windows
Even the most technically advanced tent design must address the inherent vulnerabilities created by necessary openings. Zippers, doors, and windows represent the most challenging areas to waterproof effectively.
Waterproof Zipper Technologies:
– Coated zippers feature a polyurethane layer applied to standard zippers, providing basic water resistance
– Laminated waterproof zippers (like YKK AquaGuard®) incorporate a polyurethane strip directly bonded to the zipper tape
– Regular application of zipper-specific lubricants prevents wear while maintaining water resistance
Storm Flap Designs:
Premium tents incorporate protective flaps that cover zippers completely, providing an additional barrier against moisture. Double-flap systems create a labyrinth seal that forces water to navigate multiple barriers before reaching the zipper itself.
Door Design Features:
– Protected entryways position doors on less weather-exposed sides when possible
– Integrated awnings extend protection beyond the doorway
– Angled entry designs channel water away from openings
– Dual zippers allow for ventilation options while maintaining protection
Window Waterproofing Solutions:
– Clear TPU (thermoplastic polyurethane) panels offer visibility without sacrificing waterproofing
– Window coverings should feature secure closure systems
– Proper angling helps shed water rather than collecting it
The quality difference between entry-level and premium tent closures becomes evident during sustained poor weather. Budget tents often begin leaking at closure points first, while high-quality designs maintain integrity even during extended exposure to harsh conditions.
Ventilation Engineering: Preventing Condensation While Maintaining Shelter
The greatest waterproofing paradox is that a completely sealed tent will still get wet inside—from condensation. When warm, moist air from breathing and body heat meets the cool tent walls, condensation forms. Without proper ventilation, this internal moisture can be as problematic as external precipitation.
Effective Ventilation Strategies:
- High/low venting systems: Create natural convection by positioning vents at different heights
- Strategic mesh placement: Allows airflow while maintaining insect protection
- Adjustable vent openings: Provide customized airflow based on conditions
- Kickstand vents: Use rigid supports to maintain airflow even during rainfall
The average person releases about 1 pint (0.5 liters) of moisture through respiration and perspiration during a night’s sleep. Multiply this by the number of occupants, and you quickly understand why ventilation is as crucial as waterproofing.
Single-wall vs. Double-wall Construction:
Single-wall tents use one waterproof-breathable layer to both repel precipitation and manage condensation. They’re lighter but more prone to condensation issues in challenging conditions.
Double-wall tents separate functions between an inner breathable tent body and outer waterproof rainfly. The air gap between layers allows moisture to escape more effectively, making them the preferred choice for varied conditions.
Mastering two-person lightweight tent setup involves understanding how to optimize ventilation based on expected weather conditions and positioning your tent to take advantage of natural airflow patterns.
Interior Design Elements for Weather Protection and Comfort
Beyond keeping external water out, thoughtful interior design enhances your tent’s overall weather protection capabilities:
Wall Angle Optimization:
– Steeper wall angles prevent water pooling
– Minimal contact points reduce the chance of touching wet surfaces
– Near-vertical walls maximize usable space while maintaining water-shedding capability
Water-Resistant Interior Features:
– Strategic pocket placement above potential entry points keeps essentials dry
– Suspended gear lofts provide off-floor storage for moisture-sensitive items
– Absorption points and drainage channels manage any moisture that does enter
Specialized Design Features:
– Snow-load support systems prevent collapse under heavy accumulation
– Multi-point guy systems distribute forces during high winds
– Emergency drainage solutions prevent catastrophic pooling
The interior dimensions of your tent significantly impact comfort during extended weather events. Understanding appropriate tent sizes for two people ensures you have adequate space to remain comfortable while staying clear of potentially damp walls.
Selecting the Right Waterproof Tent for Your Activities
The ideal waterproof tent balances protection with the specific requirements of your intended activities:
| Activity | Priority Features | Recommended HH Rating |
|---|---|---|
| Backpacking | Lightweight waterproofing, packability | 2000-3000mm |
| Car Camping | Durability, comfort, extended protection | 3000-5000mm |
| Mountaineering | Extreme weather protection, structural integrity | 5000mm+ |
Seasonality Considerations:
– 3-season tents prioritize ventilation with adequate rain protection
– 3-4 season (convertible) tents offer adaptable features for variable conditions
– 4-season tents maximize weather protection, often at the expense of ventilation and weight
When balancing factors, consider:
– How frequently you’ll encounter significant precipitation
– Average duration of your trips
– Weight sensitivity of your activities
– Typical environmental conditions
– Budget constraints
Many experienced adventurers find that waterproof backpacking tents with thoughtful design features provide the optimal balance of protection and practicality for most three-season activities.
Maintaining Your Tent’s Waterproof Integrity
Even the most advanced waterproof tent requires regular maintenance to preserve its protective capabilities:
Cleaning Procedures:
1. Brush off loose dirt and debris
2. Spot clean with mild soap and water (never use detergents)
3. Rinse thoroughly without submerging
4. Air dry completely before storage
DWR Restoration:
When water no longer beads on your tent’s surface, it’s time to restore the Durable Water Repellent (DWR) coating:
1. Clean the tent thoroughly
2. Apply manufacturer-recommended DWR spray evenly
3. Allow to dry completely
4. Repeat annually or whenever water stops beading
Seam Maintenance:
1. Inspect seams regularly for peeling tape or visible holes
2. Clean affected areas with alcohol wipes
3. Apply appropriate seam sealer (matching your tent fabric type)
4. Allow 24+ hours to cure completely

Lightweight Backpacking Tent, Ultralight Backpacking Tent, Waterproof Backpacking Tent
$391.05 Select options This product has multiple variants. The options may be chosen on the product page
Heavy Duty 4 Season Tent, Mountaineering Tent, Winter Camping Tent
$870.40 Select options This product has multiple variants. The options may be chosen on the product page
Compact Backpacking Tent, Lightweight Backpacking Tent, Waterproof Camping Tent
$335.52 Select options This product has multiple variants. The options may be chosen on the product page
Ultralight Backpacking Tent, Ultralight Dome Tent, Winter Camping Tent
Price range: $369.63 through $370.07 Select options This product has multiple variants. The options may be chosen on the product page
Camping Tent with Vestibule, Waterproof Camping Tent
Price range: $407.89 through $479.48 Select options This product has multiple variants. The options may be chosen on the product page
Heavy Duty 4 Season Tent, Ultralight Freestanding Tent, Winter Camping Tent
$3,722.66 Select options This product has multiple variants. The options may be chosen on the product page
Specialized tents, like heavy duty 4-season tents and ultralight freestanding tents, often have specific maintenance requirements. Always follow manufacturer recommendations for your particular model.
Most waterproof camping tents benefit from proper storage practices—never store damp, always loose rather than tightly packed, and in a cool, dry place. Winter camping tents require extra attention to prevent mildew during off-season storage.
Essential Waterproof Tent Specifications: A Quick Selection Guide
When evaluating waterproof tents, keep these key specifications in mind:
- Minimum 2000mm HH rating for three-season use (3000mm+ for reliable protection)
- Factory-sealed seams on all panels (particularly floor and rainfly)
- Full-coverage rainfly with adequate overhang
- Bathtub floor construction with 3”+ height
- Multiple protected ventilation points
- At least 4-6 guy-out points with reflective cord
- Properly designed door and window protection
- Compatible groundsheet option
By focusing on these essential waterproof design elements, you’ll ensure your outdoor shelter provides reliable protection for countless adventures across every terrain and weather condition.