

Understanding Freestanding Shelters: The Foundation of Backcountry Comfort
When venturing into the wilderness, your choice of shelter can make or break your hiking experience. Freestanding shelters stand as a popular option among outdoor enthusiasts for good reason. These are shelter designs that maintain their structure using poles without requiring stakes to stand upright.
At their core, freestanding shelters consist of three primary components: a framework of poles (typically aluminum or carbon fiber), an inner tent body (often partially mesh for ventilation), and a waterproof rainfly that covers the structure. The magic of these shelters lies in their freestanding tent structure – the poles create a self-supporting framework that allows the shelter to maintain its shape independently.
The mechanics behind freestanding shelters involve a clever distribution of tension and support. The poles thread through sleeves or attach to clips on the tent body, creating a dome or similar shape that stands on its own. This independence from stakes has revolutionized backcountry accommodation, offering flexibility that traditional tents simply couldn’t match.
Freestanding shelters have gained tremendous popularity among hikers due to their versatility and ease of use. Their ability to be set up on various surfaces has made them a go-to choice for adventurers exploring diverse landscapes. Whether you’re a weekend warrior or a seasoned thru-hiker, understanding the types of freestanding shelters available is the first step toward making an informed choice.
As we explore deeper into the world of portable trail protection, we’ll examine how these shelters compare to other options and help you determine if they’re the right choice for your adventure style.
The Advantages: Why Freestanding Designs Excel on the Trail
Freestanding shelters offer numerous benefits that make them a preferred choice for many hikers. Let’s explore these advantages in detail:
Versatile Pitching Capability: Perhaps the most celebrated feature of freestanding shelters is their ability to be set up on virtually any surface. Unlike their non-freestanding counterparts, these shelters can be pitched on solid rock, wooden platforms, sandy beaches, or snow without relying on stakes. This makes them ideal for freestanding tent rocky terrain scenarios where driving stakes would be impossible.
Setup Simplicity: Freestanding shelters typically feature intuitive designs that can be assembled quickly, even by beginners. Most modern models use color-coded poles and attachment points that eliminate guesswork. This simplicity becomes particularly valuable when setting up camp in adverse weather conditions or after an exhausting day on the trail.
Repositioning Freedom: Once set up, a freestanding shelter can be picked up and moved without requiring complete disassembly. This advantage proves invaluable when you realize your camping spot has an uncomfortable root underneath or when you need to adjust your position for better wind protection or morning sun exposure.
Weather Stability: The pole structure of freestanding shelters provides excellent resistance against environmental challenges. When properly staked (yes, even freestanding tents benefit from stakes in windy conditions), the dome or similar architecture distributes wind force effectively, preventing collapse in challenging weather.
Enhanced Living Space: The pole architecture of most freestanding backpacking tents creates more usable interior volume than many non-freestanding alternatives. The walls typically stand more vertically, resulting in more headroom and a greater sense of spaciousness that enhances livability during extended trips.
Double-Wall Benefits: Most freestanding shelters feature double-wall construction with separate inner and outer layers. This design creates a buffer zone that significantly improves condensation management and temperature regulation. The inner tent keeps you dry while the outer rainfly handles precipitation, preventing the soaking effect that can occur in single-wall designs.
Beginner-Friendly Design: For those new to backcountry camping, freestanding shelters offer a forgiving introduction. Their straightforward setup process and structural integrity provide confidence and reliability that help newcomers focus on enjoying their adventure rather than wrestling with complex pitching techniques.
For comprehensive information about these benefits, you can explore our definitive guide to freestanding shelters.
The Limitations: Understanding Freestanding Shelter Trade-offs
While freestanding shelters offer numerous benefits, they come with certain limitations that hikers should consider before making a purchase:
• Weight Penalty: The self-supporting pole structure that gives freestanding shelters their independence also adds significant weight to your pack. Compared to minimalist non-freestanding options, freestanding shelters typically weigh 1-2 pounds more due to their pole system. For ultralight backpackers counting every ounce, this additional weight can be a major consideration.
• Packed Size Concerns: The rigid poles required for freestanding designs don’t compress as efficiently as other gear. This results in a bulkier packed size that takes up more volume in your backpack. The larger packed dimensions can challenge those with smaller backpacks or those needing to fit additional gear for longer journeys.
• Price Considerations: The more complex engineering and additional materials in freestanding shelters often translate to higher costs. The price difference can be substantial, with comparable freestanding models frequently commanding a 20-40% premium over their non-freestanding alternatives.
• Wind Performance Reality: While freestanding structures can perform well in wind, there’s a common misconception that they don’t need to be staked down. In reality, a freestanding tent without stakes can become a dangerous projectile in strong winds. The comparison between freestanding and staked hiking shelters reveals that proper securing is still essential for safety and performance.
• Setup Space Requirements: Many freestanding designs require more clear, flat ground area during initial setup. The process of extending and assembling poles often needs more space than simply staking out a non-freestanding shelter, which can be challenging in densely wooded or limited terrain areas.
• Durability Vulnerabilities: The pole systems that enable freestanding capability represent potential failure points. In extreme conditions, poles can break or deform, compromising the entire shelter structure. This vulnerability doesn’t exist to the same degree with simpler trekking pole shelters.
Understanding these limitations doesn’t diminish the value of freestanding shelters but rather helps hikers make informed decisions based on their specific needs, priorities, and trail conditions.
Shelter Comparison: Freestanding vs. Non-Freestanding vs. Semi-Freestanding
To make an informed decision about your trail shelter, it’s essential to understand how different shelter types compare. Here’s a comprehensive breakdown of the three main shelter categories:
| Feature | Freestanding | Non-Freestanding | Semi-Freestanding |
|---|---|---|---|
| Weight | 2.5-5 lbs (1.1-2.3 kg) | 1-3 lbs (0.45-1.4 kg) | 2-3.5 lbs (0.9-1.6 kg) |
| Setup Time | 3-5 minutes | 5-10 minutes | 4-7 minutes |
| Terrain Adaptability | Excellent (any surface) | Limited (requires stakeable ground) | Good (some adaptability) |
| Wind Stability | Good to Excellent | Moderate to Good | Good |
| Packed Size | Larger | Smallest | Medium |
| Price Range | Higher | Lower | Middle |
| Support Mechanism | Dedicated poles | Trekking poles/stakes | Hybrid system |
| Interior Space | More headroom | Less headroom | Moderate headroom |
Freestanding Shelters maintain their structure independently using a dedicated pole system. These shelters excel in versatility, allowing setup on any surface including rock, wooden platforms, and sand. The ultralight freestanding tent options have become increasingly popular as manufacturers find ways to reduce weight without compromising structure. They provide excellent interior space with near-vertical walls but come with weight and cost penalties.
Non-Freestanding Shelters rely entirely on stakes and tension to maintain their shape, often utilizing hiking trekking poles for support instead of carrying dedicated poles. These trekking pole backpacking tents offer superior weight savings and smaller packed size, making them favorites among ultralight enthusiasts. However, they require suitable ground for staking, have more complex setups, and typically offer less interior volume due to sloping walls.
Semi-Freestanding Shelters represent a hybrid approach, using poles for partial structure while still requiring some stakes for complete setup. They strike a balance between the other two categories, offering moderate weight savings compared to fully freestanding designs while providing more structure and ease of setup than purely non-freestanding options. These shelters typically need fewer stakes than non-freestanding designs but don’t have the complete pitch-anywhere versatility of true freestanding tents.
The ideal shelter type depends largely on your hiking style and priorities:
- Choose freestanding for maximum versatility, comfort, and simplicity
- Select non-freestanding for ultimate weight savings and when you’ll consistently camp on stakeable surfaces
- Consider semi-freestanding when seeking a compromise between weight and convenience
Essential Features: What to Look for in a Quality Freestanding Shelter
Capacity and Dimensions
When evaluating freestanding shelters, understanding capacity ratings is crucial. Manufacturer “person” ratings often represent the maximum number of sleepers who can fit shoulder-to-shoulder – not necessarily comfortably. A general rule of thumb: for comfort, select a tent rated for one person more than will actually use it.
Floor area measurements matter significantly. Look for specifications in square feet or square meters, with 15-20 square feet (1.4-1.9 square meters) representing the minimum comfortable space per person. For 2-person backpacking tents, aim for at least 30-35 square feet (2.8-3.3 square meters) of floor space for reasonable comfort.
Peak height dramatically affects livability. Taller peak heights (40+ inches/102+ cm) allow sitting upright and changing clothes more easily. Consider not just the maximum height but also the wall angles – steeper walls create more usable space than steeply sloping ones.
For length and width requirements, ensure the tent floor is at least 6-8 inches (15-20 cm) longer than the tallest sleeper. Width considerations should account for sleeping pads and gear storage, with most comfortable two-person designs offering at least 50-55 inches (127-140 cm) of width.
Seasonality and Weather Protection
Freestanding shelters typically come in three seasonality ratings:
- 3-Season: Designed for spring, summer, and fall use with good ventilation and moderate weather resistance
- Extended Season: Offering enhanced weather protection for early spring and late fall, with stronger poles and less mesh
- 4-Season: Built for winter conditions with robust pole structures, minimal mesh, and snow-shedding designs
Rainfly coverage significantly impacts weather protection. Full-coverage flies extend nearly to the ground and provide superior protection against wind-driven rain, while partial coverage offers better ventilation but less protection.
Vestibule design is another critical consideration for waterproof backpacking tents. Vestibules create sheltered storage space for dirty or wet gear outside the sleeping area. Larger vestibules (6+ square feet/0.56+ square meters) provide space for gear storage and protected cooking in bad weather, though cooking in vestibules requires careful ventilation to avoid carbon monoxide dangers.
Materials and Construction Quality
Fabric selection significantly impacts shelter performance:
– Nylon: Lighter, more stretchy, and typically less expensive but degrades faster with UV exposure
– Polyester: More UV resistant and maintains tension when wet but usually slightly heavier
– Dyneema Composite Fabric (DCF): Exceptionally lightweight and waterproof but extremely expensive and less durable
Denier ratings indicate fabric thickness and durability. Lower numbers (10-20D) mean lighter but more delicate materials, while higher numbers (40-70D) indicate more durable but heavier fabrics. Floor materials should typically be higher denier than rainfly materials.
Waterproof coatings include:
– Polyurethane (PU): Common and affordable but deteriorates over time
– Silicone: More durable and maintains flexibility but more expensive
– PeU (Polyether Urethane): Advanced coating with better longevity than standard PU
Hydrostatic head ratings measure water resistance. Look for ratings of at least 1,200mm for rainflies and 2,000+mm for floors. Higher numbers indicate better waterproofing.
For more detailed information about these design elements, explore our article on freestanding hiking tents design features.
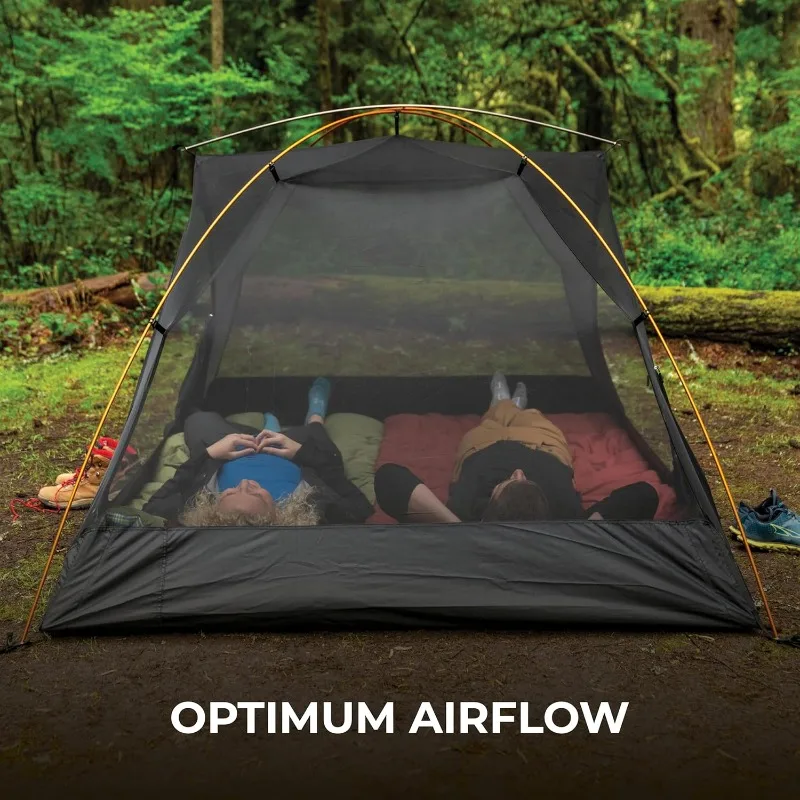
Ventilation and Condensation Management
Proper ventilation is essential for comfort and preventing condensation. Look for:
– Strategic mesh panel placement for air circulation without compromising warmth
– High and low venting options to create natural convection airflow
– Adjustable rainfly configurations for weather-appropriate ventilation
– Double-wall design with space between the inner tent and rainfly to trap and channel moisture
Effective condensation management prevents interior dripping and keeps gear dry even in humid conditions. The best designs allow for airflow customization based on weather conditions and occupancy.
Weight vs. Durability: Finding Your Perfect Balance
The relationship between weight and durability represents one of the most important trade-offs in shelter selection. Lighter materials typically offer less durability, while more robust materials add weight to your pack.
Shelter weight categories generally fall into:
– Ultralight: Under 2 lbs (0.9 kg)
– Lightweight: 2-3 lbs (0.9-1.4 kg)
– Standard: 3-5 lbs (1.4-2.3 kg)
– Expedition: 5+ lbs (2.3+ kg)
When evaluating weight specifications, understand the difference between:
– Trail weight: Tent, rainfly, and poles only (what you’ll minimally carry)
– Packed weight: Everything included (tent, rainfly, poles, stakes, stuff sacks, repair kit)
Your hiking style should dictate your durability needs. Weekend warriors might prioritize comfort and durability over weight, while thru-hikers covering thousands of miles might accept more delicate materials to reduce pack weight. Ultralight backpacking tent options often utilize specialized materials that balance weight reduction with reasonable durability.
Consider your personal priorities by asking:
– How frequently will you use the shelter?
– What conditions will you typically encounter?
– How careful are you with gear?
– How much weight are you willing to carry?
– What’s your budget? (lighter materials often cost significantly more)
The ideal balance is subjective and personal. Someone hiking the entire Appalachian Trail might justifiably choose different priorities than someone taking occasional weekend trips.
For more insights on balancing weight considerations, check our best ultralight hiking tents 2025 guide.
Setup and Livability: Beyond Basic Specifications
The true value of a freestanding shelter extends far beyond its technical specifications. The practical experience of setting up and living in your shelter can significantly impact your wilderness enjoyment.
Modern freestanding shelters incorporate numerous features to enhance setup ease:
– Color-coded poles and attachment points eliminate confusion
– Hub systems simplify pole assembly by pre-connecting pole segments
– Clip attachments offer faster setup than traditional pole sleeves
– Intuitive designs reduce the learning curve for beginners
Door configuration dramatically affects shelter livability. Single-door designs save weight but can force one occupant to climb over another for nighttime exits. Dual-door configurations, while slightly heavier, eliminate this inconvenience and typically provide two vestibules for separate gear storage.
Interior organization features enhance comfort during extended stays:
– Overhead gear lofts keep small essentials accessible
– Interior pockets provide convenient storage for personal items
– Attachment loops allow hanging lanterns for evening light
– Privacy panels on inner tents provide psychological comfort in shared camping areas
Camping tent vestibule designs vary widely in functionality. The best vestibules offer:
– Sufficient space to store backpacks and footwear
– Enough height for convenient entry/exit
– Adjustable door positions for ventilation control
– Ground space for cooking in protected (but ventilated) conditions during inclement weather
Weather Performance: Staying Protected in Challenging Conditions
A freestanding shelter’s weather performance can make the difference between a comfortable adventure and a miserable (or even dangerous) experience. Understanding how these shelters perform in various conditions is essential for proper selection and use.
Wind performance heavily depends on both design and proper setup. Dome and geodesic structures typically outperform tunnel or cabin designs in high winds due to their aerodynamic shapes and multiple crossing poles. For optimal wind stability in freestanding tents, look for:
– Low-profile designs that don’t catch wind
– Multiple pole crossings that distribute force
– Strategic guy-out points to anchor the shelter
– Pole sleeves (rather than just clips) in high-stress areas
Rain management goes beyond simple waterproof materials. Effective rain protection involves:
– Properly tensioned rainflies that prevent contact with the inner tent
– Adequate vestibule coverage for gear and entrance protection
– Bathtub floors with high sidewalls to prevent splashback entry
– Seam sealing or taped seams at all water entry points
For winter camping and snow conditions, most standard 3-season freestanding shelters have limitations. True 4-season winter 2-person tents feature:
– Stronger pole structures to support snow loads
– Steeper walls to shed accumulation
– Less mesh and more solid fabric for heat retention
– Multiple guy-out points for added stability
High-humidity and desert environments present opposite challenges. In humid conditions, maximizing ventilation through mesh panels, keeping the rainfly tensioned away from the inner tent, and site selection to capture breezes all help mitigate condensation. In desert environments, seek shelter designs with adequate shade options, maximum ventilation capability, and UV-resistant materials.
Remember that even the best freestanding shelter benefits from proper staking and guy line usage. While these shelters can stand without stakes, they perform optimally when properly secured against environmental forces.
Is a Freestanding Shelter Right for Your Adventure Style?
Determining whether a freestanding shelter suits your needs requires honest assessment of your adventure style, preferences, and priorities. Consider these key factors:
Trip Duration and Frequency
– Weekend Warriors: The slight weight penalty of freestanding shelters is less significant for shorter trips, making their convenience and comfort advantages more appealing.
– Thru-Hikers: Those covering thousands of miles might prioritize weight savings over convenience, potentially favoring non-freestanding options.
– Frequent Travelers: Regular users might appreciate the durability and ease of freestanding designs despite the weight.
Geographic and Climate Considerations
– Rocky Terrain: Freestanding shelters excel where staking is difficult or impossible.
– Heavy Precipitation: Double-wall freestanding designs typically manage condensation better in persistently wet conditions.
– High Wind Areas: The structural integrity of freestanding designs often provides better protection in exposed windy locations.
Personal Comfort Priorities
– Interior Space: Freestanding shelters typically offer more headroom and usable space.
– Setup Simplicity: If you frequently set up camp after dark or in poor weather, the simpler setup of freestanding shelters is valuable.
– Temperature Management: Double-wall construction provides better temperature regulation in varying conditions.
Weight Sensitivity
– Ultralight Enthusiasts: Those counting every ounce might find the weight penalty of freestanding designs unacceptable.
– Comfort-Focused Hikers: Many find carrying an extra pound worthwhile for the enhanced living space and convenience.
– Physical Limitations: Hikers with back or joint issues might prioritize minimizing pack weight.
The freestanding hiking shelters guide provides detailed scenarios for different hiker profiles. Generally, freestanding shelters excel for:
– Beginners appreciating easier setup
– Those camping on varied terrain types
– Comfort-prioritizing hikers
– Campers in humid environments where condensation management is crucial
Non-freestanding options might better serve:
– Ultralight backpackers
– Experienced hikers comfortable with more complex setups
– Those primarily camping on stakeable surfaces
– Budget-conscious adventurers
Top Freestanding Shelter Recommendations for Different Hikers
Selecting the perfect freestanding shelter depends on your specific needs and priorities. Here are our top recommendations across several categories:
Best Overall Freestanding Shelters
These balanced options offer the best combination of weight, durability, livability, and weather protection for most hikers:
| Feature | Specifications |
|---|---|
| Weight Range | 2.5-3.5 lbs (1.1-1.6 kg) |
| Capacity | 1-2 person |
| Price Range | $300-450 |
| Key Features | Double-wall construction, aluminum poles, dual doors/vestibules |
These shelters excel in versatility, performing well across various conditions and terrains. They typically feature high-quality materials, intuitive setup, and thoughtful design elements that enhance the camping experience without excessive weight penalty.
Ultralight Freestanding Options
For weight-conscious hikers who still value the convenience of freestanding design:
| Feature | Specifications |
|---|---|
| Weight Range | 1.8-2.5 lbs (0.8-1.1 kg) |
| Capacity | 1-2 person |
| Price Range | $400-600+ |
| Key Features | Premium materials, minimalist design, carbon fiber poles |
These cutting-edge shelters utilize advanced materials like ultralight nylon or DCF (Dyneema Composite Fabric) and carbon fiber poles to reduce weight while maintaining structure. The weight savings comes with trade-offs in durability and price, making these best suited for experienced hikers who handle gear with care.
Budget-Friendly Selections
Quality options that won’t break the bank:
| Feature | Specifications |
|---|---|
| Weight Range | 3.5-5 lbs (1.6-2.3 kg) |
| Capacity | 1-2 person |
| Price Range | $150-250 |
| Key Features | Durable materials, simpler designs, aluminum poles |
These shelters often use slightly heavier materials and simpler designs to reduce costs while maintaining reliability. The weight penalty and slightly reduced feature set are reasonable trade-offs for occasional hikers or those just starting their outdoor journey.
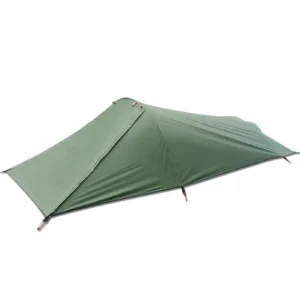

Lightweight Backpacking Tent, Ultralight Backpacking Tent, Ultralight Bivy Tent
Ultralight Single Person Camping Tent with Aluminum Poles for 3-Season Backpacking Waterproof DesignPrice range: $94.88 through $326.82 Select options This product has multiple variants. The options may be chosen on the product page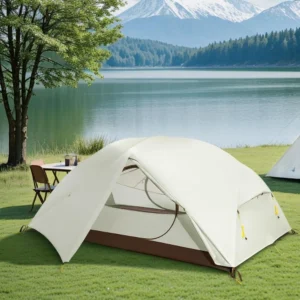
Lightweight Backpacking Tent, Ultralight Backpacking Tent, Waterproof Backpacking Tent
$391.05 Select options This product has multiple variants. The options may be chosen on the product page
Heavy Duty 4 Season Tent, Mountaineering Tent, Winter Camping Tent
$870.40 Select options This product has multiple variants. The options may be chosen on the product page
Compact Backpacking Tent, Lightweight Backpacking Tent, Waterproof Camping Tent
$335.52 Select options This product has multiple variants. The options may be chosen on the product page
Ultralight Backpacking Tent, Ultralight Dome Tent, Winter Camping Tent
Price range: $369.63 through $370.07 Select options This product has multiple variants. The options may be chosen on the product page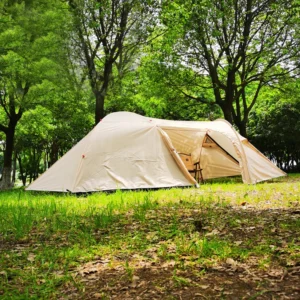
Camping Tent with Vestibule, Waterproof Camping Tent
Price range: $407.89 through $479.48 Select options This product has multiple variants. The options may be chosen on the product page
Most Durable Designs
For challenging conditions or those hard on gear:
| Feature | Specifications |
|---|---|
| Weight Range | 4-6 lbs (1.8-2.7 kg) |
| Capacity | 2 person |
| Price Range | $350-550 |
| Key Features | Reinforced stress points, higher denier fabrics, robust pole systems |
These shelters prioritize longevity and reliability over weight savings. They feature higher denier fabrics, reinforced stress points, and more robust pole structures that can withstand harsh conditions and rough handling, making them ideal for extended journeys or extreme environments.
Best Solo Hiker Configurations
Optimized for single-person use:
| Feature | Specifications |
|---|---|
| Weight Range | 2-3 lbs (0.9-1.4 kg) |
| Capacity | 1 person |
| Price Range | $250-400 |
| Key Features | Efficient space utilization, lighter weight, simplified design |
These shelters offer excellent balance between weight and livability for solo adventurers. They typically provide more generous dimensions than minimalist bivies while weighing substantially less than their 2-person counterparts.
For more comprehensive recommendations and detailed analysis, visit our best freestanding hiking shelters guide or explore our complete guide to tent weight for backpacking.
Essential Skills: Setting Up and Maintaining Your Freestanding Shelter
Setup Mastery
While freestanding shelters are generally straightforward to erect, mastering proper setup techniques enhances performance and longevity:
Site Selection Best Practices
– Choose level ground when possible, clearing small rocks and debris
– Avoid depressions where water might collect during rain
– Consider natural windbreaks in exposed areas
– Look up for dead branches or “widow makers” before setting up
– Position your entrance away from prevailing winds when possible
Proper Staking Techniques
Despite being “freestanding,” these shelters perform best when properly staked:
– Use stakes appropriate for your terrain (sand, snow, or rocky soil may require specialized stakes)
– Drive stakes at a 45-degree angle away from the tent for maximum holding power
– Ensure guy lines maintain even tension without distorting the shelter’s shape
– Consider carrying extra stakes for additional stability in adverse conditions
Guy Line Optimization
– Attach guy lines to all provided attachment points in windy conditions
– Adjust tension as temperature and humidity change (particularly important with nylon shelters)
– Use reflective guy lines to prevent tripping hazards at night
– Learn adjustable knots for easy tension adjustment
Maintenance and Care
Proper maintenance dramatically extends your shelter’s lifespan and reliability:
Field Cleaning Approaches
– Sweep out dirt and debris daily during extended trips
– Spot clean with water and a soft cloth for small stains or sap
– Shake out thoroughly before packing to remove sand and debris
Thorough Drying Processes
– Always dry completely before storage, even if this means setting up the tent at home after a trip
– Pay special attention to corners and seams where moisture hides
– Consider using a fan to accelerate drying in humid environments
Storage Recommendations
– Store loosely in a breathable cotton or mesh bag, not tightly in the provided stuff sack
– Keep in a cool, dry place away from direct sunlight
– Avoid storing in garages or attics with temperature extremes
Pole Care and Inspection
– Regularly check for hairline cracks or bends
– Clean dirt from pole segments and connections
– Apply silicone lubricant to shock cord connections occasionally
– Assemble poles by unfolding rather than snapping sections together
With proper care and maintenance, a quality freestanding shelter from Explore Elements can provide reliable protection through countless adventures across diverse landscapes and conditions.
Frequently Asked Questions About Freestanding Shelters
Do I still need to stake a freestanding tent?
While freestanding shelters can stand without stakes, they should still be secured in most conditions. Staking prevents your shelter from blowing away in unexpected gusts and creates proper tension for optimal performance. Think of stakes as essential for security and performance, not just optional accessories.
Can freestanding tents handle high winds?
Quality freestanding shelters can handle moderate to strong winds when properly set up and secured. Their pole structure distributes wind force effectively, but performance varies significantly between models. Dome and geodesic designs typically outperform cabin-style shapes in windy conditions. Always use all guy-out points in windy situations and position your shelter with the narrowest end facing the prevailing wind.
Are freestanding tents suitable for winter camping?
Standard 3-season freestanding tents aren’t designed for winter conditions. True winter camping requires specialized 4-season shelters with stronger pole structures, reduced mesh, and designs that shed snow effectively. Some extended-season freestanding models can handle light snow and mild winter conditions, but sustained heavy snow loads require purpose-built winter shelters.
What’s the main difference between freestanding and semi-freestanding?
Freestanding shelters stand completely on their own using internal poles, while semi-freestanding designs require some staking to achieve their full structure. Semi-freestanding tents typically use poles for most support but need stakes to extend vestibules or create proper tension in certain areas. This hybrid approach offers a compromise between weight and convenience.
Can I pitch just the inner tent or just the rainfly?
Many freestanding shelters allow for “fast-fly” setup using just the rainfly and poles (great for lightweight trips in bug-free conditions) or just the inner tent (ideal for stargazing in dry weather). Not all models offer this versatility, so check the specific design features if this flexibility matters to you.
How much should I expect to spend on a quality freestanding shelter?
Quality freestanding shelters typically range from $200-600, with ultralight models using premium materials pushing toward the higher end. Budget-friendly options around $150-250 can provide good performance for occasional use, while premium shelters with cutting-edge materials and design can exceed $600. Consider frequency of use and conditions when determining your budget.
How long do freestanding shelters typically last?
With proper care, a quality freestanding shelter should last 200-500 nights of use. Variables affecting lifespan include material quality, maintenance habits, UV exposure, and usage conditions. Premium shelters from respected brands like those offered by Explore Elements typically last longer than budget options due to superior materials and construction.
What’s the lightest freestanding shelter available?
The lightest fully freestanding shelters currently available weigh around 1.8-2.2 pounds (0.8-1 kg) for one-person models. These ultralight designs typically use carbon fiber poles and extremely lightweight fabrics to achieve these impressive weights. Remember that significant weight reduction usually involves trade-offs in durability and interior space.