
Understanding the Challenges of Rocky Terrain Camping
Camping on rocky terrain offers some of nature’s most breathtaking rewards – panoramic alpine views, sunrise vistas over desert landscapes, and unique experiences far from crowded campgrounds. These spectacular locations come with their own set of distinctive challenges that require special preparation and techniques.
Rocky terrain presents several specific obstacles for campers:
- Traditional tent stakes become useless when there’s no soil to drive them into
- Sharp rocks pose a constant threat to your tent floor
- Exposed locations often mean dealing with stronger, unpredictable winds
- Finding a flat, comfortable spot can feel nearly impossible
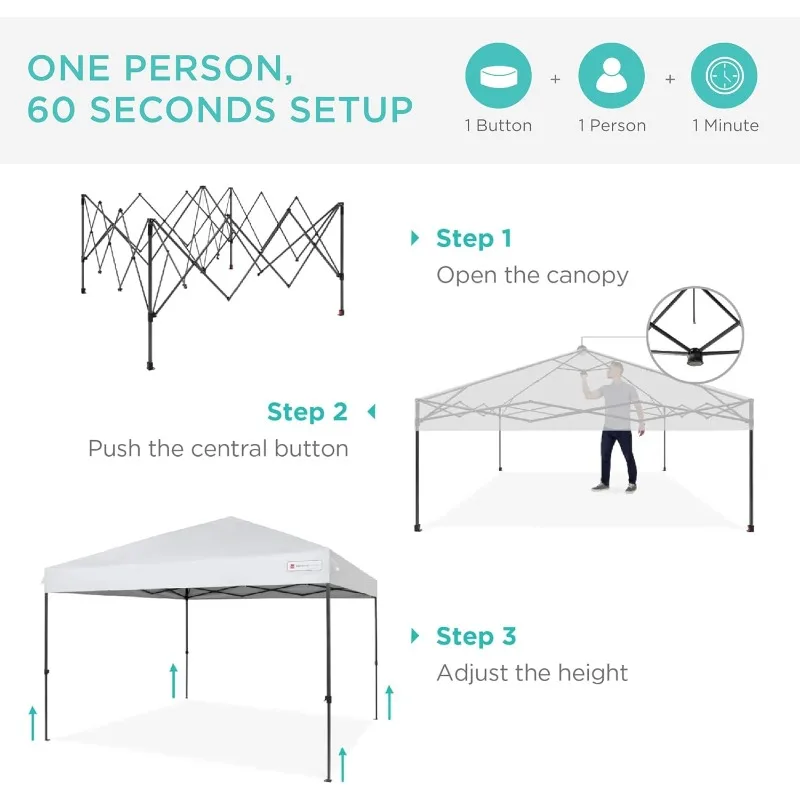
This is precisely why freestanding shelters for hikers are typically preferred for these environments. Their self-supporting structure doesn’t rely on stakes for the basic setup, giving you more flexibility on solid surfaces.
Throughout this guide, we’ll explore field-tested techniques that work in various rocky environments – from alpine zones above the treeline to desert slickrock and exposed ridge camps. By mastering these methods, you’ll expand your camping possibilities to include some of the most spectacular (and less crowded) destinations the wilderness has to offer.
Essential Pre-Trip Preparation for Rocky Terrain
Before heading out to rocky terrain, it’s crucial to understand your equipment and prepare accordingly. Each freestanding tent structure has unique features that affect how it performs on rocky ground. Take time to familiarize yourself with your tent’s design, especially its stability without stakes.
Specialized Gear for Rocky Terrain:
Ground Protection Options:
– Manufacturer’s custom footprint (most durable but often heavier)
– Tyvek sheets (lightweight with good durability)
– Polycro plastic (ultralight but less durable)
– Emergency blankets (multi-purpose but noisy)
Alternative Anchoring Systems:
– Rock bags/sacks (small stuff sacks filled with rocks or sand)
– Deadman anchors (flat objects that can be buried under rocks)
– Extra guylines (3mm-4mm paracord or reflective cord)
– Tent pole extenders for additional stability
Additional Recommended Items:
– Repair tape (for potential floor punctures)
– Extra cordage (15-20 feet of 3mm paracord)
– Small foam pad sections (for creating level spots)
– Lightweight gloves (for handling sharp rocks)
Before any trip, set up your tent at home and practice the anchoring techniques we’ll cover. Test how stable your tent is without stakes, and identify any potential weak points in the structure that might need reinforcement.
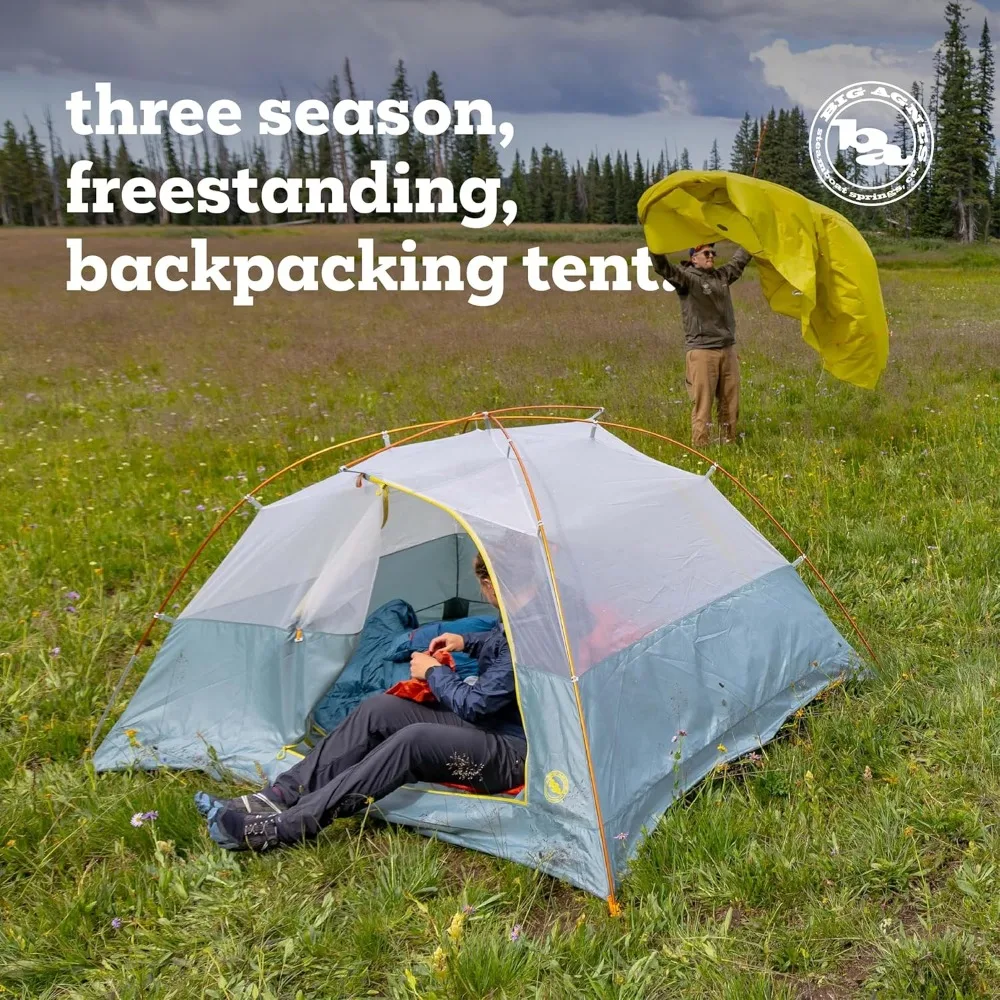
Considering an upgrade specifically for rocky terrain adventures? Our selection of freestanding backpacking tents includes models with reinforced floors and robust pole structures that excel in challenging environments.
Strategic Campsite Selection on Rocky Ground
Finding the right spot to pitch your tent can make the difference between a miserable night and a comfortable one. On rocky terrain, this becomes even more critical.
Primary Selection Criteria:
- Flatness: Look for naturally level areas, even if small. A tent footprint can help you visualize if the area is large enough.
- Wind protection: Natural windbreaks like large boulders, rock walls, or depressions can significantly reduce wind exposure.
- Safety considerations: Avoid areas beneath loose rocks or in potential drainage paths.
- Surface texture: Smoother rock surfaces are generally better than jagged ones.
When scouting locations, pay attention to subtle clues. Patches of small gravel or sand indicate where water collects during rain (avoid these). Areas with moss or lichen generally indicate more stable rocks that haven’t shifted recently.
Site Preparation Techniques:
- Clear away loose, sharp rocks from your tent area
- Identify potential natural anchoring points nearby
- Test the surface for stability – avoid rocks that wobble
- Consider sun exposure – morning sun can be welcome in cold environments
Remember that mastering trekking pole tent setup techniques offers insights for challenging terrain that apply to freestanding tents as well, particularly when it comes to site selection and adaptation to uneven surfaces.
Leave No Trace Considerations:
When camping on rocky terrain, the “leave no trace” principles remain important. Avoid disturbing large rocks, creating new fire rings, or building unnecessary cairns. Your goal should be to leave the area exactly as you found it, preserving the experience for future visitors and the natural environment.
Protecting Your Tent Floor from Damage
Rocky terrain can quickly destroy an unprotected tent floor. This critical layer keeps you dry and comfortable while maintaining your tent’s structural integrity.
Ground Protection Options Comparison:
| Protection Type | Weight | Durability | Coverage | Best For |
|---|---|---|---|---|
| Manufacturer Footprint | Medium | Excellent | Perfect fit | Extended trips |
| Tyvek Sheet | Light | Very Good | Customizable | Most conditions |
| Polycro Plastic | Ultralight | Moderate | Full coverage | Weight-conscious hikers |
| Heavy-duty Tarp | Heavy | Superior | Extra coverage | Base camping |
Ground Cloth Placement Techniques:
- Lay your ground cloth flat, ensuring no wrinkles that could collect water
- For windy conditions, place a few small rocks around the edges before setting up the tent
- Ensure the footprint doesn’t extend beyond the tent edges (which would collect rain)
- On particularly sharp surfaces, consider a double layer under high-pressure points
For unexpected situations where your footprint is damaged or missing, improvise with rain gear, pack liners, or even maps in an emergency.
Inside your tent, consider adding extra protection with a thin foam pad under your sleeping pad in areas with unavoidable sharp protrusions. This provides both additional insulation and protection.
For those concerned about durability in harsh conditions, waterproof backpacking tents with reinforced floors offer extra protection without requiring as much additional groundsheet material.
Master Anchoring Techniques for Rocky Terrain
Without soil for stakes, securing your tent becomes a creative exercise in using what nature provides. These field-tested anchoring methods will keep your shelter stable even without traditional staking options.
Big Rock, Little Rock Method:
- Attach your guy line to a small rock (fist-sized)
- Place the small rock where you want your anchor point
- Cover it with a larger rock (at least 5-10 pounds)
- Tension the line as needed
This technique creates friction between the rocks that holds surprisingly well, even in wind.
Direct Weight Anchoring:
Exterior Technique:
1. Place rocks (3-5 pounds minimum) directly on top of tent corner flaps
2. Ensure rocks don’t have sharp edges that might damage fabric
3. Add rocks to guy line attachment points when available
Interior Technique:
1. Place smooth, clean rocks inside the tent corners
2. Use your gear as additional weight – backpacks work well
3. For extreme conditions, fill stuff sacks with rocks for interior anchoring
Natural Anchor Utilization:
- Identify nearby boulders, rock outcroppings, or trees (if available)
- Run guy lines to these stable natural features
- Use padding where the cord might rub against sharp edges
- Create tension systems with adjustable knots (trucker’s hitch works well)
Rock Stacking for Guy Lines:
- Create a small rock cairn (3-4 rocks)
- Run your guy line around or through the stack
- Ensure the bottom rock is stable and flat
- Build the stack with increasingly smaller rocks
Learning these adaptable techniques allows you to secure any shelter in rocky conditions. For more detailed explanations of shelter setups, the definitive guide to freestanding shelters provides comprehensive information that complements these techniques.

Maximizing Tent Stability in Windy Conditions
Rocky terrain often means camping in exposed areas where wind becomes a significant challenge. Properly deploying guy lines becomes essential rather than optional in these conditions.
Optimal Guy Line Deployment:
- Always use all available guy line attachment points in windy conditions
- Deploy lines at 45° angles from the tent for maximum stability
- Create opposing tension on all sides of the tent
- Use adjustable tensioners or knots to maintain proper tension as conditions change
Strategic Tent Orientation:
- Position the lowest, most aerodynamic end of the tent facing the prevailing wind
- In variable winds, orient the strongest axis of your tent structure to the strongest expected wind
- Use natural windbreaks whenever possible to create protected pockets
Reinforcement Techniques for High Winds:
- Create X-pattern guy lines for critical attachment points
- Lower the tent profile by adjusting pole configurations if your model allows
- Use your backpack as a windbreak inside the tent
- Add additional weight to the tent floor on the windward side
Different tent designs require specific approaches to wind management. Understanding the principles of wind stability in freestanding tents helps you adapt these techniques to your specific shelter. For those camping in mountain environments, understanding wind resistance in alpine tents provides valuable insights for dealing with the unpredictable air currents common in rocky terrain.
Advanced Techniques for Uneven Ground
Perfect flat spots are rare in rocky environments, but with some creativity, you can create a comfortable sleeping platform almost anywhere.
Creating a Level Sleeping Platform:
- Identify the flattest section available for your upper body
- Use small rocks and available gear to fill gaps under your tent floor
- Create a subtle slope down toward your feet if necessary
- Test the spot by lying down before fully setting up
Managing Sloped Surfaces:
- Orient your sleeping position across the slope rather than up/down when possible
- Create a small rock platform under your tent that mimics a terraced garden
- Use hiking poles, rolled clothing, or gear to create a retaining wall on the downhill side
- Create natural “stops” at your feet to prevent sliding during the night
Inside-Tent Adjustments:
- Use clothing, empty stuff sacks, or a sit pad to fill depressions under your sleeping pad
- Create a custom sleeping pad arrangement that accommodates the terrain
- Consider an inflatable sleeping pad with adjustable chambers for uneven surfaces
These techniques become even more important with lightweight backpacking tents that have more flexible floors. While their adaptability is beneficial, they also require more attention to ground preparation.
Troubleshooting Common Problems in Rocky Environments
Even with perfect preparation, challenges arise. Here are solutions to common problems you may encounter:
Q: My tent keeps collecting condensation on rocky ground. Why?
A: Rocky surfaces don’t absorb moisture like soil does. Maximize ventilation by keeping doors/vents open when possible, and wipe down interior walls with a bandana in the morning.
Q: The poles keep slipping on smooth rock surfaces. How do I stabilize them?
A: Create small rock cups or depressions where pole ends meet the ground. Alternatively, wrap the pole ends with a rubber band or piece of high-friction material.
Q: My guy lines keep slipping on smooth rock surfaces. What can I do?
A: Use trucker’s hitches or adjustable tensioners to maintain tension. For very smooth surfaces, create a small “nest” of smaller rocks under the anchor rock to increase friction.
Q: My tent floor has developed a small puncture. How do I fix it in the field?
A: Clean the area thoroughly, apply repair tape to both sides of the puncture, and place your sleeping pad over the repaired area for additional protection.
Q: The wind shifted overnight and now my tent is straining. How do I adjust?
A: Consider a middle-of-the-night readjustment of your orientation and anchors. It’s better to lose a few minutes of sleep than to damage your shelter.
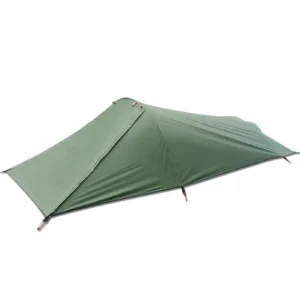

Lightweight Backpacking Tent, Ultralight Backpacking Tent, Ultralight Bivy Tent
Ultralight Single Person Camping Tent with Aluminum Poles for 3-Season Backpacking Waterproof DesignPrice range: $94.88 through $326.82 Select options This product has multiple variants. The options may be chosen on the product page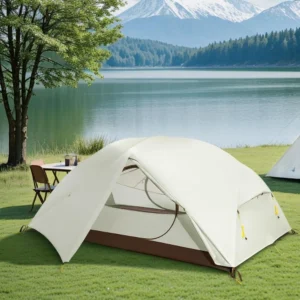
Lightweight Backpacking Tent, Ultralight Backpacking Tent, Waterproof Backpacking Tent
$391.05 Select options This product has multiple variants. The options may be chosen on the product page
Compact Backpacking Tent, Lightweight Backpacking Tent, Waterproof Camping Tent
$335.52 Select options This product has multiple variants. The options may be chosen on the product page
Heavy Duty 4 Season Tent, Ultralight Freestanding Tent, Winter Camping Tent
$3,722.66 Select options This product has multiple variants. The options may be chosen on the product page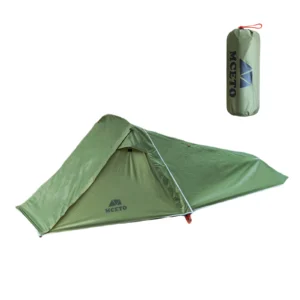
Backpacking Tent with Vestibule, Freestanding Backpacking Tent, Lightweight Backpacking Tent
Price range: $446.89 through $447.22 Select options This product has multiple variants. The options may be chosen on the product page
Backpacking Tent with Vestibule, Trekking Pole Backpacking Tent, Waterproof Camping Tent
Price range: $271.99 through $519.52 Select options This product has multiple variants. The options may be chosen on the product page
Weather Considerations for Rocky Terrain Camping
Rocky terrain creates unique weather patterns that can catch unprepared campers off guard:
Special Weather Awareness:
- Rocks absorb heat during the day and release it at night, creating temperature fluctuations
- Exposed rocky areas experience stronger winds than forested areas
- Rain can create sudden runoff channels where none were visible in dry conditions
- Rock faces can create wind tunnels or unexpected gusts
- Temperature swings are typically more extreme than in forested areas
Weather Adaptation Strategies:
- Double-check all anchoring before leaving camp or sleeping
- Create small drainage channels around your tent if rain threatens
- Be prepared to relocate if water begins pooling near your site
- Add extra guy lines before storms arrive, not during them
- Consider a lower-profile setup when heavy winds are forecast
The lightweight design of ultralight freestanding tents makes them particularly responsive to these weather adjustments, allowing quick reconfiguration as conditions change.
Safety Best Practices When Camping on Rocks
Safety becomes especially important when camping on rocky terrain:
Safety Checklist:
- Regular Shelter Checks:
- Inspect guy lines and anchors before leaving camp and before sleeping
- Check tent poles for stress points after windy periods
Verify that no sharp rocks have shifted under your tent floor
Movement Safety:
- Mark guy lines with bright cord or reflective material for nighttime visibility
- Clear a path to nighttime necessities (bathroom breaks)
- Wear appropriate footwear even for middle-of-night excursions
Keep a headlamp within easy reach at all times
Gear Security:
- Store loose items inside the tent in windy conditions
- Secure cooking equipment on flat, stable surfaces
Keep all essential gear in waterproof bags in case of unexpected moisture
Emergency Preparedness:
- Know how to rapidly secure your tent if a storm approaches
- Have a backup plan for shelter in case of tent failure
- Keep essential gear organized for quick relocation if necessary
Essential Leave No Trace Principles for Rocky Environments
Rocky environments, particularly alpine areas, can be surprisingly fragile ecosystems:
- Rock Displacement: Return any moved rocks to their original positions and orientations when breaking camp
- Biological Soil Crusts: In desert environments, avoid disturbing the dark, lumpy soil between rocks which contains crucial microorganisms
- Cairn Considerations: Avoid building decorative cairns which can confuse trail markers and disturb habitats
- Vegetation Respect: Plants growing in rocky areas often take decades to establish – avoid damaging them
- Water Considerations: Camp at least 200 feet from water sources, even in rocky terrain
Following these principles ensures these spectacular environments remain pristine for future visitors and maintain their ecological balance.
Is a Freestanding Tent Always the Best Choice for Rocky Terrain?
While freestanding tents offer significant advantages on rocky ground, other options might work better in specific scenarios:
Freestanding Tent Advantages:
- Can be set up without any stakes if necessary
- Easier to move around to find the optimal spot
- Generally more stable in variable winds
- Simpler setup on challenging surfaces
When Non-Freestanding Might Work Better:
- When natural anchoring points (trees, large boulders) are readily available
- In very protected areas with minimal wind exposure
- When weight is the absolute priority over ease of setup
- In mixed terrain with patches of soil among rocks
For most rocky camping situations, a freestanding design provides the versatility needed, but understanding the differences between freestanding vs. staked hiking shelters helps you make informed choices based on your specific trip conditions. If you’re considering options, our selection of 2-person backpacking tents includes models suited for various terrain types.
Can These Techniques Damage My Tent?
It’s natural to worry about potential damage when adapting your tent to rocky conditions:
Q: Will placing rocks directly on my tent fabric cause damage?
A: Possibly, if not done carefully. Always check rocks for sharp edges, place them on reinforced areas like corner webbing, and use minimum weight necessary for stability.
Q: Do these anchoring methods put extra stress on my tent?
A: Yes, but the stress can be managed. Ensure tension is evenly distributed across multiple anchor points rather than concentrating force on one or two points.
Q: How can I minimize potential damage?
A: Regularly inspect high-stress areas, avoid over-tensioning guy lines, and consider adding small protective patches to areas that frequently contact rocks.
After camping on rocky terrain, thoroughly inspect your tent for any signs of abrasion, small punctures, or stress on seams. Clean off any dirt or sand that might have accumulated in zippers or pole connections to prevent long-term wear.
Summary: Your Rocky Terrain Tent Setup Checklist
Use this concise checklist to ensure a successful rocky terrain camping experience:
Preparation:
– Select appropriate ground cloth and anchoring materials
– Practice rock anchoring techniques before your trip
– Pack additional cordage and tent repair materialsSite Selection:
– Find the flattest area available with natural wind protection
– Clear sharp rocks and debris from the tent area
– Identify natural anchoring options nearbySetup Sequence:
– Place and secure ground protection first
– Set up tent body and verify pole stability
– Apply rock anchors at corners first, then mid-points
– Add guy lines with proper tension and anchoring
– Create interior comfort adjustments lastFinal Checks:
– Test stability by gently pushing tent from multiple angles
– Ensure all sharp edges are padded or removed
– Verify drainage paths if rain is possible
– Double-check all anchor points for security
With proper preparation and technique, rocky terrain camping can provide incredible experiences with views and solitude impossible to find elsewhere. The challenges of setup are more than compensated by the rewards of these extraordinary camping locations.