
1. Why Reduce Your Backpacking Weight: Understanding the Transformative Benefits
Lightweight backpacking represents more than just carrying less—it’s a philosophy that transforms how you experience the outdoors. This approach has evolved from an extreme niche to a mainstream practice as more hikers discover its numerous advantages.
The physical benefits of reducing your pack weight are immediate and significant:
– Reduced fatigue and energy conservation throughout your hike
– Decreased strain on knees, ankles, and back, potentially preventing long-term injuries
– Improved posture and balance on varied terrain
– Less recovery time needed after long days on the trail
Performance improvements become equally noticeable:
– Increased daily mileage without additional effort
– Enhanced agility when navigating technical terrain like rock scrambles
– Better endurance for sustained climbs and challenging sections
– More energy for side trails and scenic detours
The mental shift might be the most rewarding change:
– Hiking becomes more enjoyable when you’re not constantly adjusting an uncomfortable pack
– Your focus shifts from discomfort to the surrounding environment
– Greater mental clarity when you’re not physically strained
– More present-moment awareness on the trail
Consider this simple calculation: A 40-pound (18 kg) pack requires approximately 20% more energy to carry than a 20-pound (9 kg) pack over the same distance. This difference becomes exponentially more significant over multiple days of hiking. Understanding the 20-percent rule in backpacking can help you make more informed decisions about your gear selection and overall approach.
Lightweight backpacking also aligns with environmental ethics—carrying less often means consuming less and creating less waste. By focusing on multipurpose items and quality over quantity, you’ll not only lighten your load but also reduce your environmental footprint.
2. Conducting a Thorough Gear Audit: The First Step to Lightening Your Load
Before purchasing any new ultralight equipment, the essential first step is understanding exactly what you’re currently carrying. A methodical gear audit reveals opportunities for weight savings you might never have considered.
Follow this process to conduct your audit:
- Empty your pack completely and sort everything by category (shelter, sleep, cooking, clothing, etc.)
- Weigh each individual item using a digital kitchen scale (measuring in ounces or grams)
- Create a spreadsheet with columns for: item name, weight, category, necessity rating (1-5), and potential alternatives
- Calculate your base weight (everything except consumables like food, water, and fuel)
- Identify your heaviest items—these represent your greatest opportunities for reduction
- Research lighter alternatives for items weighing more than 1-2 pounds (450-900g)
A sample spreadsheet might look like this:
| Item | Weight (oz) | Category | Necessity (1-5) | Potential Alternative | Weight Savings (oz) |
|---|---|---|---|---|---|
| Tent | 58 | Shelter | 5 | Trekking pole tent | 32 |
| Sleeping bag | 42 | Sleep | 5 | Down quilt | 24 |
| Stove system | 16 | Cooking | 4 | Alcohol stove | 10 |
The heaviest items in your pack typically fall into what backpackers call the “Big Three”: your shelter, sleep system, and backpack itself. Understanding different shelter options for two campers often reveals significant weight-saving opportunities that don’t compromise protection or comfort.
Set realistic goals based on your audit findings. Many backpackers can reduce their base weight by 30-40% without sacrificing comfort or safety. The key is identifying where you’re carrying excess weight that doesn’t contribute meaningfully to your wilderness experience.
3. The Big Three: Optimizing Your Backpack for Maximum Weight Savings
The backpack itself represents one-third of your “Big Three” gear items, and it’s often heavier than necessary. Many traditional packs weigh 5+ pounds (2.3+ kg) empty, while ultralight alternatives can weigh as little as 1-2 pounds (0.45-0.9 kg)—a potential savings of nearly 4 pounds before you’ve even packed a single item.
When assessing if your current pack is overbuilt for your needs, consider these factors:
- Volume vs. actual needs: Many backpackers carry packs with 20-30% more volume than required
- Frame complexity: Full suspension systems add weight; frameless or minimalist frames work well for loads under 25-30 pounds
- Excessive features: Multiple access points, numerous compartments, and heavy-duty buckles add ounces that compound quickly
- Materials: Heavy-duty fabrics may be overkill for standard trail conditions
When shopping for lightweight packs, prioritize these features:
- Appropriate volume for your typical trip length (40-50L for weekend trips, 50-60L for longer expeditions)
- Simple, effective suspension that matches your anticipated load weight
- Streamlined organization with minimal external pockets and attachment points
- Durable but lightweight materials like Dyneema Composite Fabric (DCF) or ripstop nylon
The right pack represents a delicate balance between weight savings and comfort. The backpacking Big 3 essential gear choices you make will have the greatest impact on your overall weight reduction journey. Remember that as you lighten your other gear, you can often switch to an even lighter pack, creating a positive cycle of weight reduction.
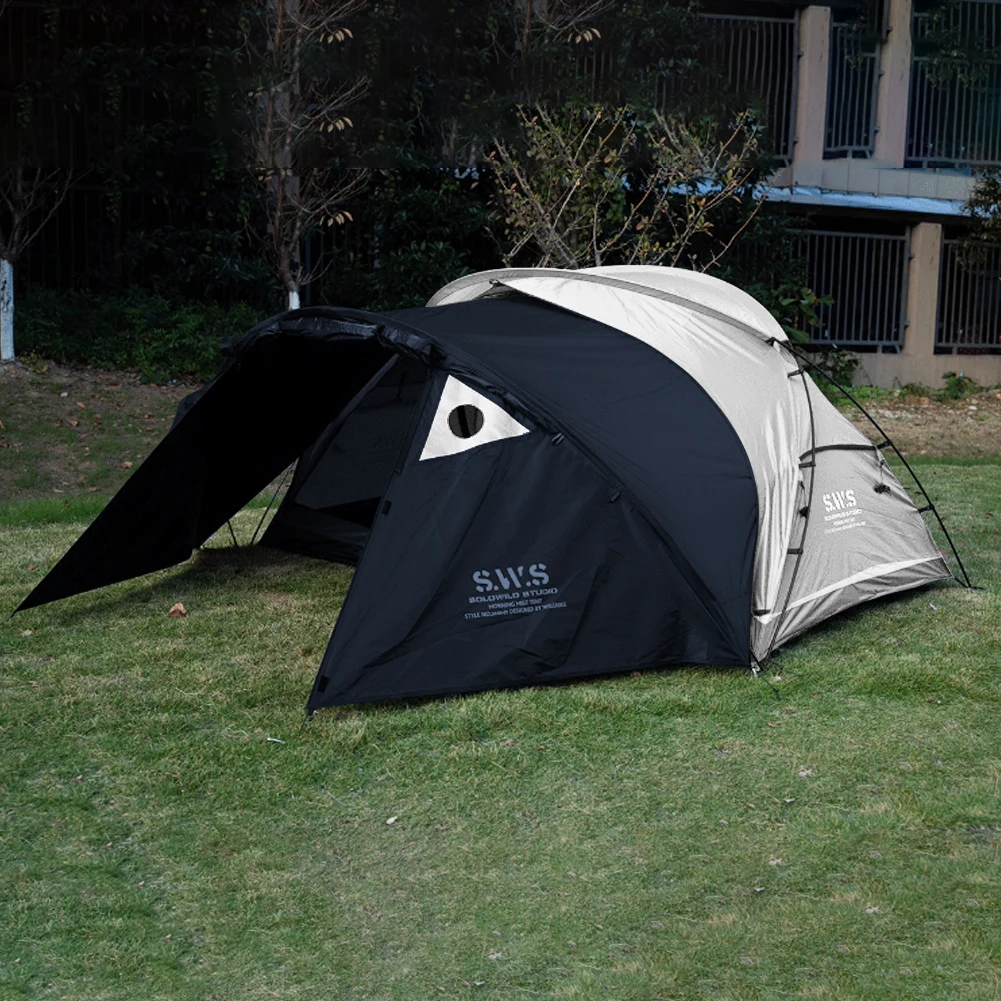
4. Creating a Lighter Shelter System: Protection Without the Pounds
Your shelter often represents the single heaviest item in your pack, making it a prime target for weight reduction. Traditional double-wall tents typically weigh 4-6 pounds (1.8-2.7 kg), while ultralight alternatives can weigh less than 2 pounds (0.9 kg)—a potential savings of 3+ pounds from this single category.
Consider these shelter options across the weight spectrum:
| Shelter Type | Typical Weight (2-person) | Weather Protection | Setup Complexity | Price Range |
|---|---|---|---|---|
| Traditional double-wall tent | 4-6 lbs (1.8-2.7 kg) | Excellent | Moderate | $$ |
| Ultralight single-wall tent | 1.5-3 lbs (0.7-1.4 kg) | Very good | Moderate | $$-$$$ |
| Trekking pole tent | 1-2 lbs (0.45-0.9 kg) | Good to very good | Higher | $$-$$$ |
| Tarp shelter | 0.5-1.5 lbs (0.2-0.7 kg) | Moderate | Highest | $-$$ |
| Hammock system | 2-4 lbs (0.9-1.8 kg) | Good | Moderate | $$-$$$ |
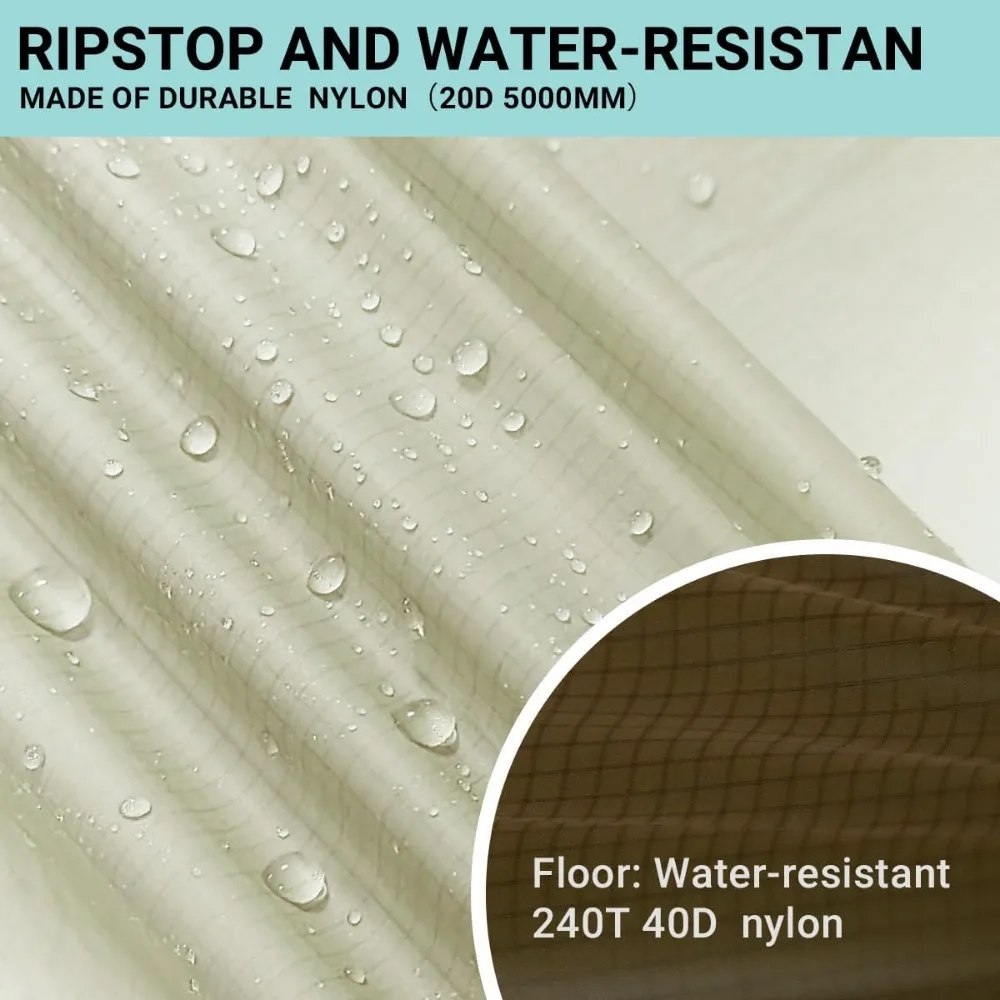
Material choice significantly impacts both weight and performance:
– Silnylon offers good waterproofing at moderate weight and cost
– Silpoly provides better UV resistance and less stretching when wet
– Dyneema Composite Fabric (DCF/cuben fiber) delivers the lightest weight but at premium cost
One of the most effective weight-saving strategies involves ultralight trekking pole tents that eliminate dedicated tent poles by using your trekking poles for structural support. This multi-use approach can save 8-16 ounces (225-450g) without sacrificing protection.
When selecting the perfect ultralight backpacking tent, consider your typical camping conditions. If you primarily backpack in moderate weather with occasional rain, an ultralight shelter may offer all the protection you need. For more extreme conditions, you might prioritize a more robust shelter while seeking weight savings in other categories.
5. Optimizing Your Sleep System: Comfort Without the Weight Penalty
Your sleep system represents the final component of the “Big Three” and offers substantial weight-saving potential without sacrificing comfort. In fact, many backpackers report sleeping better with lightweight alternatives once they adjust to the differences.
The most significant weight savings come from switching from traditional sleeping bags to quilts:
| Sleep Item | Traditional Weight | Ultralight Alternative | Potential Savings |
|---|---|---|---|
| Sleeping Bag | 2.5-4 lbs (1.1-1.8 kg) | Down Quilt: 1-2 lbs (0.45-0.9 kg) | 1.5-2 lbs (0.7-0.9 kg) |
| Sleeping Pad | 1-2 lbs (0.45-0.9 kg) | Foam or UL Inflatable: 0.5-1 lb (0.2-0.45 kg) | 0.5-1 lb (0.2-0.45 kg) |
| Pillow | 4-8 oz (113-227 g) | Inflatable or Clothing Stuff Sack: 1-2 oz (28-57 g) | 3-6 oz (85-170 g) |
Down insulation offers the best warmth-to-weight ratio, with higher fill powers (800+) providing more warmth per ounce. While synthetic insulation weighs more, it maintains insulating properties when wet—an important consideration for humid environments.
Temperature ratings require careful consideration:
– Avoid overpacking by matching your insulation to expected conditions
– Consider that a 20°F (-7°C) bag often adds 8-16 ounces over a 30°F (-1°C) option
– Remember that sleeping pad insulation (R-value) is as important as your bag/quilt rating
Sleeping pad selection balances comfort and weight:
– Closed-cell foam pads are virtually indestructible but bulky
– Inflatable pads offer more comfort at slightly higher weights and risk of puncture
– Insulated inflatables combine comfort with four-season functionality
The combination of an appropriate quilt and lightweight pad can easily reduce your sleep system weight by 2-3 pounds while maintaining or even improving sleep comfort on the trail. Quality ultralight backpacking tents pair perfectly with these lightweight sleep systems to create a shelter solution that minimizes weight while maximizing protection and rest.
6. Lightweight Cooking and Food Systems: Fuel Efficiency and Smart Planning
Your cooking system and food represent “consumable weight”—items that become lighter as your trip progresses. Smart choices here not only reduce initial weight but continue to benefit you throughout your journey.
Consider these cooking system options:
- Canister stoves (3-4 oz/85-113g plus fuel): Fast, convenient, less efficient in cold/high altitudes
- Alcohol stoves (0.5-2 oz/14-57g plus fuel): Ultralight, slower cooking, fuel availability challenges
- Solid fuel tablets (0.5-1 oz/14-28g stove plus fuel): Extremely lightweight, limited temperature control
- Stoveless approach (0 oz): No cooking equipment, relies on cold soaking or no-cook foods
Cookware material significantly impacts weight:
– Titanium offers the best strength-to-weight ratio but conducts heat poorly
– Aluminum provides better heat distribution at slightly higher weight
– Anodized surfaces improve durability and cleaning ease
Food planning represents your greatest opportunity for weight optimization:
– Target 125-150 calories per ounce (4.4-5.3 calories per gram) for efficient caloric density
– Dehydrated meals typically offer 120-130 calories per ounce versus 70-90 for fresh foods
– Repackaging commercial foods can reduce weight by 30-40% by eliminating excess packaging
High-calorie density foods for efficient packing:
– Nut butters: ~170 calories per ounce (6 calories per gram)
– Olive oil: ~250 calories per ounce (8.8 calories per gram)
– Chocolate: ~150 calories per ounce (5.3 calories per gram)
– Dehydrated meals: ~120-130 calories per ounce (4.2-4.6 calories per gram)
For ultra-minimalists, cold soaking (rehydrating food without heat) eliminates cooking equipment entirely. This approach works particularly well with foods like couscous, instant rice, and dehydrated beans that rehydrate easily in cold water.
7. Water Management: Strategies for Carrying Less and Staying Hydrated
Water represents the heaviest consumable you’ll carry (1 liter = 2.2 pounds/1 kg), making efficient water management crucial for weight reduction. The key is carrying enough for safety without excess.
Lightweight water treatment options include:
- Chemical purification (tablets/drops): 0.5-2 oz (14-57g), effective against most pathogens, slow acting
- Squeeze filters: 2-3 oz (57-85g), immediate use, requires maintenance, may clog
- UV purifiers: 3-4 oz (85-113g) plus batteries, quick treatment, battery dependent
- Gravity systems: 5-10 oz (142-283g), effortless filtration, great for groups, bulkier
Smart water carrying strategies:
– Study maps to identify reliable water sources along your route
– Carry only what you need between known water sources (plus a safety margin)
– In water-abundant areas, carry 1-2 liters; in arid regions, capacity for 4-6 liters
– Use collapsible containers that reduce in size as you consume water
Container options and their benefits:
– SmartWater bottles (reused commercial bottles): Lightweight, durable, compatible with many filters
– Soft flasks: Compress when empty, but less durable
– Hydration reservoirs: Convenient drinking while moving, but heavier and harder to fill
Winter and desert environments require specialized approaches to water management, but the principle remains the same: carry what you need for safety, know where your next source is, and avoid the unnecessary weight of excess water. Understanding these principles aligns perfectly with the broader philosophy behind lightweight backpacking tents and other gear—carrying exactly what you need without excess.
8. Clothing Systems: The Layering Approach to Lightweight Apparel
An optimized clothing system follows the layering principle—multiple thin layers that together provide more versatility and thermal efficiency than fewer thick layers. This approach not only saves weight but improves your ability to regulate temperature during various activities and conditions.
The three-layer system forms the foundation of efficient backpacking clothing:
Base Layer:
– Function: Moisture management, next-to-skin comfort
– Materials: Merino wool (odor resistant, good temperature regulation) or synthetic (faster drying, less expensive)
– Weight-saving tip: One set to hike in, one set for sleeping—no more
Mid Layer:
– Function: Insulation through trapped air
– Materials: Fleece (durable, inexpensive), grid fleece (better warmth-to-weight), or lightweight down/synthetic puffy
– Weight-saving tip: Choose one versatile mid-layer rather than multiple specialized pieces
Outer Layer:
– Function: Wind and rain protection
– Materials: Waterproof-breathable membrane (full protection, less breathable) or water-resistant (lighter, more breathable)
– Weight-saving tip: Consider ultralight rain jackets (6-8 oz/170-227g) instead of heavy (16+ oz/454+ g) alternatives
Beyond the basics, consider these weight-saving approaches:
- Avoid redundancy: Don’t pack for every possible scenario
- Emphasize versatility: Items that work in multiple conditions and activities
- Consider “worn weight” separate from “carried weight” in your calculations
- Focus on minimalist footwear—one pound on your feet equals five pounds on your back in terms of energy expenditure
Specialized clothing worth its weight includes:
– Quality rain protection appropriate to your environment
– Adequate insulation for overnight temperatures
– Sun protection for exposed terrain
This layering approach complements the protection offered by waterproof backpacking tents, creating multiple barriers between you and challenging weather conditions. Together, they form a comprehensive system that keeps you comfortable while minimizing unnecessary weight.
9. Minimalist Approach to Essentials and Safety Gear
Safety equipment presents a challenging balance—items you hope never to use but shouldn’t be without. The key is identifying truly essential safety items while finding the lightest functional versions.
Navigation essentials:
– Digital: Smartphone GPS apps (use airplane mode to conserve battery)
– Analog backup: Small compass and paper map section or printout
– Weight-saving tip: Download offline maps rather than carrying guidebooks
Illumination options:
– Modern LED headlamps (1-3 oz/28-85g) with 150+ lumens
– Consider rechargeable vs. battery-powered based on trip length
– Weight-saving tip: Multi-use options like headlamps that double as tent lights
First-aid customization:
– Commercial kits typically contain unnecessary items
– Build a personal kit based on trip duration, remoteness, and personal medical needs
– Include only medications and treatments you know how to use
– Weight-saving tip: Repackage medications and ointments into smaller containers
Emergency communication:
– Personal locator beacons (PLBs) or satellite messengers justify their weight on remote trips
– Cell phones work in surprisingly many backcountry areas
– Weight-saving tip: Devices that combine GPS and communication functions
Repair kit essentials:
– Multi-tool with only the functions you need
– Gear repair tape (Tenacious Tape) instead of full repair kits
– Cordage: 10-15 feet of lightweight cord has countless uses
– Weight-saving tip: Store small repair items in otherwise empty containers
The goal isn’t eliminating safety items but optimizing them—a properly curated first-aid kit might weigh 4 ounces (113g) instead of 12 ounces (340g), while providing all the functionality you’re likely to need.
10. Multi-Use Gear Strategy: Items That Serve Multiple Functions
The multi-use philosophy represents one of the most powerful concepts in lightweight backpacking—items that serve multiple purposes eliminate the need for separate, single-function gear. This approach reduces both weight and volume in your pack.
Common multi-use strategies include:
| Item | Primary Function | Secondary Function(s) |
|---|---|---|
| Trekking poles | Walking stability | Tent poles, splint material, probe |
| Buff/neck gaiter | Neck protection | Face mask, headband, pot holder |
| Smartphone | Communication | Camera, GPS, e-reader, notebook |
| Stuff sack with clothing | Gear organization | Pillow when filled with soft items |
| Cooking pot | Food preparation | Eating vessel, water collection |
| Sit pad | Sitting comfort | Supplemental sleeping pad insulation |
The skill-over-gear philosophy also reduces weight—knowledge weighs nothing but can replace many physical items:
– Learning natural navigation reduces dependency on devices
– Understanding weather patterns minimizes excessive “just in case” clothing
– Mastering fire-starting techniques might replace redundant ignition sources
DIY modifications can transform single-purpose items into multi-functional tools:
– Add measuring marks to a cooking pot to eliminate a separate measuring cup
– Modify trekking poles to accept camera mounting hardware
– Use a cutting board that doubles as a plate
Efficient use of multi-functional gear is enhanced by understanding how to set up lightweight tents and other equipment quickly and effectively, allowing you to make the most of versatile components in various conditions.
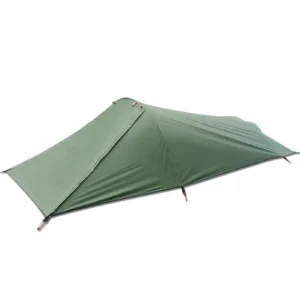

Lightweight Backpacking Tent, Ultralight Backpacking Tent, Ultralight Bivy Tent
Ultralight Single Person Camping Tent with Aluminum Poles for 3-Season Backpacking Waterproof DesignPrice range: $94.88 through $326.82 Select options This product has multiple variants. The options may be chosen on the product page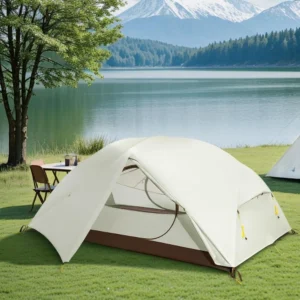
Lightweight Backpacking Tent, Ultralight Backpacking Tent, Waterproof Backpacking Tent
$391.05 Select options This product has multiple variants. The options may be chosen on the product page
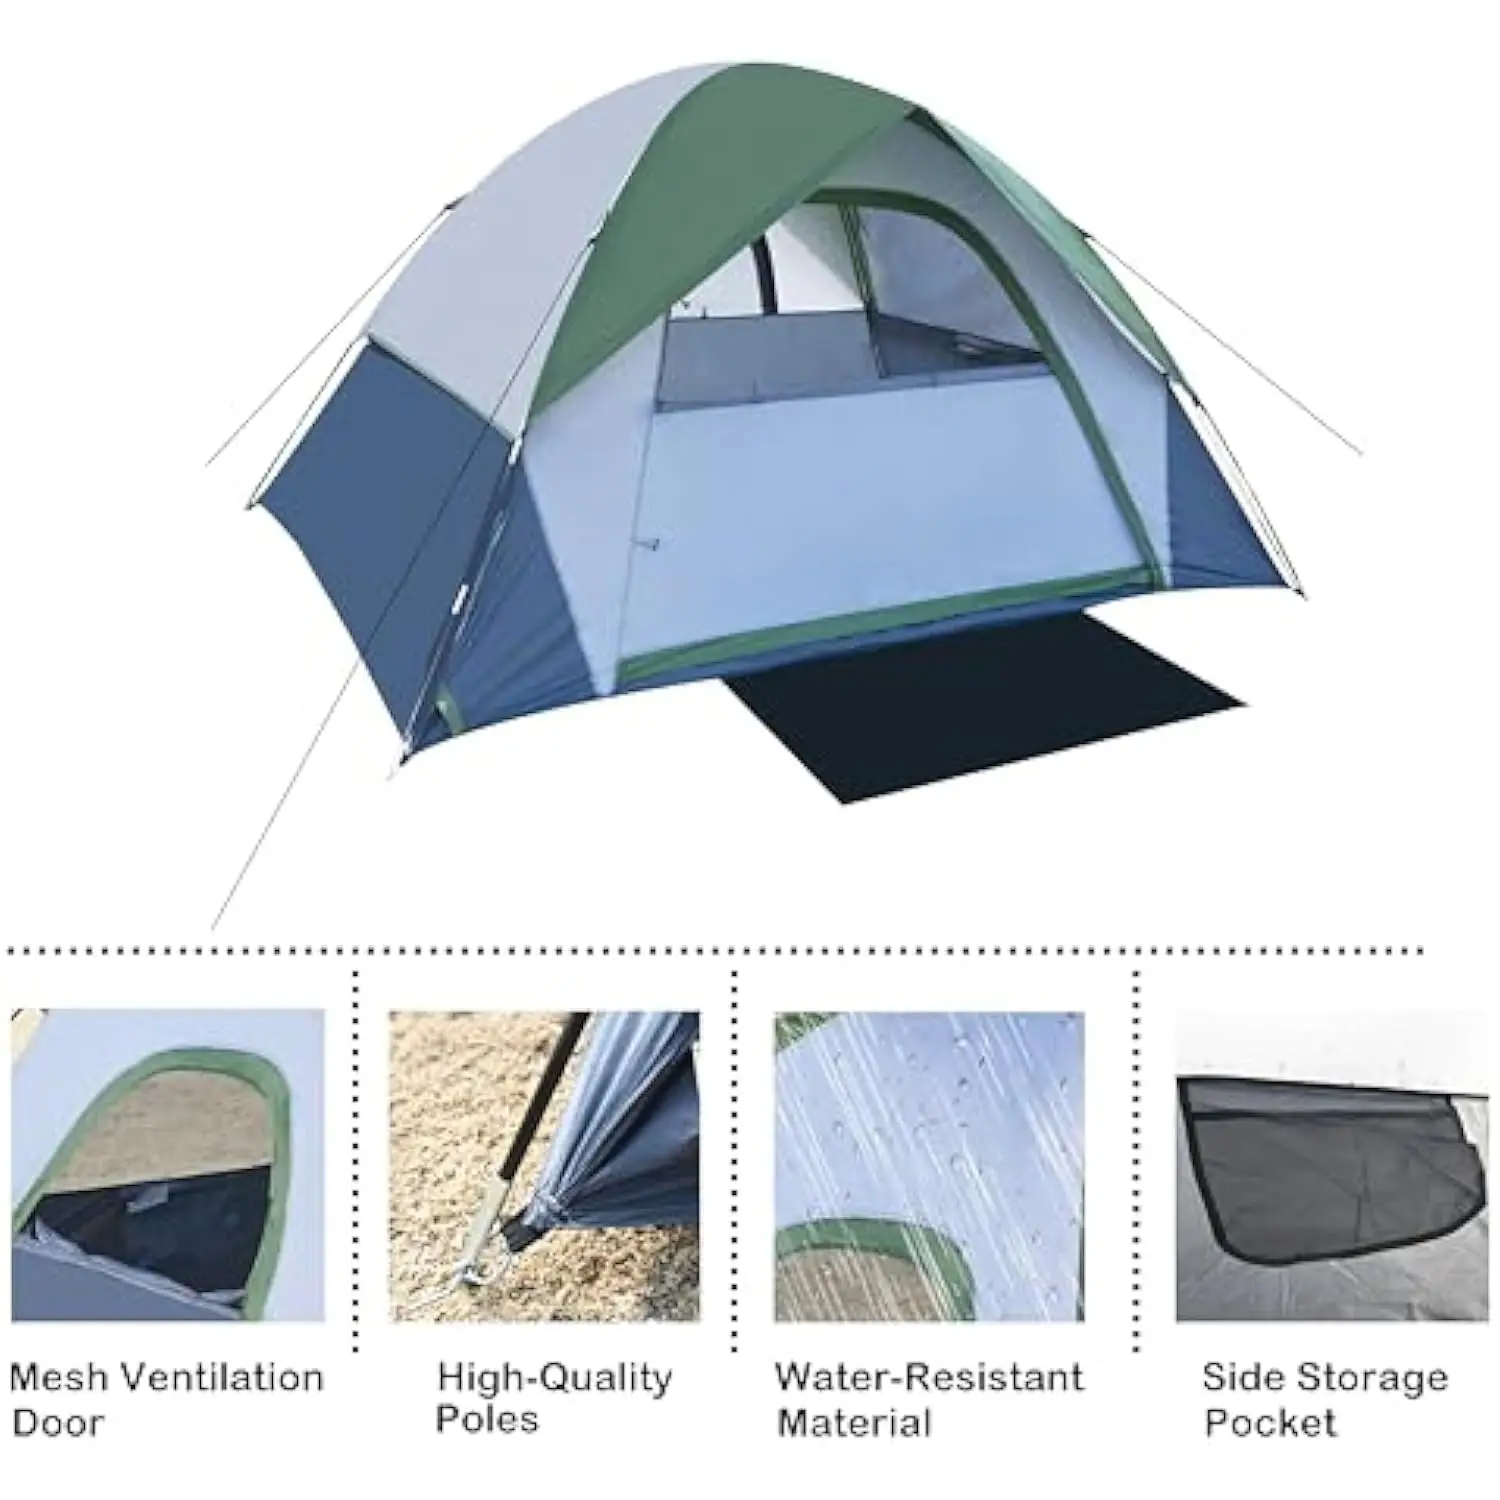
Compact Backpacking Tent, Lightweight Backpacking Tent, Waterproof Camping Tent
$335.52 Select options This product has multiple variants. The options may be chosen on the product page
Ultralight Backpacking Tent, Ultralight Dome Tent, Winter Camping Tent
Price range: $369.63 through $370.07 Select options This product has multiple variants. The options may be chosen on the product page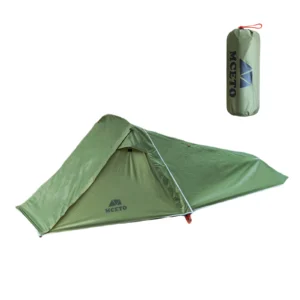
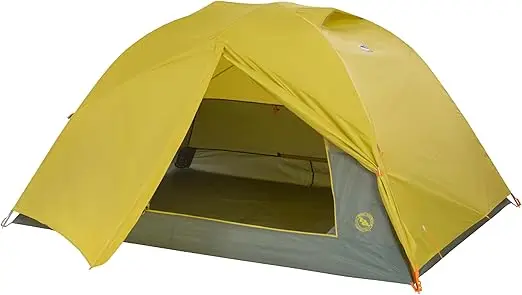
Backpacking Tent with Vestibule, Freestanding Backpacking Tent, Lightweight Backpacking Tent
Price range: $446.89 through $447.22 Select options This product has multiple variants. The options may be chosen on the product page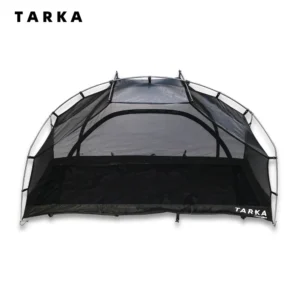
Ultralight Backpacking Tent, Ultralight Trekking Pole Tent
Price range: $350.87 through $351.98 Select options This product has multiple variants. The options may be chosen on the product page
11. Budget-Friendly Lightweight Strategies: Saving Weight Without Breaking the Bank
The lightweight backpacking movement has unfortunately gained a reputation for being expensive. While premium ultralight gear often comes with premium prices, many weight-saving strategies cost little or nothing. Start with these affordable approaches before investing in costly equipment.
Free weight-saving strategies:
– Leave unnecessary items at home (most effective weight-saving technique)
– Repackage food and toiletries into smaller containers
– Reduce redundancy in clothing and equipment
– Carry appropriate water amounts between sources instead of “just in case” excess
Low-cost weight reduction:
– Replace heavy flashlights with inexpensive LED options
– Swap plastic utensils for titanium (under $10)
– Switch to SmartWater bottles instead of heavy water bottles
– Use a tarp footprint instead of manufacturer groundsheets
DIY projects for significant savings:
– Make your own alcohol stove from aluminum cans
– Create ultralight stuff sacks from silnylon fabric
– Construct a food cozy from reflective car sunshade material
– Modify existing gear to remove unnecessary components
When you’re ready to invest in new gear, prioritize by impact:
1. Sleep system (particularly switching to a quilt)
2. Shelter system (often the heaviest single item)
3. Backpack (choose after lightening other gear)
4. Cooking system
5. Specialized clothing
The used gear marketplace offers excellent opportunities for affordable lightweight equipment. Many backpackers upgrade frequently, selling lightly used gear at significant discounts. Freestanding backpacking tents often appear on these markets in excellent condition, offering substantial savings for budget-conscious backpackers.
12. Safety Considerations: Where Not to Compromise
While reducing pack weight improves many aspects of backpacking, certain safety margins should never be compromised. Understanding the balance between going light and staying safe ensures your lightweight journey remains enjoyable.
Non-negotiable safety items based on conditions:
– Appropriate shelter for expected weather
– Sufficient insulation for overnight temperatures
– Adequate water capacity and treatment for your route
– Navigation tools you know how to use
– First-aid supplies for common injuries and personal medical needs
Understanding ultralight gear limitations:
– Reduced durability of lighter fabrics requires more careful handling
– Thinner materials may offer less insulation or weather resistance
– Minimalist designs provide less margin for user error
– Some ultralight equipment requires more skilled setup and maintenance
The appropriate gear balance depends significantly on:
– Weather conditions and seasonal considerations
– Terrain challenges and remoteness
– Your experience level and skill set
– Group size and composition
– Trip duration and resupply options
When making lightweight gear decisions, consider this risk assessment framework:
1. What’s the likelihood of needing this item?
2. What’s the consequence of not having it if needed?
3. Are there lighter alternatives that fulfill the same function?
4. Can skills or knowledge replace this physical item?
For many backpackers, choosing the ultimate compact shelter for two represents the perfect balance between weight savings and protection—providing necessary safety while eliminating unnecessary ounces. Remember that different trips require different approaches to safety and comfort.
13. Personal Journey to Lightweight Backpacking: Continuous Improvement
The transition to lightweight backpacking is a personal journey that evolves with experience. Most successful lightweight backpackers follow a continuous improvement process rather than making dramatic changes all at once.
After each trip, conduct a systematic post-trip analysis:
– Document what you used versus what remained untouched
– Identify items that could be lighter or multi-functional
– Note any missing items you wished you’d brought
– Assess where comfort could be improved without significant weight penalties
– Record conditions experienced versus conditions prepared for
Track your improvement metrics over time:
– Base weight (everything except consumables)
– Comfort level during hiking and camping
– Energy levels throughout the day
– Recovery time after trips
– Overall enjoyment of the experience
Learning from experienced lightweight backpackers accelerates your progress:
– Join online communities focused on lightweight techniques
– Participate in gear discussions and review threads
– Attend workshops or hiking club events where you can see others’ setups
– Be open to unconventional approaches that challenge traditional camping wisdom
Action steps for continued improvement:
– Set incremental weight goals (e.g., reduce by 2 pounds/0.9 kg this season)
– Test new techniques on short trips before committing to longer adventures
– Create different gear lists for different seasons and trip types
– Weigh everything and maintain your gear spreadsheet
Remember that the ultimate goal isn’t achieving the absolute minimum weight but finding your optimal balance between comfort, safety, and weight—a balance that enhances your wilderness experience.
14. Lightweight Backpacking Questions and Considerations
Does lightweight gear compromise durability?
Not necessarily. While some ultralight materials are indeed thinner, advances in fabric technology have created remarkably durable lightweight options. The key is understanding appropriate use and care. Many lightweight items will last for thousands of miles when properly maintained, though they may require more careful handling than their heavier counterparts.
What defines ultralight vs. lightweight backpacking?
Lightweight backpacking generally refers to a base weight (everything except consumables) between 10-20 pounds (4.5-9 kg). Ultralight typically means a base weight under 10 pounds (4.5 kg), while traditional backpacking often involves base weights of 20+ pounds (9+ kg). However, these are guidelines rather than strict definitions—the philosophy of intentional weight reduction matters more than hitting specific numbers.
Which trips benefit most from ultralight approaches?
Longer distances, challenging terrain, and extended trips show the greatest benefits from weight reduction. When you’re covering 15+ miles (24+ km) daily or tackling significant elevation change, every ounce matters. However, even weekend warriors notice improved comfort and enjoyment with thoughtfully reduced pack weight.
How does lightweight backpacking compare to traditional methods for extended trips?
Lightweight approaches excel on extended trips by reducing fatigue and physical strain over multiple days. The primary challenge involves resupply planning, as lightweight gear often has less capacity for carrying food between resupply points. Careful meal planning and strategic resupply locations become more important with lightweight systems on longer journeys.
Is lightweight backpacking suitable for beginners?
Yes, with some caveats. Starting with a lightweight mindset helps beginners avoid developing poor habits and acquiring unnecessary gear. However, novices should focus first on safety and basic skills before pursuing extreme weight reduction. A moderate approach that balances weight savings with adequate safety margins is ideal for those new to backpacking. Understanding how much a backpacking tent should weigh and similar considerations provides beginners with realistic expectations as they build their kit.
The lightweight backpacking journey is ultimately personal—finding your individual balance point between carrying less and maintaining the comfort and safety you need for an enjoyable wilderness experience.