
Embracing the Winter Backcountry
There’s something magical about winter camping that summer adventures simply can’t match. Picture pristine snow-covered landscapes, absolute silence broken only by the crunch of snow beneath your boots, and starry skies that seem to shine brighter against the white backdrop. But with this unique beauty comes unique challenges – plummeting temperatures, unpredictable snowfall, and winds that can transform from gentle to ferocious in minutes.
In these conditions, your tent isn’t just a place to sleep – it’s your lifeline. Proper setup isn’t merely a matter of convenience; it’s essential for safety and survival. The difference between a properly pitched snow tent and one hastily assembled could mean the difference between a memorable adventure and a dangerous emergency.
Throughout this guide, we’ll walk through everything you need to know about winter tent setup – from selecting the right location to anchoring techniques that will keep your shelter secure in howling winds. Understanding different shelter options for two campers helps you make better decisions before you even step into the backcountry. With the expertise from Explore Elements’ team of winter camping specialists, you’ll learn how to create not just a tent, but a comfortable winter haven.
Choosing the Right Winter Shelter: 4-Season Tent Essentials
When facing winter’s fury, not just any tent will do. A true 4-season tent differs fundamentally from its 3-season counterparts in ways that could save your life.
Key features to look for in a winter tent include:
- Robust pole structure: More numerous and stronger poles, often with crossing designs to withstand snow loading
- Dome or geodesic design: These shapes shed snow better than flat-topped designs
- Extended vestibules: Crucial for gear storage and as a transition space from snowy exterior
- Snow skirts/valances: These flaps at the tent base can be buried in snow, creating a seal against drafts and blowing snow
Material considerations matter significantly in winter tents. Look for higher denier ratings (typically 50D-70D) in both floor and canopy materials for durability against harsh conditions. Pole materials also play a crucial role – aluminum poles offer a good balance of strength and weight, while carbon fiber provides exceptional strength but at a premium price.
When planning a winter camping trip, you’ll need additional space compared to summer adventures. Cold weather requires more gear, from extra insulating layers to heftier sleeping bags. The 4-season winter 2-person tents provide the space needed while maintaining structural integrity against challenging conditions.
For those venturing into extreme environments with severe weather potential, heavy-duty 4-season tent options provide the ultimate protection with reinforced structures and materials designed to withstand the worst Mother Nature can deliver.
Pre-Trip Planning: Essential Preparation for Winter Camping
Before heading into winter backcountry, thorough preparation can mean the difference between a comfortable adventure and a dangerous situation.
Start by researching weather forecasts from multiple sources, paying special attention to predicted overnight lows, wind speeds, and snowfall amounts. Don’t just check the day before – track patterns for several days leading up to your trip, as winter weather can change rapidly.
Avalanche safety deserves serious consideration. Check local avalanche forecasts, understand danger ratings, and carry proper safety equipment if traveling in avalanche terrain. Consider taking an avalanche safety course before venturing into high-risk areas.
Create a comprehensive trip plan that includes:
– Detailed route with mileage expectations adjusted for winter conditions
– Multiple bailout options if weather deteriorates
– Communication plan and expected check-in times with someone not on the trip
– GPS coordinates of planned camping locations
Your winter camping gear checklist should be more extensive than summer trips. Beyond your standard equipment, consider:
– Extra insulation layers
– Additional fuel for melting snow
– Emergency shelter beyond your tent
– Chemical hand warmers
– Insulated water bottles
Before departing, one crucial step is often overlooked: practice setting up your tent in winter conditions. Don [gloves and set up your tent in your backyard or local park during cold weather. Winter tent setup techniques differ significantly from warm-weather camping, and you’ll want to master these skills before you’re fighting daylight and plunging temperatures.
Understanding how snow tents differ from regular tents can save you significant trouble once you’re in the field. Features like reinforced pole structures and snow-specific anchoring points might seem minor but become essential when winds pick up.
Finding the Perfect Winter Campsite: Safety and Strategy
Selecting an appropriate campsite in winter requires careful consideration of both safety and comfort factors. Your first priority is always avoiding avalanche terrain – stay away from slopes steeper than 30 degrees and the areas below them. Look for signs of previous avalanche activity such as broken trees or debris fields, which indicate danger zones.
Overhead hazards present another danger that many campers overlook. Examine trees carefully for snow-loaded branches that could release during the night, and avoid setting up beneath cornices or other snow formations that might collapse.
Wind protection should be a primary consideration for site selection. Natural windbreaks like tree stands, rock formations, or terrain depressions can dramatically reduce the battering your tent takes. However, balance this with the need for some sun exposure, which can provide welcome warmth during daylight hours. Understanding what makes a tent windproof informs better decisions about placement and orientation.
When choosing your specific tent location, consider:
– Direction of prevailing winds (position your tent with the narrower, lower end facing the wind)
– Snow depth adequate for anchoring (at least 8-12 inches)
– Relatively flat terrain that won’t create uncomfortable sleeping angles
– Safe distance from potential tree fall
– Proximity to water sources vs. the effort of melting snow
Always plan to arrive at your camping area with several daylight hours remaining. Winter tent setup takes significantly longer than summer camping, and you’ll want ample light for safety assessments and proper site preparation.
Snow Site Preparation: Creating Your Winter Foundation
Creating a solid foundation in snow is essential for comfort, warmth, and tent stability. Begin by assessing snow depth and consistency using a probe, ski pole, or ice axe. Ideally, you want at least 1-2 feet of snow for proper site preparation.
The process of packing snow for your tent platform follows these steps:
- Mark out an area approximately 2-3 feet larger than your tent footprint in all directions
- Remove any surface irregularities like sticks or rocks
- Walk methodically across the area while wearing snowshoes, skis, or boots to compress the snow
- Pay special attention to where your sleeping area will be, ensuring even compaction
- Allow the packed snow to “sinter” (harden through partial melting and refreezing) for 20-30 minutes
- Perform a second compaction pass
- Use a snowshoe, avalanche shovel, or flat object to level the surface
The science behind snow sintering is fascinating – the pressure and friction from compaction cause snow crystals to partially melt and then refreeze into a more solid mass. This waiting period is crucial for creating a platform that won’t collapse under your weight overnight.
For extended comfort, consider additional snow structures:
– Wind walls on the windward side (2-3 feet high)
– A kitchen area with seating blocks cut from compacted snow
– A “cold sink” (deeper area near the tent door where cold air can pool away from sleeping areas)
The winter camping tent options available today are designed to work with these snow preparation techniques, featuring reinforced floors that can withstand the moisture and cold from snow contact.
Tent Pitching Techniques for Snowy Conditions
Setting up a tent in winter conditions requires strategic approaches that differ from warm-weather camping. Follow these steps for efficient setup:
Organize your equipment: Before unpacking, place all components in an accessible arrangement, perhaps on a tarp to prevent losing small items in the snow. Keep gloves on but consider having a pair of liner gloves for tasks requiring dexterity.
Consider orientation carefully: Position your tent with the lowest, narrowest profile facing the prevailing wind, and the door oriented away from the wind when possible.
Assemble poles with care: Cold temperatures make aluminum poles less flexible and more brittle. Assemble them slowly and gently, allowing the sections to come together naturally without forcing them. If extremely cold (below 0°F/-18°C), warm the pole sections inside your jacket briefly before assembly.
Address the footprint question: In winter, a ground cloth or footprint is optional. The snow itself provides protection from abrasion, and a footprint can actually collect moisture. If you do use one, make sure it doesn’t extend beyond the tent edges.
Erect the tent body: If working in windy conditions, use your pack or have a partner anchor one end while you work from the opposite side. Stake at least two points before inserting poles to prevent the tent from becoming a sail.
Attach the fly immediately: Don’t wait to add the rainfly as you might in summer. In winter, the fly provides crucial insulation and wind protection. Ensure even tension on all sides.
Configure vestibules purposefully: Position the main vestibule door away from prevailing wind, and consider digging the vestibule area slightly deeper than the sleeping area for additional headroom and storage.
Mastering two-person lightweight tent setup techniques provides a foundation of skills that apply in winter conditions, though you’ll need to adapt for the additional challenges of cold and snow.

Mastering Snow Anchoring Systems
Conventional tent stakes are virtually useless in snow, making specialized anchoring techniques essential for winter camping security. Several effective options exist, each with advantages in different snow conditions.
Deadman Anchors provide exceptional holding power in most snow types:
1. Attach your guyline to the middle of a sturdy object (stuff sack, stick, ice axe)
2. Dig a small trench perpendicular to the direction of tension
3. Bury the object horizontally in the trench, about 8-12 inches deep
4. Pack snow firmly over the anchor
5. Allow 5-10 minutes for the snow to sinter before applying full tension
Snow Stakes are specialized anchors designed for winter use:
– V-shaped or tubular stakes provide more surface area than standard stakes
– Place them perpendicular to the guyline at a 10-20 degree angle away from the tent
– Bury the top portion with packed snow for additional strength
Creative Alternatives when specialized equipment isn’t available:
– Ski poles or ice axes can be buried horizontally as deadman anchors
– Filled stuff sacks make excellent improvised anchors
– Skis and snowshoes can serve as substantial anchors for strong winds
| Anchor Type | Snow Condition | Holding Strength | Setup Time |
|---|---|---|---|
| Deadman (buried stuff sack) | Most snow types | Excellent | 3-5 minutes |
| Snow stakes (vertical) | Compact snow | Good | 1 minute |
| Snow stakes (horizontal) | Loose snow | Very good | 2-3 minutes |
| Ski/pole anchors | Any snow | Excellent | 2-4 minutes |
For high-wind situations, use redundant anchoring methods and double-check all anchor points before nightfall and after any significant snowfall. Testing is simple – apply firm pressure in the direction of tension to ensure the anchor holds without slipping.
The structural design of mountaineering tent options incorporates reinforced attachment points specifically engineered for these advanced anchoring systems, allowing them to withstand severe mountain conditions.
Fortifying Your Winter Camp: Beyond Basic Setup
Once your tent is erected and secured, additional fortification can dramatically improve comfort and safety in harsh conditions.
Protective Snow Walls: These windbreaks can reduce wind speed by 50-70% when properly constructed.
– Build walls 2-3 feet high on windward sides of your tent
– Maintain at least 3 feet of distance between walls and tent to prevent snow accumulation against your shelter
– Use blocks cut from compacted snow, or pile and pack snow into a mounded wall
– Angle the walls slightly away from the tent to deflect wind upward
Enhanced Vestibule Areas: Transform your vestibule from a simple entrance into a functional winter room.
– Dig down 1-2 feet to create standing room and cold air drainage
– Smooth the walls and floor for easier use
– Consider creating snow shelving for organizing gear
– In multi-day camps, expand this area daily for additional comfort
Snow Management Strategy: Plan for ongoing maintenance during your stay.
– Clear accumulating snow from your tent every few hours during snowfall
– Gently pat snow from the sides rather than brushing vigorously
– Re-tighten guylines as needed, as snow loading can cause sagging
– Reinforce anchors that show any signs of loosening
These fortifications not only improve comfort but can be life-saving in severe weather. The most effective windproof tents for cold weather work in harmony with these snow structures, creating a comprehensive shelter system against winter’s fury.
Inside Your Winter Cocoon: Creating a Warm, Functional Interior
The interior arrangement of your winter tent is crucial for both comfort and safety. Begin with creating an optimal sleep system:
- Use two sleeping pads – a closed-cell foam pad directly on the snow (R-value of at least 2) topped with an inflatable pad (R-value of 4+)
- Position sleeping bags away from tent walls to prevent contact with condensation
- Pre-warm sleeping bags with hot water bottles (properly sealed) before bedtime
- Consider a sleeping bag liner for additional warmth (+5-15°F)
Organization becomes critical in winter conditions, as fumbling for gear in the cold can lead to discomfort or even frostbite:
- Designate specific areas for wet gear versus dry items
- Store electronics and batteries in interior pockets of your sleeping bag to preserve battery life
- Keep essential nighttime items (headlamp, water bottle, urination device) within arm’s reach
- Use stuff sacks color-coded by category for easy identification
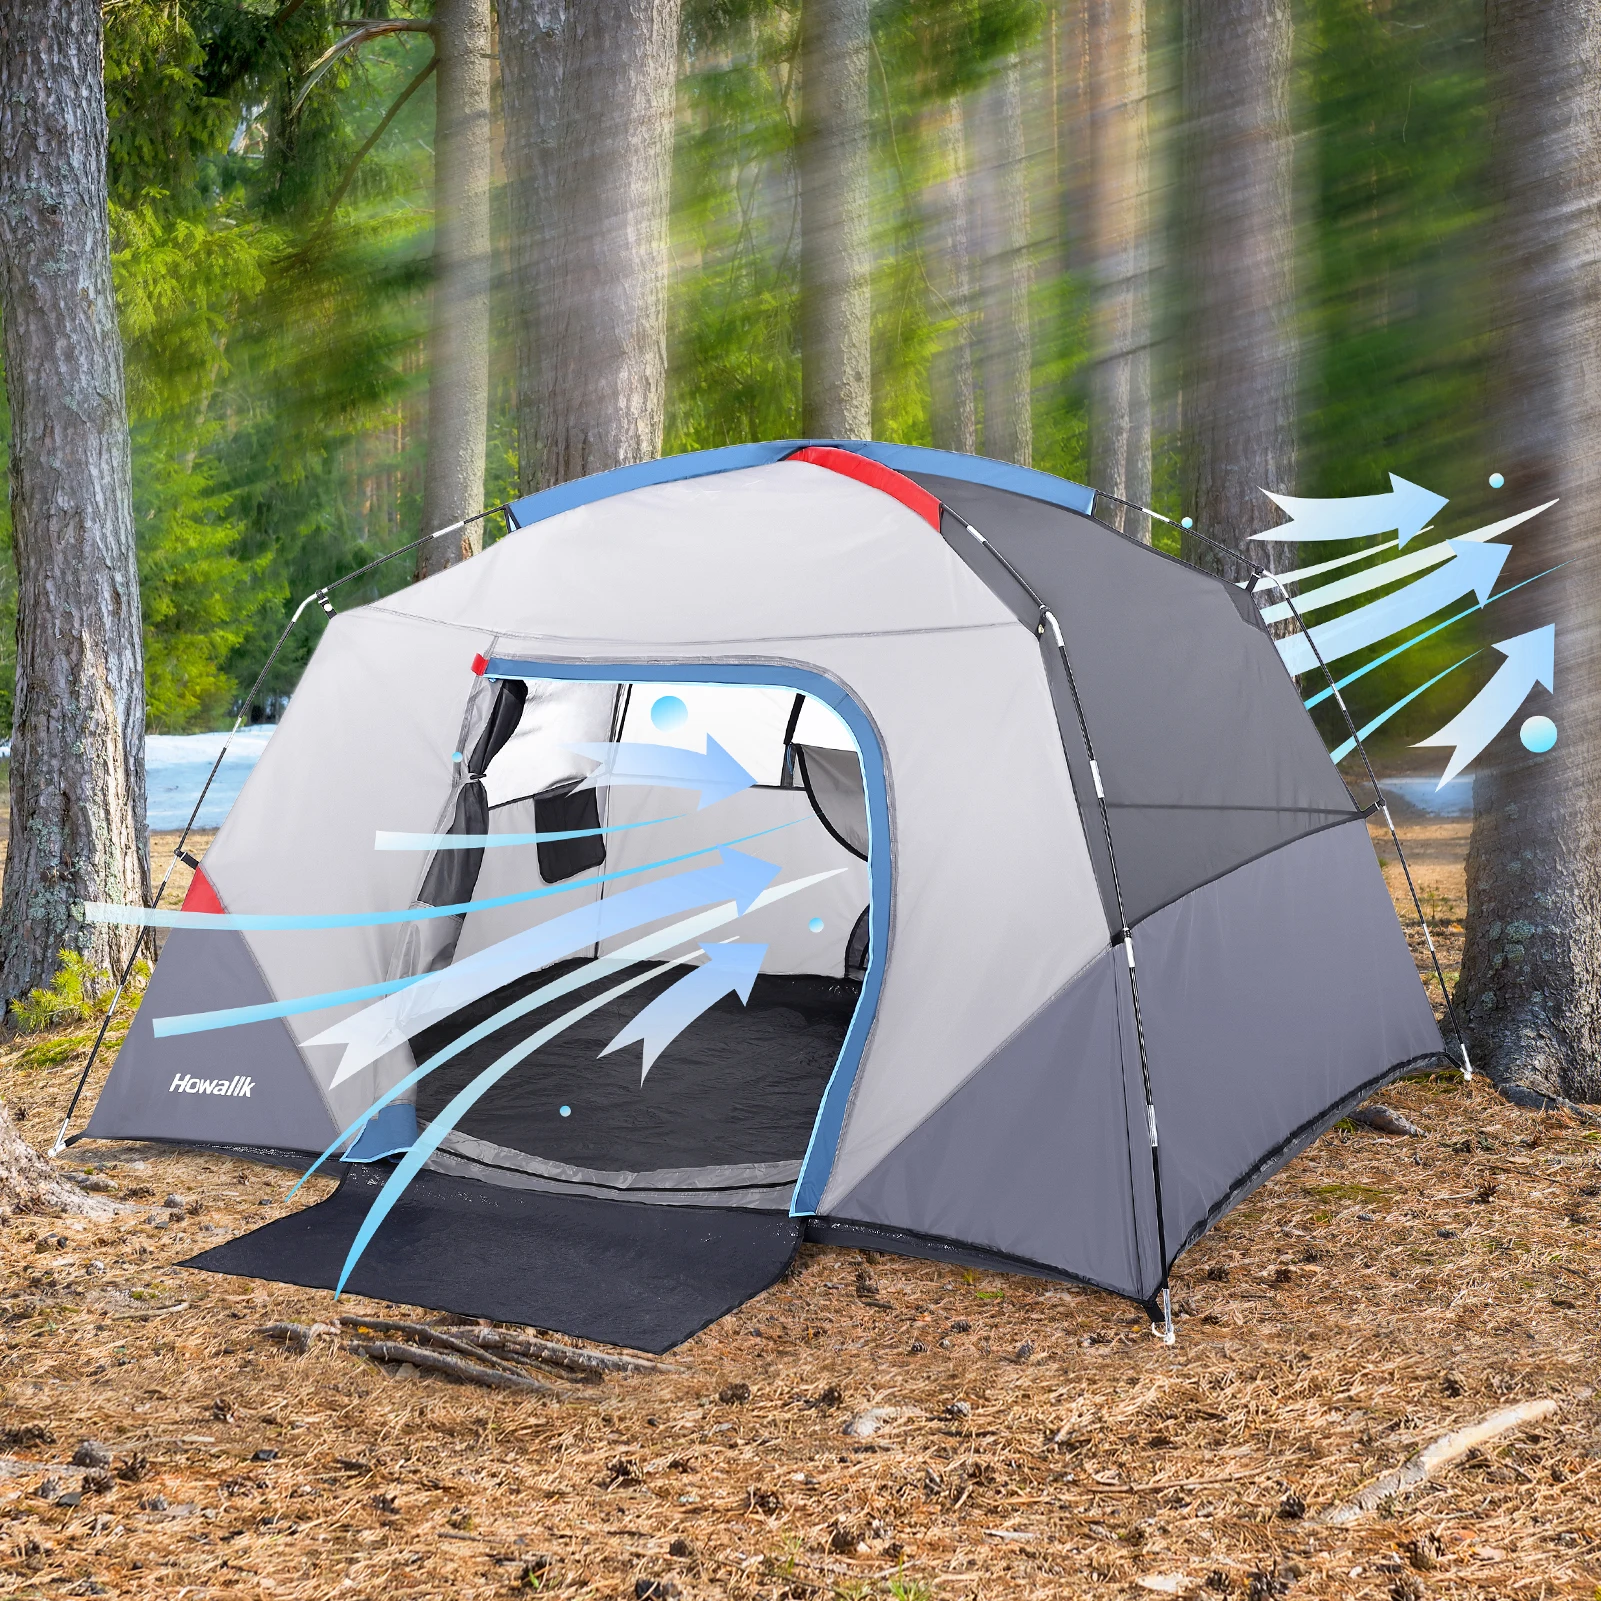
Managing condensation requires active effort, as each person can produce up to a liter of moisture through respiration overnight. Snow tent ventilation and condensation control techniques include:
- Keep at least one vent open, even in the coldest conditions
- Minimize cooking inside the tent to reduce moisture
- Brush frost from tent walls in the morning before it melts
- Air out sleeping bags and pads during the day when possible
Always remember that cooking in an enclosed tent presents serious carbon monoxide risks. If cooking in the vestibule is necessary, ensure exceptional ventilation and never leave stoves unattended.


Heavy Duty 4 Season Tent, Mountaineering Tent, Winter Camping Tent
$870.40 Select options This product has multiple variants. The options may be chosen on the product page
Compact Backpacking Tent, Lightweight Backpacking Tent, Waterproof Camping Tent
$335.52 Select options This product has multiple variants. The options may be chosen on the product page
Ultralight Backpacking Tent, Ultralight Dome Tent, Winter Camping Tent
Price range: $369.63 through $370.07 Select options This product has multiple variants. The options may be chosen on the product page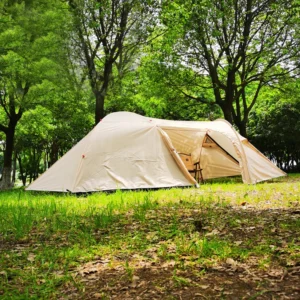
Camping Tent with Vestibule, Waterproof Camping Tent
Price range: $407.89 through $479.48 Select options This product has multiple variants. The options may be chosen on the product page
Heavy Duty 4 Season Tent, Ultralight Freestanding Tent, Winter Camping Tent
$3,722.66 Select options This product has multiple variants. The options may be chosen on the product page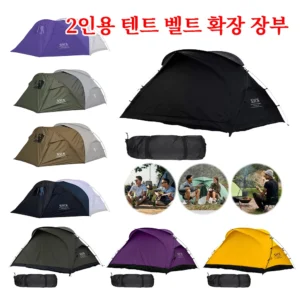
Backpacking Tent with Vestibule, Trekking Pole Backpacking Tent, Waterproof Camping Tent
Price range: $271.99 through $519.52 Select options This product has multiple variants. The options may be chosen on the product page
Troubleshooting Common Winter Tent Problems
Even with perfect preparation, winter camping presents unique challenges. Here’s how to address common issues:
Heavy Snowfall Accumulation
– Wake up periodically during heavy snowfall to clear snow from tent surfaces
– Tap tent walls gently from inside to dislodge building snow
– Reinforce pole structure by tightening any adjustable pole connections
– If snow load becomes dangerous, exit safely and clear the tent exterior
Excessive Condensation
– Increase ventilation immediately
– Wipe walls with a small camp towel and wring it outside
– Avoid bringing snow-covered items inside
– Consider adjusting sleeping arrangements to minimize breath contact with tent walls
Failed Anchors
– Always carry extra cordage and anchoring materials
– Replace failed anchors during daylight hours when possible
– Use larger or multiple deadman anchors in problematic areas
– In emergency situations, consider using backpacks filled with gear as anchors
Frozen Zippers and Hardware
– Never force frozen zippers – apply gentle heat from your hands
– Use lip balm or candle wax as lubricant on zipper teeth
– Keep snow away from zipper tracks during use
– Store zipper pulls inside when possible
Snow Melt Under the Tent
– Build your initial platform more thoroughly with proper sintering time
– Consider placing a thin foam pad under your sleeping pads to minimize heat transfer
– Rotate sleeping positions slightly each night on longer trips
– In persistent cases, rebuild your tent platform if time allows
For extended winter camping, waterproof camping tent options with advanced waterproof treatments help manage the inevitable moisture challenges that arise in snow conditions.
Breaking Camp: Packing Up in Winter Conditions
Breaking camp in winter requires different techniques than summer departures. Start by timing your departure appropriately – allowing for the additional time needed and ideally packing during the warmer part of the day.
Follow these steps for efficient winter camp breakdown:
- Begin by removing and packing internal items while the tent structure provides protection
- Shake off interior frost or condensation before it melts
- Sweep out any snow or debris
- For frozen anchors, don’t pull directly on guylines, which can damage them – instead:
– Pour a small amount of warm water over deadman anchors if available
– Apply steady pressure rather than sharp tugs
– Use a trekking pole to pry up stubborn anchors - Collapse the tent carefully, avoiding sharp bends in frozen poles
- Pack the tent body and fly separately if they’re wet or icy
- Store stakes and hardware in dedicated bags to prevent puncturing other gear
When packing a wet or frozen tent, recognize that it will be significantly heavier and bulkier than when dry. Plan pack space accordingly. If possible, take a short break at midday to air out the tent materials before the final leg of your journey.
Leave No Trace principles apply differently in winter. While snow will eventually melt and eliminate many signs of your presence, proper waste management remains crucial. Pack out all trash, bury human waste deeply in snow away from water sources, and disperse fire impacts completely if emergency fires were necessary.
For extended trips in changing conditions, insulated tents for cold weather provide more consistency in interior temperatures, making both camping and breaking camp less challenging.
Winter Tent Innovation: Materials and Designs for Extreme Conditions
Winter tent technology continues to evolve, driven by the extreme demands of cold-weather exploration. Modern designs represent a significant leap forward from traditional winter shelters, with specialized features addressing specific challenges of snow camping.
Cutting-edge fabrics now offer enhanced waterproofing while maintaining breathability – crucial for managing condensation. Silicone-treated nylons provide superior tear strength and water resistance compared to traditional polyurethane coatings, while still remaining flexible in freezing temperatures.
Pole systems have seen remarkable innovation, particularly for snow-loading capacity. DAC Featherlite NSL poles combine incredible strength with reduced weight, while hubbed pole designs distribute stress more effectively across the tent structure. Some advanced models feature pole sleeves with additional reinforcement at stress points specifically engineered for winter conditions.
Ventilation design has become increasingly sophisticated, with adjustable systems allowing fine-tuned airflow management based on conditions. Strategic vent placement creates natural air circulation that reduces condensation without introducing uncomfortable drafts.
These innovations are particularly evident in shelter options for two people designed for winter use, where balancing livability with weather resistance presents unique design challenges.
Is Winter Tent Camping for Me? Assessing Your Readiness
Winter camping isn’t for everyone, and honest self-assessment is important before venturing into potentially dangerous conditions. Consider these factors to determine your readiness:
Experience Assessment:
– Have you completed multiple three-season overnight trips successfully?
– Have you camped in mild winter or late fall/early spring conditions?
– Are you comfortable with basic navigation, including in low-visibility conditions?
– Can you recognize signs of hypothermia and frostbite?
Physical Considerations:
– Winter camping requires carrying heavier loads – can you manage 25-40% more weight than summer trips?
– Do you have good cold tolerance and circulation?
– Can you maintain body temperature during stationary periods in cold weather?
Gear Investment Reality Check:
– Quality winter camping equipment represents a significant investment
– A complete winter sleep system alone (tent, sleeping bag, pads) often costs $800-1500
– Specialized clothing adds another substantial expense
If you’re interested but not fully ready, consider these stepping stones:
– Join guided winter day trips to learn basic skills
– Practice winter camping in established campgrounds with your vehicle nearby
– Participate in group trips with experienced winter campers
– Gradually extend your camping season from summer into fall, then early winter
Detailed cold weather camping tent comparisons can help you understand the specific features that match your experience level and intended camping conditions.
Advanced Winter Camping Techniques: Beyond Basic Tent Setup
For experienced winter campers, several advanced techniques can enhance comfort, safety, and enjoyment in extended cold-weather adventures.
Snow Cave Construction provides an excellent emergency backup shelter or alternative to tent camping:
– Requires 4-6 feet of consolidated snow
– Takes 3-6 hours to construct properly
– Maintains consistent interior temperatures around 32°F (0°C) regardless of external temperatures
– Offers superior soundproofing and wind protection compared to tents
Multi-Day Campsite Development becomes worthwhile for stays longer than two nights:
– Create progressive improvements to camp infrastructure daily
– Develop dedicated cooking areas with wind protection and seating
– Establish paths between functional areas to minimize postholing
– Build snow furniture (tables, chairs, storage areas) for increased comfort
Group Camping Arrangements in winter benefit from strategic planning:
– Position tents in a horseshoe or circular pattern for communal protection
– Develop a central cooking/gathering area with snow walls
– Create dedicated bathroom trails marked with wands or natural indicators
– Establish group gear storage areas to distribute weight and responsibility
These advanced techniques build upon the foundation of basic winter camping skills, allowing for more comfortable extended stays in challenging environments.
Conclusion: Embracing the Winter Wilderness Responsibly
Winter camping represents both a profound challenge and an unparalleled opportunity to experience the natural world at its most serene and pristine. The skills outlined in this guide – from selecting the perfect site to fortifying your camp against winter’s fury – form the foundation of safe and enjoyable cold-weather adventures.
Remember that preparation is your most powerful tool. Practice your setup in controlled environments before venturing into remote areas. Start with overnight trips close to civilization before attempting multi-day expeditions. Gradually build your skill set and confidence with each winter outing.
The rewards of mastering winter camping extend beyond the technical achievements. There’s profound satisfaction in creating comfort in seemingly inhospitable environments and accessing wilderness experiences few others will ever witness – silent forests blanketed in fresh snow, untouched alpine basins, and starlit nights unmarred by summer haze.
As you venture into winter landscapes, carry with you both confidence in your skills and humility before the power of winter conditions. Make conservative decisions, always leaving margin for unexpected challenges. By doing so, you’ll discover that winter camping isn’t about conquering nature, but finding your place within it during its most magnificent season.