
Camping should be enjoyable no matter what the weather brings. Whether you’re facing snowy winter nights or sweltering summer days, the right tent insulation strategy can transform your outdoor experience from an endurance test into a comfortable adventure. This comprehensive guide will help you understand how to properly insulate your tent for year-round camping comfort.
Understanding the Science Behind Tent Insulation
Before diving into specific strategies, it helps to understand how heat moves in and around your tent. There are three main ways heat transfers, and knowing these principles will help you make smarter insulation choices:
Conduction: This is heat transfer through direct contact. When you lie on cold ground without insulation, your body heat transfers directly into the earth. This is why ground insulation is so critical.
Convection: This occurs when warm air circulates and is replaced by cooler air. Those drafts you feel in a poorly sealed tent are convection in action, carrying away your precious warmth.
Radiation: This is heat transfer through space, like the warmth you feel from a campfire even when you’re not touching it. Your body constantly radiates heat, which can escape through tent walls.
Effective insulation works by interrupting these heat transfer mechanisms. For example, a sleeping pad doesn’t just make the ground softer—it creates a barrier that prevents your body heat from conducting into the cold earth.
Remember that proper tent insulation isn’t just about the tent itself—it’s a system including your sleeping gear and clothing. Your durable tents for all seasons provide the outer shell, but what you put inside matters just as much for temperature control.
Selecting the Right Tent for All-Season Performance
The foundation of year-round comfort starts with choosing the right tent. Not all tents are created equal when it comes to insulation properties:
3-Season vs. 4-Season Tents
While 3-season tents prioritize ventilation and lightweight design, four-season tent features and benefits focus on heat retention and structural strength. Four-season tents typically have:
- Less mesh and more fabric walls
- Stronger pole structures to handle snow loads
- Lower, more aerodynamic profiles
- Better wind resistance
- Snugger rainfly coverage
Tent Materials and Insulation Properties
The materials used in tent construction significantly impact insulation performance. Understanding all-season tent materials can help you make more informed choices:
| Material | Insulation Properties | Best For |
|---|---|---|
| Canvas | Excellent natural insulation, breathable, heavy | Car camping, base camps |
| Nylon | Moderate insulation, lightweight, requires additional insulation | Backpacking, 3-season use |
| Polyester | Better UV resistance than nylon, moderate insulation | General camping |
| Polycotton blends | Good balance of weight and insulation | Mixed conditions |
Design Elements That Impact Insulation
Tent design plays a crucial role in heat retention:
- Double-wall construction: Creates an air gap that provides insulation
- Dome shapes: Shed snow better and have less internal air space to heat
- Vestibules: Provide transition zones that help maintain interior temperatures
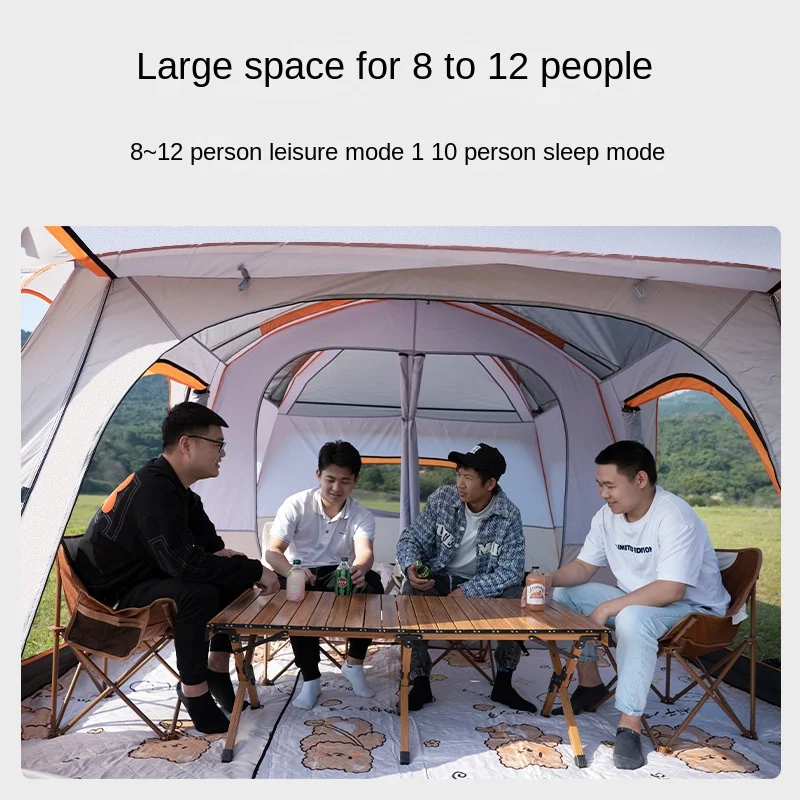
- Smaller interior space: Easier to heat than larger tents
For serious cold-weather camping, specialized 4-season winter 2-person tents offer purpose-built features that maximize heat retention without condensation issues.
Ground Insulation Strategies: Preventing Heat Loss from Below
Many campers focus on wall insulation but overlook the ground—a critical mistake since the earth can draw away body heat faster than air. Here’s how to prevent heat loss from below:
The Layering Approach
Just as with clothing, layers are your friend when insulating against the ground:
- Base layer: Start with a durable ground cloth or footprint
- Insulation layer: Add closed-cell foam pads or specialized tent floor insulation
- Comfort layer: Top with an air mattress or self-inflating pad for sleeping comfort
Sleeping Pad R-Values
R-value measures insulation effectiveness—higher numbers mean better insulation:
- R-value 1-2: Summer use only
- R-value 3-4: 3-season use, down to freezing
- R-value 5+: Winter camping and snow conditions
For cold weather, combine pads to increase your R-value. A closed-cell foam pad (R-value 2) under an inflatable pad (R-value 3) gives you a combined R-value of 5—suitable for winter conditions.
Alternative Ground Insulation Methods
When camping in extreme cold or with winter camping tents, consider these additional ground insulation techniques:
- Reflective emergency blankets under your sleeping pad
- Specialized tent carpet or rugs
- Natural materials like pine boughs in emergency situations (following Leave No Trace principles for removal)
- Dedicated tent footprints with reflective properties
Remember that compressing insulation reduces its effectiveness, so materials that maintain loft under your weight will perform better.
Wall and Ceiling Insulation Techniques
With ground insulation in place, it’s time to address heat loss through your tent walls and ceiling:
Commercial Insulation Options
Several ready-made solutions exist for insulating tent walls:
- Thermal tent liners specifically designed to hang inside your tent
- Reflective blankets that can be attached to interior walls
- Insulated tent covers that go over standard rainflies
DIY Wall Insulation Approaches
For budget-conscious campers, these DIY methods can be effective:
- Space blankets (emergency Mylar blankets) attached to interior walls
- Reflectix insulation cut to size for your tent walls
- Wool blankets hung as interior liners
- Bubble wrap with the bubble side against tent walls
When camping in extreme conditions, heavy-duty 4-season tents already incorporate advanced insulation features, but these DIY additions can enhance performance further.
For naturally superior insulation, many experienced winter campers prefer insulated canvas shelters for cold weather camping. The dense weave and natural fibers of canvas provide excellent thermal properties compared to synthetic materials.
Heat Sources and Safety: Warming Your Tent Responsibly
Adding heat to your insulated tent can dramatically improve comfort, but safety must be your primary concern:
Critical Safety Guidelines
NEVER use unvented combustion heaters inside your tent. This includes:
– Propane heaters without oxygen sensors
– Charcoal or wood burning stoves without proper ventilation
– Gas lanterns as primary heat sources
Carbon monoxide is odorless, colorless, and deadly. Always ensure:
– Proper ventilation
– Use of carbon monoxide detectors
– Following manufacturer guidelines precisely
Safer Heating Alternatives
These options provide warmth with reduced risk:
- Specially designed tent-safe heaters with automatic shutoff features
- Electric heaters (when camping with power access)
- Hot water bottles placed in your sleeping bag before sleep
- Chemical heat packs activated before bedtime
Regardless of your heat source, understanding snow tent ventilation and condensation control is crucial for both safety and comfort. Even the best insulation system needs proper airflow management.
Managing Moisture and Condensation While Maintaining Insulation
The better insulated your tent, the more likely you’ll face condensation issues. Here’s how to balance warmth and dryness:
The Condensation Challenge
When warm, moist air from breathing and body evaporation hits cold tent surfaces, it condenses into water. This creates three problems:
- Moisture reduces the effectiveness of insulation
- Dripping water creates discomfort
- Dampness increases heat loss through evaporative cooling
Strategic Ventilation Solutions
To combat condensation while preserving heat:
- Create high-low ventilation (vents at both top and bottom of tent)
- Use adjustable vents you can open slightly, even in cold weather
- Position your tent to take advantage of natural breezes
- Keep tent doors slightly unzipped with rainfly protection
Moisture Management Techniques
These practices significantly reduce in-tent moisture:
- Cook outside the tent to minimize water vapor
- Store wet gear in vestibules, not the main tent
- Use a small towel to wipe condensation from walls in the morning
- Consider weather-resistant and durable camping tents with advanced moisture management features
Maintaining this balance between insulation and ventilation is one of the most challenging aspects of year-round camping, but it’s essential for comfort.
Summer Adaptations: Using Insulation Principles to Stay Cool
Insulation works both ways—it can keep heat out as effectively as it keeps it in. Apply these principles to stay comfortable in hot weather:
Reflecting Solar Heat
- Position reflective materials on the outside of your tent (not inside as in winter)
- Use a reflective tarp or specialized reflective rainfly over your tent
- Place your tent in shade whenever possible
Maximizing Airflow
- Remove rainflies when weather permits
- Open all vents, doors, and windows
- Position the tent to catch prevailing breezes
- Create artificial shade with tarps set up above the tent
Site Selection for Natural Cooling
- Choose elevated sites where air circulates freely
- Avoid low-lying areas where hot air settles
- Seek natural shade from trees (while watching for falling branch hazards)
- Consider multi-season tents for variable climates that feature convertible designs
For optimal temperature control in changing conditions, many campers choose canvas camping tents that naturally regulate temperature better than synthetic materials, staying cooler during day and warmer at night.
Budget-Friendly DIY Insulation Projects
You don’t need expensive gear to improve tent insulation. Here are some practical projects anyone can tackle:
Reflective Bubble Wrap Tent Liner
Materials:
– Reflective bubble insulation (Reflectix or similar)
– Duct tape
– Scissors
– Adhesive velcro strips
Steps:
1. Measure your tent’s interior dimensions
2. Cut insulation to match tent walls, leaving space for doors/windows
3. Attach velcro strips to tent walls and matching pieces on insulation
4. Install panels when needed, remove when not in use
Effectiveness: Adds approximately R-1 to R-1.5 of insulation. Best for mild to moderate cold.
Emergency Blanket Ground Layer
Materials:
– 2-3 emergency mylar blankets
– Duct tape
– Scissors
Steps:
1. Lay blankets on tent floor, shiny side up
2. Tape together at edges
3. Secure to tent floor with small pieces of tape
4. Place sleeping pads on top
Effectiveness: Reflects body heat and provides moisture barrier. Adds minimal R-value but improves perceived warmth.
Draft Stopper
Materials:
– Old sock or small stuff sack
– Rice, sand, or similar filler
– Needle and thread
Steps:
1. Fill sock/bag with material
2. Sew end closed
3. Place along tent door seam or other draft sources
Effectiveness: Eliminates drafts at minimal cost. Particularly useful for best insulated tents for cold weather that already have good overall insulation but may have small air leaks.


Heavy Duty 4 Season Tent, Mountaineering Tent, Winter Camping Tent
$870.40 Select options This product has multiple variants. The options may be chosen on the product page
Compact Backpacking Tent, Lightweight Backpacking Tent, Waterproof Camping Tent
$335.52 Select options This product has multiple variants. The options may be chosen on the product page
Ultralight Backpacking Tent, Ultralight Dome Tent, Winter Camping Tent
Price range: $369.63 through $370.07 Select options This product has multiple variants. The options may be chosen on the product page
Camping Tent with Vestibule, Waterproof Camping Tent
Price range: $407.89 through $479.48 Select options This product has multiple variants. The options may be chosen on the product page
Heavy Duty 4 Season Tent, Ultralight Freestanding Tent, Winter Camping Tent
$3,722.66 Select options This product has multiple variants. The options may be chosen on the product page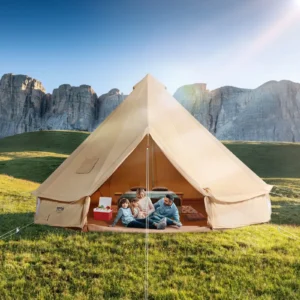 $1,221.93 Select options This product has multiple variants. The options may be chosen on the product page
Field-Tested Insulation Strategies for Extreme Conditions
When facing truly challenging conditions, these proven combinations can make the difference between misery and comfort:
Deep Winter Strategy
For temperatures well below freezing, layer multiple systems:
– Use a double-walled four-season tent as your base
– Add reflective ground insulation under sleeping pads
– Combine closed-cell foam pad (bottom) with high R-value inflatable pad (top)
– Install a tent liner or hang emergency blankets on walls
– Consider a small, tent-safe heater with proper ventilation
High-Humidity Cold Environment
For cold, wet conditions where moisture control is critical:
– Prioritize ventilation while maintaining heat
– Use synthetic insulation that performs when damp
– Focus on keeping gear dry with multiple stuff sacks
– Create a “dry zone” inside your tent using tarps or groundsheets
For specialized environments like high mountains or alpine terrain, mountaineering tents feature design elements specifically engineered for extreme conditions.
Frequently Asked Questions About Tent Insulation
Q: Can I use a space heater in my tent?
A: Most space heaters are not safe for tent use due to fire and carbon monoxide risks. Only use heaters specifically designed for tent use with proper safety features and ventilation.
Q: How do I insulate my tent without adding too much weight for backpacking?
A: Focus on high-efficiency options: a high R-value sleeping pad, reflective emergency blanket as ground layer, and a quality sleeping bag. Choose a waterproof camping tent with good baseline insulation to reduce what you need to add.
Q: Does adding insulation cause more condensation problems?
A: It can, but proper ventilation management solves this. Always maintain some airflow, even in cold conditions.
Q: What’s the most important area of the tent to insulate?
A: The ground. You lose more heat through conduction to the ground than through tent walls in most conditions.
Q: Can I safely use candles for tent heat?
A: No. Candles pose significant fire risks in the confined, flammable environment of a tent. Stick to safer alternatives like hot water bottles.
With these principles and techniques in mind, you’re ready to tackle camping in any season. Remember that insulation is a system approach—your tent, sleeping gear, and clothing all work together to create a comfortable microclimate. By applying the right strategies for your specific conditions, you can enjoy the outdoors year-round, regardless of what mother nature has in store.