
Understanding Your Vestibule: More Than Just a Tent Porch
A tent vestibule is much more than just an entrance to your tent—it’s a valuable transitional space that serves multiple purposes during your outdoor adventures. This covered area sits outside the main tent body but remains protected by your rainfly, creating a buffer between the interior living space and the elements.
When properly utilized, your vestibule delivers several key benefits:
- Expanded usable space: Moves gear storage outside the sleeping area, maximizing interior comfort
- Weather protection: Shields equipment from rain, snow, and morning dew while allowing access to your tent
- Transition zone: Creates a “mudroom” effect where dirt, debris, and moisture can be contained
- Sheltered utility area: Provides a protected space for simple camp tasks like changing shoes or preparing gear
Vestibules come in various configurations, each with unique organizational potential:
- Front vestibules: Typically offer the most space and function as the main entrance
- Side vestibules: Provide convenient access for multiple tent occupants
- Dual vestibules: Allow separate storage areas for multi-person trips
- Add-on vestibules: Can be attached to compatible tents for additional covered space
The average vestibule for a 1-2 person tent provides about 4-6 square feet (0.4-0.6 square meters) of usable space, while family tents might feature vestibules of 8-12+ square feet (0.7-1.1+ square meters). Understanding your specific vestibule dimensions is the first step toward creating an effective organization system.
Comprehensive vestibule storage solutions can transform your camping experience from chaotic to comfortable. For those new to tent camping, understanding what a tent vestibule is and how to maximize its potential will significantly improve your outdoor adventures.
Strategic Gear Placement: What Goes Where
Creating a logical system for what belongs inside your tent versus in the vestibule is essential for maintaining order and comfort. The key is to establish clear zones based on items’ characteristics and when you’ll need them.
Vestibule-Appropriate Gear
These items are ideal candidates for vestibule storage:
- Footwear: Boots, hiking shoes, and camp sandals (positioned for easy access and to prevent tracking dirt inside)
- Wet or dirty outerwear: Rain jackets, rain pants, and muddy layers
- Backpacks and daypacks: Empty or partially emptied packs take up valuable interior space
- Trekking poles and equipment: Store with sharp points covered and away from tent walls
- Camp chairs: Folded chairs if vestibule size permits
- Cooking equipment: Only after it has fully cooled and been cleaned (never cook in vestibules due to fire and carbon monoxide risks)
Inside Tent Storage
Keep these items protected within your tent’s interior:
- Sleeping gear: Bags, pads, pillows, and sleep clothes
- Clean clothing and layers: Items you want to keep dry and readily accessible
- Electronics and valuables: Phones, cameras, wallets, and other essentials
- Nighttime necessities: Headlamps, water bottles, and medications
- First-aid supplies: Keep medical items easily accessible and protected from moisture
- Personal items: Glasses, contact lenses, and toiletries
Critical Safety Note
Never store food, scented items, or cooking equipment with food residue in your vestibule in bear country. These items should be stored according to local regulations—typically in bear canisters or hung properly away from your sleeping area. Even in areas without bears, food can attract raccoons, rodents, and other wildlife that might damage your tent seeking access.
Understanding the benefits of proper vestibule organization enhances both comfort and safety. For optimal storage capacity, consider tents with specially designed vestibule storage features that maximize organizational potential.
Essential Ground Protection: The Foundation of Vestibule Organization
Before placing any gear in your vestibule, establishing proper ground protection is essential. This foundational step keeps your gear cleaner, drier, and better organized while extending the life of your equipment.
Ground Cover Options
| Solution | Pros | Cons | Weight | Waterproofing |
|---|---|---|---|---|
| Extended tent footprint | Perfect fit, integrated with tent | Additional cost, potential water pooling if not properly sized | 4-8 oz (113-227g) | Excellent |
| Dedicated vestibule mat | Designed for purpose, often includes organizational features | Added cost, single-purpose item | 3-6 oz (85-170g) | Very good |
| Foam pad section | Lightweight, insulative, dual-purpose | Limited waterproofing, less durable | 1-2 oz (28-57g) | Fair |
| Pack towel | Absorbent, multi-purpose, packs tiny | Limited area coverage, requires drying | 1-3 oz (28-85g) | Poor |
| Plastic sheet (DIY) | Extremely affordable, customizable size | Noisy, less durable, environmental concerns | 2-4 oz (57-113g) | Very good |
When installing ground protection, ensure it extends fully under the vestibule area but doesn’t protrude beyond the rainfly. This prevents water from channeling between layers during rainfall. For maximum effectiveness, slightly angle the ground cover toward the vestibule entrance to encourage water runoff away from the tent body.
For backpackers concerned about weight, the balance between adequate protection and minimal pack weight is crucial. Many experienced lightweight backpackers find that a small dedicated ground sheet for the vestibule weighing 2-4 ounces (57-113g) provides significant benefits that justify its weight, particularly in wet conditions.
Container Systems: Organizing Gear Within Your Vestibule
With ground protection in place, the next step is implementing a container system to keep your vestibule orderly. Proper containers prevent gear from spreading across the entire space while providing protection from moisture and dirt.
Stuff Sacks and Compression Sacks
- Color coding: Use different colored sacks for various gear categories (red for first aid, blue for rain gear, etc.)
- Size selection: 3L (183 cubic inches) sacks work well for smaller items like gloves and hats; 5-10L (305-610 cubic inches) for larger items
- Stacking technique: Place flat-bottomed sacks in vertical stacks against tent walls to maximize floor space
Dry Bags
- Tiered protection system: Use fully waterproof dry bags for critical items; water-resistant options for less sensitive gear
- Closure position: Always position roll-top closures facing upward and away from potential water entry
- Suspension options: Utilize bag loops with small carabiners to hang from vestibule attachment points
Mesh Bags
- Ventilation strategy: Perfect for damp items that need to dry while protected
- Visual identification: See contents without opening, speeding up gear access
- Moisture management: Position mesh bags where air circulation is highest, typically near the vestibule opening
Collapsible Bins (Car Camping)
- Space efficiency: Opt for collapsible designs that pack flat when not in use
- Category organization: Dedicate bins to specific functions (cooking gear, personal items)
- Elevated placement: Use waterproof bins as platform foundations to keep other items off the ground
Shoe Organization
- Paired positioning: Store shoes facing outward with soles against the vestibule wall
- Drainage accommodation: Place slightly tilted to allow water drainage from wet footwear
- Odor isolation: Use small stuff sacks or waterproof bags to isolate particularly muddy or smelly footwear
Proper weather protection strategies for stored gear can extend equipment life and improve comfort on multi-day trips. By implementing these container systems, you’ll transform a chaotic pile of gear into an organized vestibule that functions efficiently throughout your camping trip.
Vertical Space Utilization: Maximizing Your Vestibule’s Full Potential
Most campers underutilize the vertical space in their vestibules, focusing only on floor organization. By thinking three-dimensionally, you can dramatically increase your storage capacity while improving access to essential items.
Attachment Methods for Existing Tent Features
- Gear loops: Use factory-installed loops to hang lightweight items directly
- Temporary lines: Create a mini clothesline using paracord between opposing attachment points
- Pole attachment: Carefully secure organizers to tent poles with removable hooks that won’t damage pole material
Strategic Stacking Techniques
- Weight distribution: Place heaviest items at the bottom of stacks
- Accessibility planning: Arrange gear with most frequently used items on top or at stack edges
- Stability considerations: Create broader base layers with narrower top layers, especially on uneven ground
- Weather adaptations: Lower stack heights in high-wind conditions for greater stability
Creating Clear Entry/Exit Pathways
- Middle channel maintenance: Always preserve a clear path to your tent door
- Quick-access organization: Position emergency items (headlamp, rain jacket) nearest to the entry point
- Zipping space: Ensure enough clearance around zippers to prevent gear from catching
Most standard vestibules provide 36-48 inches (91-122 cm) of peak height. To calculate usable vertical space, measure from the ground to where the vestibule angle significantly narrows—this typically gives you 65-75% of the peak height for practical storage.
For optimal vertical organization, consider tents with vestibule designs specifically engineered for storage. These models often feature additional attachment points, higher clearance, and strategic shapes that enhance organizational potential.
Wet Gear Management: Keeping Moisture Under Control
One of the primary functions of a vestibule is separating wet gear from the dry interior of your tent. Having an effective system for managing moisture prevents dampness from migrating inside while allowing wet equipment to dry when possible.
Pre-Storage Preparation
- Shake off excess water from rainfly, jackets, and pants before bringing them into the vestibule
- Wipe down hard surfaces like water bottles and cooking equipment with a pack towel
- Wring out extremely wet items like socks or gloves to remove as much water as possible
- Brush off mud and debris from boots and gaiters outside the vestibule
Strategic Placement of Wet Items
- Separation principle: Create distinct zones for wet and dry gear with physical barriers
- Elevation technique: Use stuff sacks or other gear to lift wet items off the ground
- Drainage positioning: Angle wet items so water runs toward vestibule opening rather than tent body
- Rotation strategy: Periodically reposition wet items to expose different surfaces to air
Improvised Drying Solutions
- Mini clotheslines: String lightweight cord between attachment points to hang socks, gloves, and small items
- Extended guylines: Utilize external tent guylines (during clear weather) as additional drying space
- Absorption assistance: Place absorbent pack towels under or alongside wet items to draw moisture away
Ventilation Optimization
- Strategic door position: Keep vestibule door partially open during safe weather conditions
- Cross-ventilation creation: If possible, open multiple vestibule points to create airflow
- Condensation prevention: Regularly check for moisture buildup on vestibule walls and wipe down if necessary
Understanding proper waterproof gear care significantly extends equipment life and performance. Even the most waterproof materials require proper drying to maintain their effectiveness over time.
Pre-Trip Planning: Setting Yourself Up for Vestibule Success
Effective vestibule organization begins before you leave home. Thoughtful preparation ensures you’ll have the right gear in the right containers, making campsite setup more efficient and stress-free.
Pre-Trip Organization Checklist
- [ ] Sort gear into logical categories (sleeping, cooking, clothing, etc.)
- [ ] Pre-pack items in appropriate containers by category
- [ ] Designate specific stuff sacks or bags for vestibule storage
- [ ] Ensure you have sufficient waterproof storage options
- [ ] Pack high-priority items for easy initial access
- [ ] Consider weather forecast when planning organization strategy
- [ ] Identify items that must stay inside the tent vs. vestibule
Vestibule-Optimized Gear Selection
- Choose equipment with vestibule storage in mind (collapsible design, proper cases)
- Evaluate multi-purpose items that reduce overall volume
- Consider the shape of gear and how it will fit in your specific vestibule
- Pack items that nest together when possible
- Minimize unnecessary packaging that takes up valuable space
Vehicle-to-Vestibule Transition Planning
- Stage gear groups logically in your vehicle for efficient unloading
- Establish a clear unpacking sequence (tent first, sleeping gear, then secondary items)
- Create a temporary staging area protected from elements during setup
- Develop wet-weather contingency plans for rapid tent setup while keeping gear dry
Thorough understanding of different vestibule uses in backpacking helps you anticipate specific organization needs for your trip style, whether that’s overnight adventures or extended wilderness journeys.
Essential Organizational Accessories: Tools That Make the Difference
The right organizational tools can transform your vestibule from a chaotic gear pile into a functional storage system. These lightweight additions earn their place in your pack by creating more usable space and better accessibility.
Must-Have Organizational Tools
- Multi-sized dry bags and stuff sacks: 3L, 5L, and 10L sizes cover most needs (1-3oz/28-85g each)
- Packable microfiber towels: Absorb moisture and provide ground protection (1-2oz/28-57g)
- Lightweight carabiners and S-hooks: Create hanging points throughout vestibule (0.5oz/14g each)
- Adjustable cord or paracord: 10-15ft section for clotheslines and tie-downs (1oz/28g)
- Elastic cord or bungee alternatives: Secure items while allowing flexible access (0.5oz/14g)
Bonus Accessories for Enhanced Organization
- Compact LED lighting: Small string lights or lanterns illuminate vestibule space (1-3oz/28-85g)
- Magnetic hooks and clips: Attach to metal pole sections for additional hanging points (0.5oz/14g each)
- Lightweight mesh pockets: Adhere to vestibule walls for small item storage (1-2oz/28-57g)
- Silicone bands: Bundle similar items together within the vestibule (0.5oz/14g)
Tent Features That Enhance Vestibule Organization
- Multiple access points for better item separation
- Integrated gear loops and attachment points
- Adjustable vestibule configurations for weather adaptation
- High-visibility interior colors that make finding gear easier
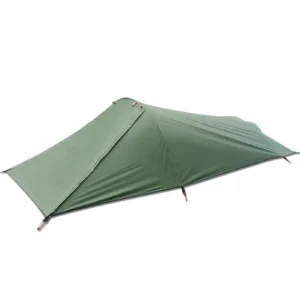

Lightweight Backpacking Tent, Ultralight Backpacking Tent, Ultralight Bivy Tent
Ultralight Single Person Camping Tent with Aluminum Poles for 3-Season Backpacking Waterproof DesignPrice range: $94.88 through $326.82 Select options This product has multiple variants. The options may be chosen on the product page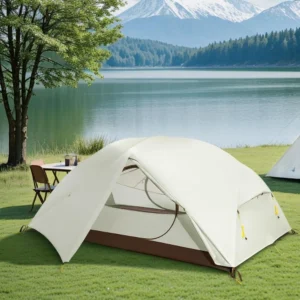
Lightweight Backpacking Tent, Ultralight Backpacking Tent, Waterproof Backpacking Tent
$391.05 Select options This product has multiple variants. The options may be chosen on the product page
Ultralight Backpacking Tent, Ultralight Dome Tent, Winter Camping Tent
Price range: $369.63 through $370.07 Select options This product has multiple variants. The options may be chosen on the product page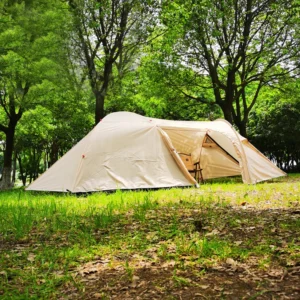
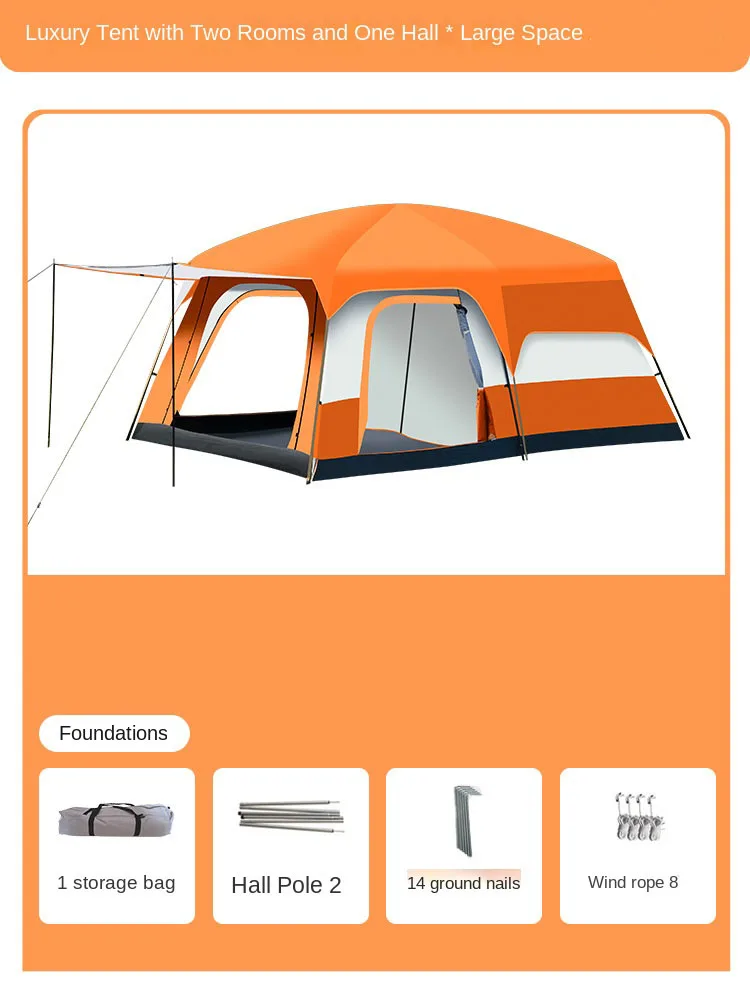
Camping Tent with Vestibule, Waterproof Camping Tent
Price range: $407.89 through $479.48 Select options This product has multiple variants. The options may be chosen on the product page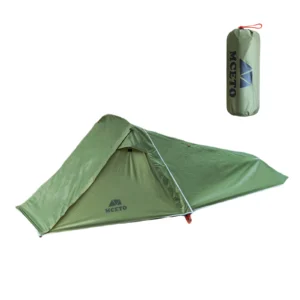
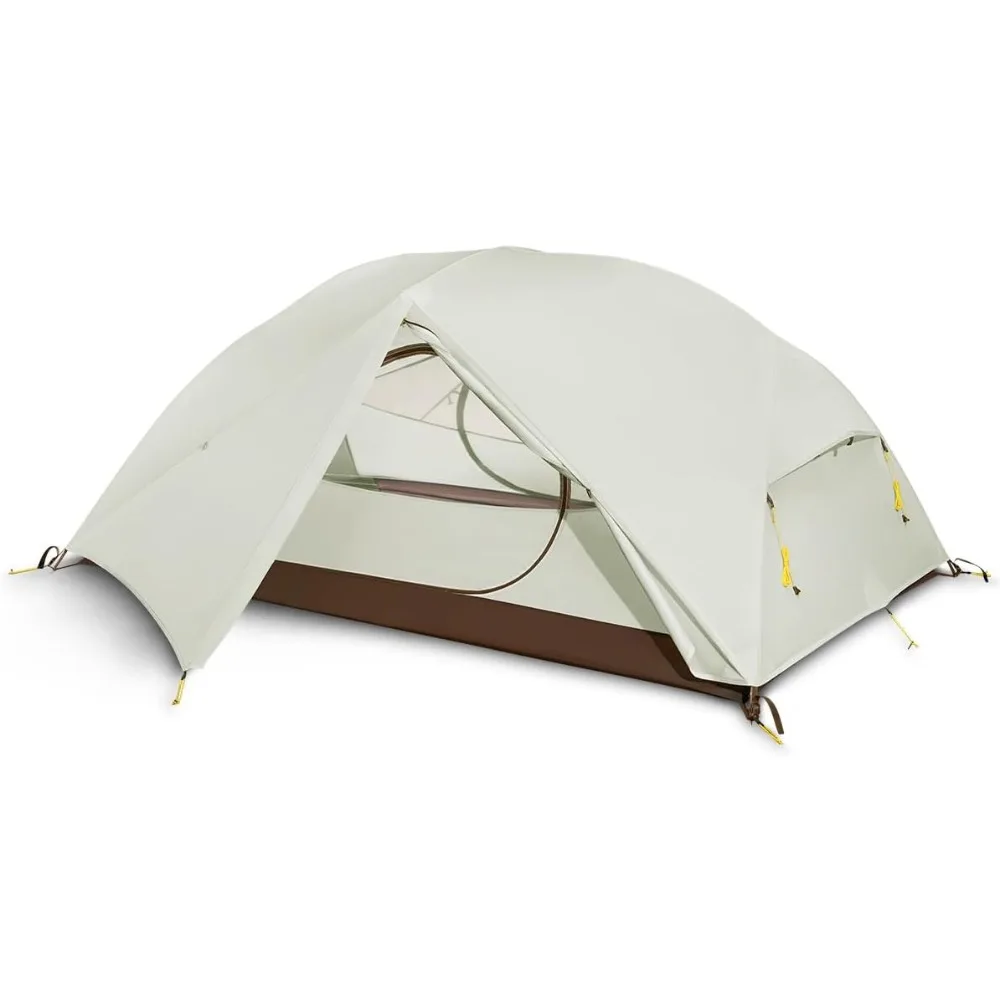
Backpacking Tent with Vestibule, Freestanding Backpacking Tent, Lightweight Backpacking Tent
Price range: $446.89 through $447.22 Select options This product has multiple variants. The options may be chosen on the product page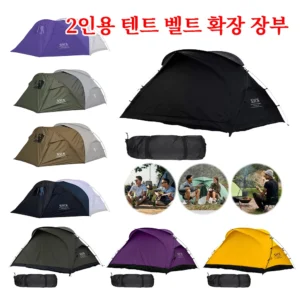
Backpacking Tent with Vestibule, Trekking Pole Backpacking Tent, Waterproof Camping Tent
Price range: $271.99 through $519.52 Select options This product has multiple variants. The options may be chosen on the product page
For the ultimate in space efficiency, consider trekking pole backpacking tents that often feature innovative vestibule designs that maximize storage while minimizing weight.
Troubleshooting Common Vestibule Challenges
Even with the best organizational system, certain challenges can arise when using vestibule storage. Here are solutions to common problems you might encounter during your camping adventures.
Condensation Management
Problem: Morning condensation dripping onto gear
Solution: Position water-sensitive equipment toward the center of the vestibule, away from walls where condensation forms. Use a small pack towel to wipe down vestibule interior during high humidity conditions.
Problem: Wet rainfly transferring moisture to stored items
Solution: Create a barrier between the rainfly and your gear using a dry bag or waterproof stuff sack. When possible, shake off the rainfly exterior before entering the vestibule.
Limited Space Challenges
Problem: Too much gear for a small vestibule
Solution: Implement a rotation system where less essential items are stored in your pack or elsewhere, bringing only currently needed items into the vestibule. Compress soft items like extra clothing to minimize volume.
Problem: Difficulty accessing items in cramped conditions
Solution: Organize by frequency of use, with most-needed items positioned closest to the door. Use clear or mesh containers to identify contents without unpacking everything.
Weather-Specific Challenges
Problem: Heavy rain causing water to enter the vestibule
Solution: Create a small drainage trench around the perimeter if camping regulations permit. Adjust ground cover to channel water away from gear and entry points.
Problem: High winds destabilizing vestibule organization
Solution: Lower stack heights, secure loose items in containers, and use the vestibule wall as a windbreak by positioning gear against it.
Problem: Snow accumulation around vestibule entrance
Solution: Create a “cold well” entrance by compacting and removing snow to form a lower entry area that contains snow and moisture.
Multi-Person Coordination
Problem: Conflicting organizational styles between tent mates
Solution: Designate personal zones within the vestibule and establish common areas for shared gear. Communicate about high-traffic periods when you’ll need access to your items.
For improved moisture management in challenging conditions, waterproof backpacking tents with enhanced vestibule designs can significantly reduce condensation issues and protect gear more effectively.
Real-World Scenarios: Vestibule Organization in Action
Understanding how vestibule organization works in specific situations helps you adapt these principles to your own adventures. Here are practical examples of organization systems tailored to common camping scenarios.
Weekend Backpacking in Rainy Conditions
When facing persistent precipitation, keeping gear dry becomes your primary organizational concern:
- Establish a ground system: Use a dedicated vestibule mat with waterproof backing
- Create a wet/dry division: Position a stuff sack as a physical barrier between zones
- Implement vertical storage: Hang a mini clothesline 30 inches (76 cm) high for wet socks and gloves
- Utilize rotation system: Move partially dried items closer to tent wall as they dry
- Maintain entry discipline: Keep center channel clear for access while containing water entry
Key gear: 10L dry bag for wet clothing, absorbent pack towel, 4 lightweight carabiners, 8ft (2.4m) of cord, vestibule mat
Family Car Camping with Multiple Tent Users
Managing a busy vestibule with children requires clear organization and accessibility:
- Create personal zones: Designate areas for each family member’s gear
- Implement container color-coding: Assign each person their own color for easy identification
- Establish traffic flow pattern: Keep high-use items near the entrance
- Use vertical space aggressively: Stack containers in stable formations against vestibule walls
- Create a footwear station: Designate a specific area for everyone’s shoes and boots
Key gear: Collapsible bins with lids, multiple stuff sacks in different colors, vestibule mat, headlamp or string lights for nighttime visibility
Solo Ultralight Backpacking
When every ounce counts, vestibule organization must be minimalist yet effective:
- Multipurpose ground cover: Use a folded pack towel as ground protection
- Strategic positioning: Place pack vertically against vestibule wall as organizational backbone
- Cooking equipment management: Store cooled equipment in pot with lid closed
- Simplified container system: Use just one small dry bag for essential items
- External attachment strategy: Utilize existing guylines for minimal drying needs
Key gear: Ultralight stuff sack, multi-purpose pack towel, 2 mini carabiners, trekking poles positioned to create additional hanging points
Winter Camping Considerations
Cold-weather camping demands specialized vestibule organization:
- Insulation foundation: Use foam pad section as ground protection with insulative properties
- Snow management strategy: Create dedicated area for snow-covered items to freeze/dry
- Quick-access system: Position essential gloves/hats for easy retrieval
- Bottle inversion technique: Store water bottles upside down to prevent freezing at the cap
- Emergency gear positioning: Keep crucial items like headlamp and extra layers closest to door
Key gear: Insulated sit pad as ground cover, stuff sacks with pull cords that can be operated with gloves, carabiners, small whisk broom for snow removal
For winter adventures that require specialized gear organization, understanding four-season tent features and benefits helps you choose equipment that integrates better with cold-weather organizational needs.
FAQ: Your Top Vestibule Organization Questions Answered
Safety Questions
Q: Is it safe to cook in a tent vestibule?
A: Generally, no. Cooking in enclosed or semi-enclosed tent spaces creates fire hazards and carbon monoxide risks that can be deadly. In extreme emergency conditions only, ensure maximum ventilation and keep flames away from all tent materials.
Q: How do I keep wildlife from investigating my vestibule?
A: Never store food, scented items, or cooking equipment with food residue in your vestibule. In bear country, follow local regulations for food storage using bear canisters or proper hang methods at least 100 feet (30m) from your tent.
Q: What’s the safest way to arrange gear for emergency exit?
A: Always maintain a clear path to your tent door with no obstacles that could trip you or block quick exit. Position your headlamp or flashlight in the same accessible location every night for consistency.
Technical Questions
Q: How do I organize my vestibule on sloped terrain?
A: Position items perpendicular to the slope when possible, use your backpack or other large flat items as a leveling platform, and place containers with secure closures downhill to prevent contents from spilling if they roll.
Q: How can I adapt organization to different vestibule shapes?
A: For A-frame vestibules, use the peaks for hanging and the wider base for ground storage. With dome-style vestibules, utilize the higher ceiling height for vertical organization. For minimal vestibules, prioritize essential gear and use your pack as the primary organizational structure.
Q: How do I prevent condensation from my breathing from affecting stored gear?
A: Position gear away from tent vents where warm, moist air exits. Use a small pack towel to wipe down problem areas in the morning, and consider a tiny battery-powered fan in humid conditions to improve air circulation.
Maintenance Questions
Q: What’s the best way to clean a dirty vestibule floor?
A: Use a small whisk broom for dry debris. For mud, allow it to dry completely before brushing off. For persistent dirt, a damp pack towel works for spot cleaning. Always fully dry before packing.
Q: How do I prevent odors from developing in my vestibule?
A: Ensure gear is fully dried before packing, store potentially smelly items like boots in well-ventilated mesh bags, and consider small portions of baking soda in breathable containers for persistent odors.
For the most efficient organization systems, ultralight backpacking tents often incorporate innovative vestibule designs that enhance storage while minimizing weight penalties.
Elevating Your Camping Experience: Beyond Basic Organization
A well-organized vestibule transcends simple tidiness—it fundamentally enhances your entire outdoor experience. When your gear is thoughtfully arranged, protected from the elements, and easily accessible, you spend less time searching for equipment and more time enjoying nature.
The psychological benefits are equally significant. Returning to an organized campsite after a long hike reduces stress and creates a sense of order in an otherwise unpredictable outdoor environment. This mental clarity extends to other aspects of your trip, from better decision-making to increased awareness of your surroundings.
Time savings represent another meaningful advantage. A systematic approach to vestibule organization can save 15-20 minutes during both setup and breakdown of camp—valuable time that adds up over multiple days in the backcountry. These efficiency gains become especially important during inclement weather or when daylight is limited.
Perhaps most importantly, proper organization protects your investment in quality gear. Equipment properly stored in vestibules remains cleaner, drier, and experiences less unnecessary wear. This protection extends the life of expensive outdoor equipment and ensures reliable performance when you need it most.
Well-organized vestibules also support Leave No Trace principles by containing gear and preventing sprawl across natural areas. By transforming your living space through thoughtful organization, you minimize your campsite footprint while maximizing comfort and functionality.
About Explore Elements’ Premium Tent Solutions
At Explore Elements, we design our tents with organization in mind from the very beginning. Our premium shelters feature vestibules engineered for optimal storage, with strategic attachment points, durable waterproof floors, and weather-resistant entry systems that keep your gear protected in all conditions.
Our design team extensively tests vestibule functionality across diverse environments—from desert heat to mountain snow—ensuring reliable performance regardless of your adventure destination. This real-world testing informs innovations like elevated vestibule floors, integrated pocket systems, and dual-access points that set our shelters apart.
The premium materials used in our vestibule construction deliver superior durability and weather resistance, with reinforced stake points and zipper guards that withstand the rigors of backcountry use. These thoughtful design elements come together in tents that serve as true base camps, not just sleeping quarters.
When you choose an Explore Elements tent, you’re investing in a shelter system engineered with organization as a core feature—not an afterthought. This integration of smart storage solutions with premium weather protection creates a foundation for better outdoor experiences, trip after trip.