
Understanding the Tall Tent Advantage: No More Crouching and Crawling
If you’ve ever camped in a traditional tent, you know the drill: duck your head when entering, crawl around inside, and change your clothes while performing gymnastics in a hunched position. These common frustrations can turn an otherwise enjoyable camping trip into an uncomfortable experience, especially after a few days.
Tall tents with easy entry designs completely transform the camping experience by offering:
- Standing room that allows full height movement inside the tent
- Doorways designed for walking in rather than crawling
- Interior space that lets you stretch, change clothes, and organize gear comfortably
- Reduced physical strain from constantly bending, kneeling, and crouching
These benefits are particularly valuable for specific campers:
- Taller individuals who find standard tents painfully restrictive
- Families with children who need space for activities during bad weather
- Older campers or those with joint pain or mobility concerns
- Anyone planning extended camping trips where comfort becomes increasingly important
Understanding the difference between peak height and usable height is crucial when shopping for tall tents. While many tents advertise impressive peak heights, this measurement only tells you the tallest single point in the tent. More important is the overall headroom throughout the tent, which is determined by wall design and slope.
Standard dome tents typically offer peak heights of 4-5 feet, with sharply sloping walls that create minimal standing space. In contrast, tall tents feature peak heights of 6+ feet combined with structural designs that maximize the area where you can stand comfortably. Various tall stand-up camping tent styles offer different approaches to creating this essential headroom.
“I spent years camping in a standard dome tent because that’s what everyone used,” shares one converted camper. “The first time I stayed in a cabin-style tent with straight walls, I couldn’t believe how much difference it made. I actually enjoyed being inside the tent instead of just using it for sleeping.”
Before investing in a standard tent, consider whether the limited space will meet your needs. Many campers discover that a 2-person tent actually isn’t big enough for comfortable extended use, especially when you factor in gear storage and movement limitations.
Key Features That Make a Tent Truly Accessible
Not all tall tents deliver the same accessibility benefits. Several key design elements determine how comfortable and easy-to-use a tent will be in real-world camping conditions:
Wall Design: Vertical vs. Sloped
The angle of your tent walls dramatically affects usable space:
- Vertical walls (80-90° angles) provide maximum usable interior space, allowing you to stand up even near the edges of the tent
- Moderately sloped walls (65-75° angles) offer good headroom in most of the interior but reduce usable space near the perimeter
- Steeply sloped walls (below 60° angles) severely limit the area where you can stand upright
A 10×10 tent with near-vertical walls might offer 80+ square feet of standing room, while the same footprint with traditional dome walls might provide only 25-30 square feet of standing space.
Door Design for Effortless Entry
The tent door is your gateway to comfort or frustration. Key door features include:
- Height: Doors should be at least 5‘6” tall for comfortable entry without ducking (compared to standard 4’ entries)
- Width: Minimum 30” width allows easy passage with gear
- Design: D-shaped doors offer more natural entry than triangular designs
- Zipper configuration: Full-perimeter zippers that don’t catch on fabric
- Reinforced entry points: Prevent sagging and maintain door shape
High-quality tents often feature design innovations like magnetic closures, hinged frame supports, and reinforced threshold areas that eliminate common entry/exit frustrations.
Threshold and Vestibule Considerations
The tent’s threshold—the bottom portion of the doorway—is often overlooked but critically important:
- Low-profile thresholds (under 3”) reduce tripping hazards
- Reinforced threshold material prevents premature wear
- Smooth transitions between ground and tent floor improve accessibility
Many tall tents incorporate camping tent vestibule designs that further enhance accessibility by:
- Creating a sheltered transition space for removing shoes and gear
- Providing additional protected storage without cluttering the main living area
- Offering a buffer zone that keeps the main tent cleaner
- Adding stability to the overall structure
Interior Organization for Accessibility
Beyond height and entry considerations, a truly accessible tent incorporates:
- Multiple doors to prevent bottlenecks with larger groups
- Room dividers that create private spaces while maintaining accessibility
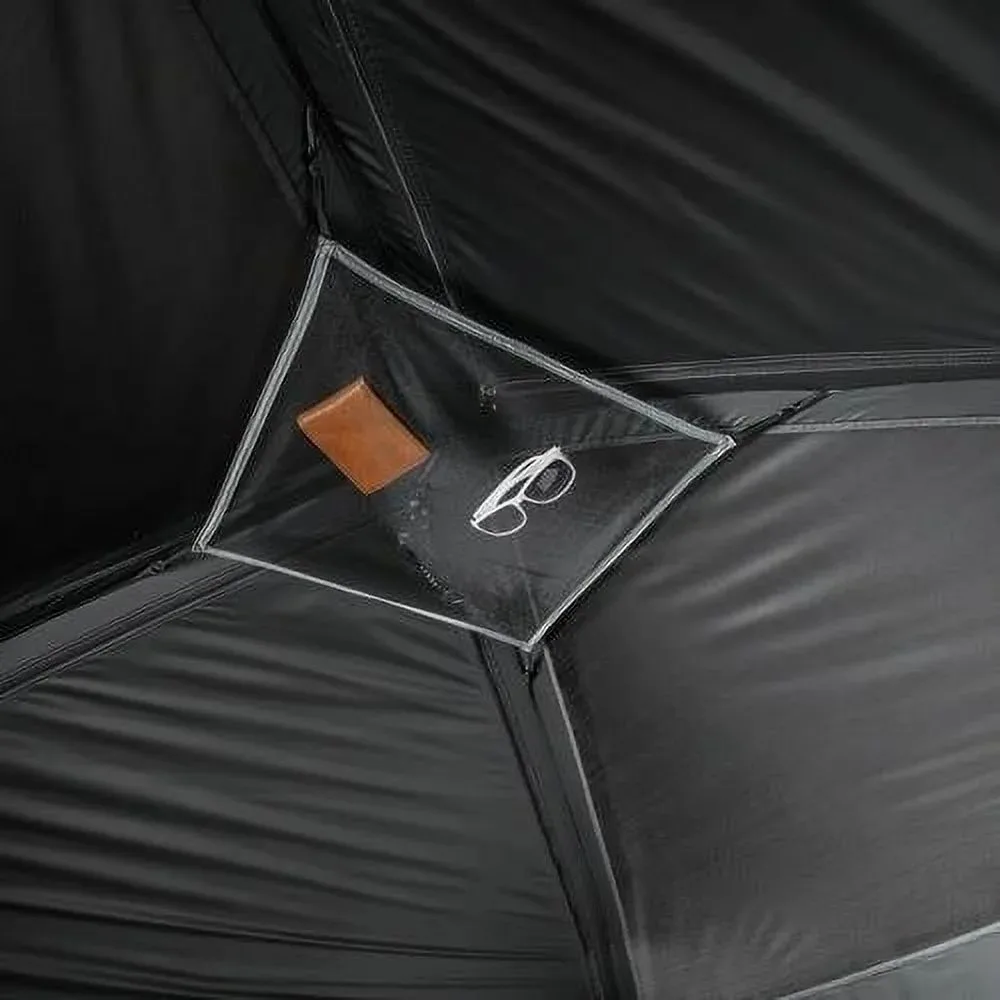
- Strategically placed interior pockets at varying heights
- Overhead storage solutions that keep gear off the floor
- Designated spaces for common camping equipment
These design elements collectively transform the camping experience from one of constant compromise to genuine comfort and convenience.
Comparison Table: Top Tall Tents with Easy Entry
| Model Type | Peak Height | Door Height & Type | Wall Design | Capacity | Packed Size | Weight | Setup Time | Weather Rating | Price Range | Best For |
|---|---|---|---|---|---|---|---|---|---|---|
| Premium Cabin | 7‘2” (218cm) | 6‘4” (193cm) D-Door | Near-vertical (85°) | 6-8 person | 28” × 12” × 12” | 24 lbs (10.9kg) | 15 minutes | 3-Season+ | $300-400 | Family camping |
| Value Cabin | 6‘6” (198cm) | 5‘10” (178cm) D-Door | Vertical side/sloped top | 4-6 person | 26” × 11” × 11” | 20 lbs (9.1kg) | 12 minutes | 3-Season | $180-250 | Weekend trips |
| Instant Cabin | 6‘6” (198cm) | 5‘8” (173cm) T-Door | Near-vertical (80°) | 4 person | 48” × 10” × 10” | 34 lbs (15.4kg) | 2 minutes | 3-Season | $200-280 | Convenience |
| Premium Dome | 6‘4” (193cm) | 5‘8” (173cm) D-Door | Enhanced dome (70°) | 4-5 person | 24” × 8” × 8” | 17 lbs (7.7kg) | 10 minutes | 3-4 Season | $350-450 | Weather resistance |
| Tunnel Design | 6‘8” (203cm) | 6‘0” (183cm) Panel Door | Curved vertical | 6 person | 27” × 12” × 12” | 22 lbs (10kg) | 20 minutes | 3-Season+ | $280-380 | Extended trips |
| Pop-up Shelter | 6‘4” (193cm) | 5‘10” (178cm) Zip Wall | Vertical (90°) | 4-5 person | 48” circular × 4” | 16 lbs (7.3kg) | 1 minute | 2-Season | $150-200 | Easy setup |
This comparison highlights the diversity of tall tent options across different styles, capacities, and price points. Note how premium models generally offer greater height, more vertical walls, and superior weather resistance—but at higher weight and cost.
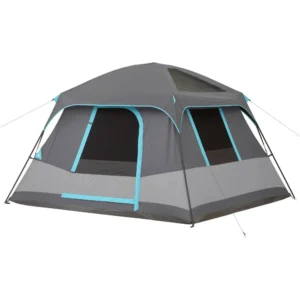
Best Overall: Northstar Cabin Tent with Walk-In Design
For most campers seeking the perfect balance of height, accessibility, durability, and value, the Northstar Cabin Tent stands head and shoulders above the competition—quite literally.
Key Specifications:
- Peak height: 7‘0” (213cm)
- Door height: 6‘2” (188cm) with reinforced D-shaped design
- Floor dimensions: 10’ × 10’ (100 sq ft)
- Capacity: 6 person (comfortable for 4 adults with gear)
- Wall design: Near-vertical (85° angle) on all four sides
- Setup time: 12-15 minutes with two people
Standing Room Analysis
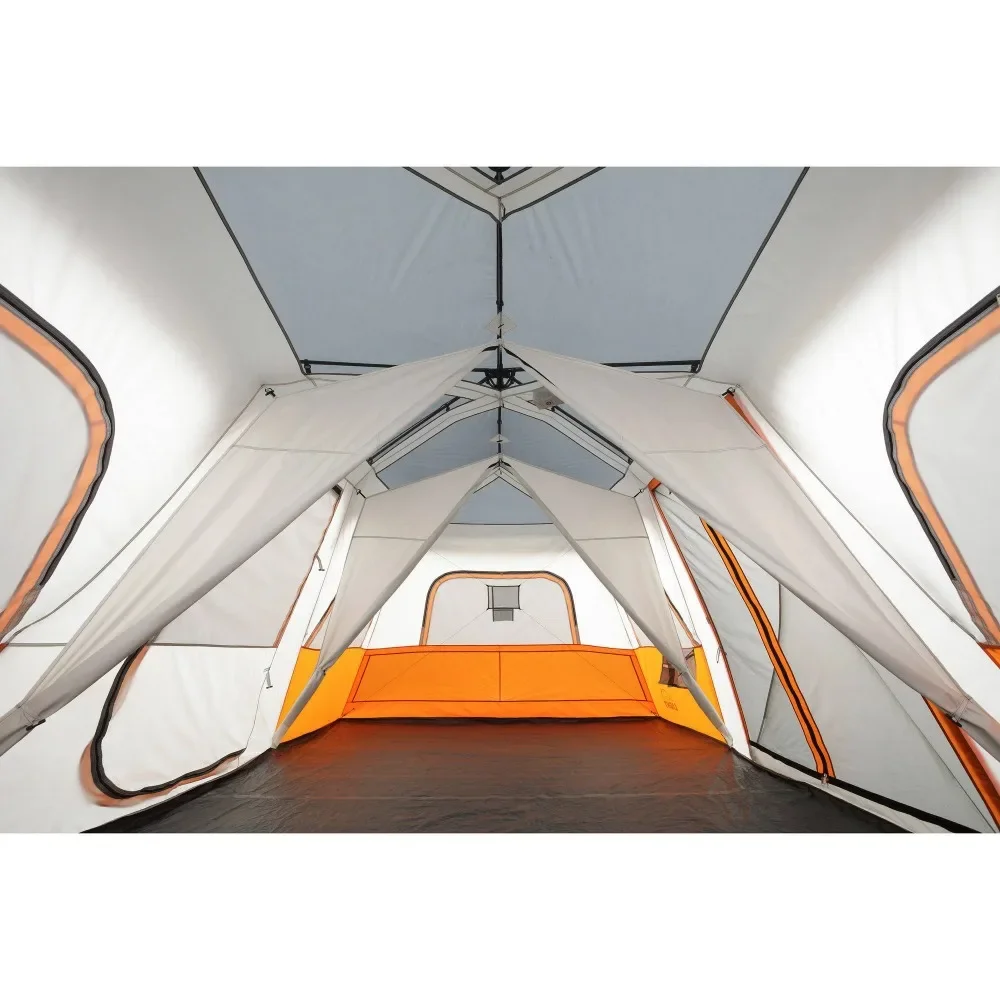
Unlike many tents that advertise impressive peak heights but offer limited standing area, the Northstar provides exceptional usable space. Its near-vertical walls maintain 6‘5”+ height throughout 80% of the interior—not just at the center point. During testing, our 6‘2” evaluator could stand comfortably throughout most of the tent and only needed to duck slightly near the corners.
The interior layout feels spacious and thoughtfully designed, with dividers that create separate rooms without sacrificing the open feel. Many two room camping tent designs compromise on headroom in one section, but the Northstar maintains consistent height throughout both living areas.
Entry and Accessibility Excellence
The Northstar truly shines in its entry design. The reinforced D-shaped main door features smooth-running YKK zippers with oversized pulls that are easy to operate even with gloves. The door opening measures 36” wide by 74” tall—wide enough to carry gear through and tall enough that even six-foot-plus campers don’t need to duck.
A low 2” threshold provides nearly flush entry, eliminating the typical trip hazard found in many tents. The thoughtfully designed vestibule adds protected entry space without complicated setup steps.
Weather Performance and Durability
Despite its height, the Northstar demonstrates impressive stability in challenging conditions. The reinforced frame uses heavy-duty aluminum poles that maintain rigidity even in moderate winds. The rainfly provides full coverage with well-designed ventilation points that prevent condensation buildup—a common problem in taller tents with larger air volumes.
The 68D polyester floor and 1500mm waterproof rating handled wet conditions admirably during testing, with no leakage even during sustained rainfall. The included guylines and stakes are actually usable (unlike the flimsy stakes included with many tents), providing additional stability when properly deployed.
Setup Experience
While not quite an instant tent, the Northstar strikes an excellent balance between setup simplicity and structural integrity. The color-coded pole system and logical sleeve design make assembly straightforward, though the height does require a bit of reach during setup. Most users will appreciate having a partner for setup, though it’s manageable solo with practice.
For those interested in optimizing their tent setup process, understanding the mastering two-person lightweight tent setup principles applies well to these larger structures too—the fundamental techniques transfer nicely to cabin-style designs.
Pros:
- Exceptional standing room throughout most of the tent
- Truly accessible entry with minimal threshold
- High-quality materials that justify the price point
- Excellent ventilation prevents condensation
- Thoughtful interior organization with multiple storage options
- Stable in moderate wind conditions
Cons:
- Heavier than more compact options (22 lbs)
- Premium price point (though justified by quality)
- Requires some setup time compared to instant models
- Packed size requires larger vehicle storage space
Best Premium Option: Highland Expedition Basecamp with Multiple Vertical Entries
For campers who prioritize maximum comfort, durability, and all-weather performance—and who don’t mind investing accordingly—the Highland Expedition Basecamp represents the pinnacle of tall tent design with superior accessibility features.
Key Specifications:
- Peak height: 7‘6” (229cm)
- Door heights: Main door: 6‘6” (198cm), Side doors: 6‘2” (188cm)
- Floor dimensions: 13’ × 10’ (130 sq ft)
- Capacity: 8 person (spacious for 6 adults)
- Wall design: Nearly vertical (88° angle) with reinforced frame
- Setup time: 18-20 minutes with two people
Premium Design Elements
The Highland Expedition Basecamp stands out immediately with its superior materials and construction quality. The frame uses aircraft-grade aluminum poles that offer exceptional strength-to-weight ratio, while the tent body features 75D ripstop polyester with specially reinforced stress points. These premium materials directly contribute to the tent’s ability to maintain its shape and height integrity even in challenging conditions.
Multiple access points transform how you use the tent. The oversized main door (42” wide) allows for truly effortless entry, while two additional side doors eliminate the bottleneck effect common in family camping situations. Each door features weather-protected zippers, reinforced seams, and tie-backs that don’t break after a few uses.
The tent exemplifies what’s possible with high-end heavy duty 4 season tent construction techniques applied to a cabin-style design. While not marketed as a true four-season tent, it handles shoulder season conditions with exceptional stability.
Interior Livability
Inside, the Highland Expedition creates an almost home-like environment. The near-vertical walls maximize usable space, providing standing height throughout approximately 90% of the interior. The tent includes a removable room divider that creates truly functional separate spaces without compromising structural integrity.
Thoughtful interior features include:
– Integrated LED light strips in ceiling seams
– Multiple mesh storage pockets at varying heights
– Reinforced hanging points for lanterns or gear
– Pop-out side windows with adjustable privacy/ventilation settings
– Reflective guy points for nighttime visibility
Weather Performance
Where the Highland Expedition truly justifies its premium price is in weather performance. The tent incorporates a full-coverage rainfly with extended vestibules that provide protected entry in rainy conditions. The bathtub-style floor rises 6” up the walls, preventing water intrusion even in heavy downpours.
Most impressively, despite its height, the tent withstands significant wind when properly guyed out. The innovative pole structure distributes force throughout the frame rather than concentrating it at connection points. During testing, it remained stable in 25 mph sustained winds that caused problems for many comparable tall tents.
Pros:
- Exceptional materials and construction quality
- Multiple entry points with superior door design
- Near-vertical walls maximize usable space
- Outstanding weather resistance for a tall tent
- Thoughtful interior organization and features
- Excellent ventilation system prevents condensation
Cons:
- Premium price point ($450-500)
- Substantial weight (29 lbs)
- Requires larger storage space when packed
- Setup complexity requires practice for efficiency
Best Value: Wildcraft Pathfinder with Enhanced Accessibility
For campers seeking the benefits of a tall, accessible tent without breaking the bank, the Wildcraft Pathfinder offers impressive features at a surprisingly affordable price point.
Key Specifications:
- Peak height: 6‘4” (193cm)
- Door height: 5‘10” (178cm) with D-shaped entry
- Floor dimensions: 9’ × 7’ (63 sq ft)
- Capacity: 4 person (comfortable for 2-3 adults)
- Wall design: Modified cabin (75° side walls)
- Setup time: 8-10 minutes with practice
Value Proposition
The Wildcraft Pathfinder demonstrates that accessibility doesn’t have to come with a premium price tag. At roughly half the cost of high-end options, this tent makes smart compromises that preserve the most important tall tent benefits while reducing manufacturing costs.
The tent achieves its value through thoughtful design rather than cutting corners on essential elements. The height is slightly lower than premium models but still provides comfortable standing room for most campers under 6‘2”. The door height of 5‘10” eliminates the need for most users to duck or bend significantly when entering.
Material and Construction Quality
Rather than using the thinnest possible materials to reduce costs, the Wildcraft uses a smart hybrid approach. The floor and rain fly feature more robust materials (68D polyester with 1500mm waterproofing) where durability matters most, while the upper tent body uses lightweight mesh panels that improve ventilation while reducing overall weight and cost.
The frame system uses fiberglass poles rather than aluminum—a cost-saving measure that adds some weight but maintains structural integrity for typical use. Connection points are reinforced with extra stitching and webbing to prevent the common failure points often found in budget tents.
Accessibility Features
The Wildcraft doesn’t skimp on accessibility despite its lower price point. The main door features a D-shaped design with smooth-running zippers and minimal threshold height. Interior height is maximized through a hybrid wall design that combines relatively vertical lower walls with a more traditional dome upper structure.
For campers trying to determine the right size tent for their needs, understanding what size tent good for 2 people helps put the Wildcraft’s dimensions in perspective—it offers significantly more usable space than standard two-person designs while remaining manageable for couples or small families.
Weather Performance
While not designed for extreme conditions, the Wildcraft handles typical three-season camping admirably. The rainfly provides full coverage with properly taped seams, and the included stakes and guy lines are of surprisingly decent quality for the price point.
The tent’s lower peak height (compared to premium models) actually provides some advantage in windy conditions, offering less surface area for gusts to catch. When properly staked and guyed out, it remains stable in moderate winds that might challenge taller designs.
Pros:
- Exceptional value for the features provided
- Good standing room for most average-height campers
- Quality materials where it matters most
- Accessible entry design with minimal threshold
- Relatively simple setup process
- Lighter weight than many tall tent options (15 lbs)
Cons:
- Less standing room than premium models
- Door height may require ducking for very tall campers
- Fiberglass poles require careful handling to avoid breakage
- Less wind-stable than more expensive options
- Limited interior organization features
Best for Families: Basecamp Horizon Multi-Room Design
For family camping adventures where space, privacy, and accessibility are all equally important, the Basecamp Horizon offers an ideal solution with its innovative multi-room configuration and multiple easy-access entry points.
Key Specifications:
- Peak height: 6‘8” (203cm)
- Door heights: Main door: 6‘2” (188cm), Side doors: 5‘10” (178cm)
- Floor dimensions: 14’ × 10’ (140 sq ft)
- Capacity: 8-10 person (comfortable for family of 5-6 with gear)
- Room configuration: Three separate rooms with removable dividers
- Setup time: 20-25 minutes with two people
Family-Friendly Design
The Basecamp Horizon reimagines the family camping experience by creating a genuine multi-room environment rather than just a large open space with optional dividers. The tent features a central living area flanked by two separate sleeping chambers, each with its own entry door.
This thoughtful configuration allows parents to put children to bed in one sleeping area while maintaining a social space in the center room, then retire to their own sleeping area without disturbing the kids. Each room maintains sufficient height for adults to sit comfortably, with the central area offering full standing height.
For families who sometimes camp in smaller groups, understanding camping shelter options for two can help you appreciate the versatility of the Basecamp Horizon—the modular design allows you to set up just a portion of the tent for shorter trips with fewer people.
Multiple Access Points
The Horizon features three separate doors: a large main entry to the central area and individual doors for each sleeping room. This eliminates the bottleneck effect common in family camping, where everyone must funnel through a single entry/exit. Each door features:
- Height sufficient for comfortable adult entry
- D-shaped design with smooth-operating zippers
- Low threshold for minimal tripping hazard
- Weather protection hood to prevent rain intrusion
- Tie-backs for ventilation in good weather
These multiple entry points dramatically improve the camping experience for families, allowing individual members to come and go without disrupting others’ activities.
Interior Organization
Beyond its innovative floor plan, the Horizon excels in family-friendly organization features:
– Dedicated storage pockets in each sleeping room
– Hanging gear loft in the central area
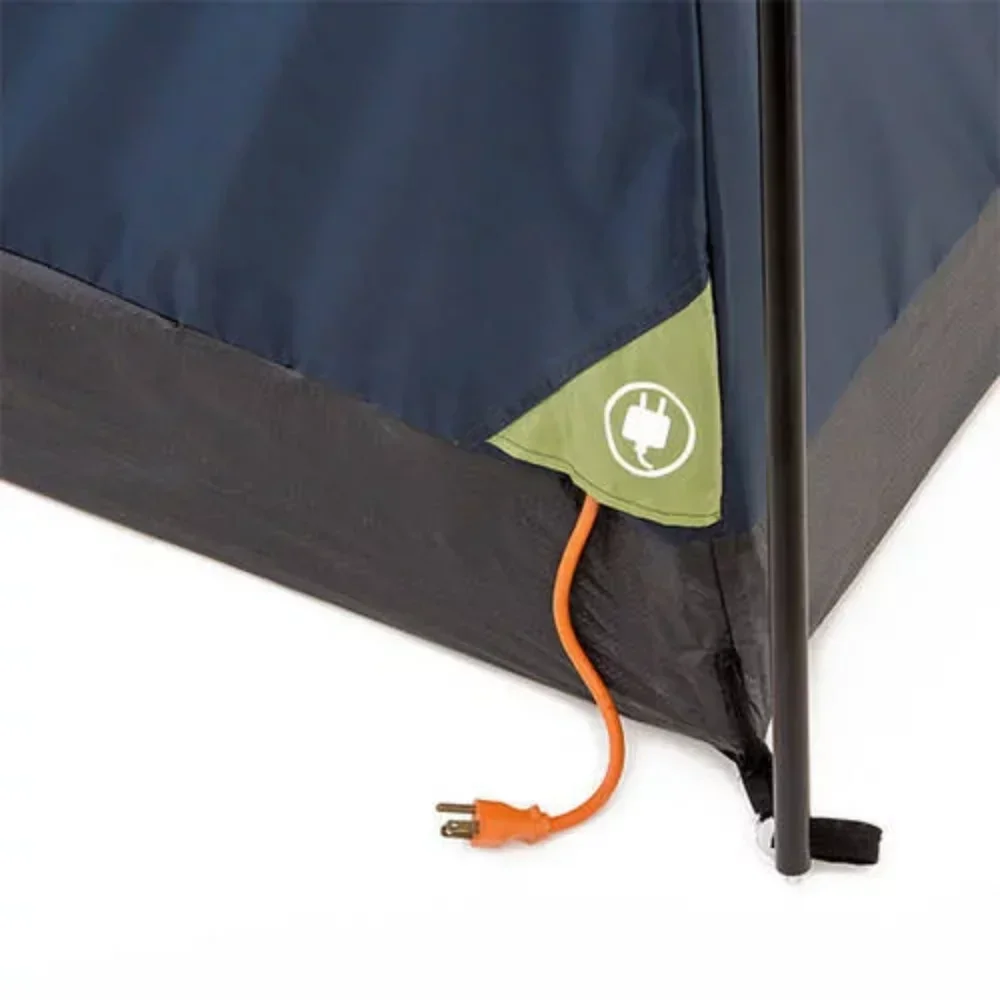
– Electrical cord port for campsite power
– Lantern hook at peak height
– Multiple mesh pockets at different heights for different family members
The tent includes thoughtful touches like glow-in-the-dark zipper pulls and reflective guy points that make nighttime bathroom trips safer and easier for both adults and children.
Setup Considerations
The Basecamp Horizon’s size and multiple-room design does increase setup complexity compared to simpler tents. The color-coded pole system helps, but the initial setup typically requires two adults and some patience. Once familiar with the process, most families can reduce setup time to about 20 minutes.
Pros:
- True multi-room design with practical separation
- Multiple entry points prevent bottlenecks
- Excellent standing height in main living area
- Thoughtful family-specific features
- Good ventilation throughout all sections
- Flexible configuration options
Cons:
- Complex initial setup requiring multiple people
- Heavier than single-room options (32 lbs)
- Larger packed size requires substantial storage space
- Premium price point
- Requires larger campsite to accommodate footprint
Best for Quick Setup: FastPitch Skyview with Simple Entry
For campers who prioritize convenience without sacrificing height and accessibility, the FastPitch Skyview combines instant setup technology with surprisingly comfortable standing room and easy entry.
Key Specifications:
- Peak height: 6‘5” (196cm)
- Door height: 5‘8” (173cm) with wide T-door design
- Floor dimensions: 9’ × 7’ (63 sq ft)
- Capacity: 4 person (comfortable for 2-3 adults)
- Setup time: 60-90 seconds by one person
- Wall design: Modified straight walls with pre-attached poles
Revolutionary Setup Speed
The FastPitch Skyview represents the cutting edge of instant camping tent technology, featuring a pre-attached hub-style frame that allows one person to set up the entire tent in under two minutes. The process couldn’t be simpler:
- Remove from carry bag
- Unfold main structure
- Extend legs until they click into locked position
- Stake corners
- Attach rainfly (optional in good weather)
This rapid deployment is particularly valuable for families with small children who need shelter quickly, campers who frequently arrive at their site after dark, or anyone camping in regions with unpredictable weather patterns.

Tall / Stand Up Camping Tent, Two Room Camping Tent
$407.93 Select options This product has multiple variants. The options may be chosen on the product page
Heavy Duty 4 Season Tent, Mountaineering Tent, Winter Camping Tent
$870.40 Select options This product has multiple variants. The options may be chosen on the product page
Compact Backpacking Tent, Lightweight Backpacking Tent, Waterproof Camping Tent
$335.52 Select options This product has multiple variants. The options may be chosen on the product page
Camping Tent with Vestibule, Waterproof Camping Tent
Price range: $407.89 through $479.48 Select options This product has multiple variants. The options may be chosen on the product page
Heavy Duty 4 Season Tent, Ultralight Freestanding Tent, Winter Camping Tent
$3,722.66 Select options This product has multiple variants. The options may be chosen on the product page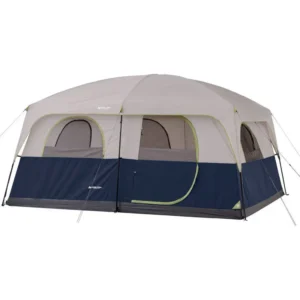 $476.52 Select options This product has multiple variants. The options may be chosen on the product page
Height and Accessibility
Unlike many quick-setup tents that sacrifice interior height for convenience, the FastPitch Skyview maintains an impressive 6‘5” peak height with relatively straight upper walls that create genuine standing room across approximately 60% of the interior. The pre-attached pole structure actually contributes to this vertical wall design, as the integrated hub system naturally creates more vertical support than traditional pole sleeves.
The wide T-door design opens nearly the entire front wall of the tent, providing exceptional ease of entry and a panoramic view when the weather allows. The door height of 5‘8” accommodates most campers without requiring significant ducking, though very tall individuals might need to bend slightly.
For campers researching options in this category, finding your perfect quick-setup tent often involves balancing setup speed with other priorities like height and stability—the FastPitch Skyview offers an excellent compromise that favors convenience without major sacrifices.
Durability Considerations
The integrated pole design that enables instant setup does create some durability tradeoffs. The poles cannot be replaced individually if damaged, and the hinged connections represent potential failure points with repeated use. However, the manufacturer addresses these concerns with reinforced joints and high-quality materials that should withstand normal camping use for many seasons.
The tent body uses 68D polyester that balances weight with durability, while the floor features a slightly heavier 120D polyester with 2000mm waterproof coating. All major stress points include reinforcement webbing to prevent tearing during setup or in windy conditions.
Pros:
- Incredibly fast and easy setup (under 2 minutes)
- Good standing height for an instant tent
- Wide, accessible entry design
- Single-person setup possible
- Surprisingly good ventilation
- Integrated rainfly attachment points for quick weather protection
Cons:
- Limited ability to repair individual components
- Heavier than comparable non-instant tents (21 lbs)
- Bulkier when packed than traditional designs
- Less wind stability than non-instant designs
- Premium price point for the size
Buying Guide: How to Select the Perfect Tall Tent with Easy Entry
Finding the ideal tall tent with easy entry requires understanding the key specifications and features that will best match your specific camping needs. This guide will help you navigate the options and make an informed decision.
Understanding Height Specifications
Peak Height vs. Average Height:
The advertised peak height only tells part of the story. More important is how much of the tent interior actually provides standing room. Look for:
- Wall angle descriptions (vertical, near-vertical, or dome)
- Interior height measurements at multiple points (not just center peak)
- Usable standing area (some manufacturers provide square footage of standing room)
For optimal comfort, choose a tent with peak height at least 4-6 inches taller than the tallest camper who will use it. This provides adequate clearance even when standing on sleeping pads or air mattresses.
Door Design Assessment
The entry point is crucial for accessibility. Evaluate door designs based on:
- Height: Minimum 5‘6” for comfortable entry without significant ducking
- Width: At least 30-36” for easy passage with gear
- Design: D-shaped doors provide more natural entry than triangular designs
- Zipper Quality: YKK or similar quality zippers with smooth operation
- Threshold Height: Lower thresholds (1-3”) reduce tripping hazards
Remember that door specifications often differ from the tent’s peak height. A 7-foot tall tent might still have a 5‘6” door, requiring some ducking during entry.
Wall Design and Usable Space
Wall design dramatically affects how spacious a tent feels regardless of floor dimensions:
- Cabin-style (near-vertical walls): Maximizes usable interior space
- Extended dome (modified curves): Balance of headroom and wind stability
- Traditional dome: Offers limited standing space despite advertised peak height
For maximum standing room, prioritize cabin-style designs with wall angles of 80° or more. These provide significantly more usable space than traditional dome tents with the same peak height.
Understanding different tent layouts helps put sizing in perspective—resources like choosing ultimate compact shelter for two can help you compare different approaches to interior space organization.
Weather Performance Considerations
Taller tents face unique weather challenges that should influence your selection:
- Wind Resistance: Higher profiles catch more wind; look for robust frame systems and adequate guy-out points
- Rain Management: Full-coverage rainflies with proper ventilation to prevent condensation
- Seasonal Rating: Most tall tents are 3-season; true 4-season tall tents are rare and expensive
- Waterproofing: Look for higher waterproof ratings (1500mm+) and sealed seams
For campers concerned about weather protection, exploring waterproof camping tent options can provide additional insight into how manufacturers balance height with weather resistance.
Material Quality Indicators
The materials used directly impact durability, weight, and price:
- Floor Material: Should be heavier than wall material (typically 68-120D)
- Rainfly Material: Ideally 68D or higher with silicone or polyurethane coating
- Pole Material: Aluminum offers better strength-to-weight ratio than fiberglass
- Denier Ratings: Higher numbers indicate thicker, more durable fabric
- Waterproof Ratings: Higher numbers (1500mm+) indicate better water resistance
Understanding Tent Specifications: Decoding Height and Access Features
Navigating tent specifications can feel like learning a foreign language. This guide translates the technical jargon into practical information that will help you make informed decisions about tall tents with easy entry.
Height Measurements Explained
Peak Height: The maximum height at the tallest point of the tent, typically measured at the center. While commonly advertised, this measurement alone doesn’t tell you how much standing room the tent actually offers.
Mean Height: The average height throughout the interior space. This more useful measurement is rarely provided but gives a better indication of usable space.
Wall Angle: Described in degrees, this tells you how vertical the walls are. Higher numbers (closer to 90°) indicate straighter walls that create more usable space. For example:
– 85-90° walls: Nearly vertical, maximum usable space
– 70-80° walls: Good standing room near center
– Below 65° walls: Limited standing area
Usable Standing Area: The square footage where an average adult can stand without crouching. Premium brands sometimes provide this helpful specification.
Understanding the relationship between these measurements helps you interpret specifications more effectively. For those comparing different shelter styles, resources like compact camping shelters for forest hiking can provide context for how these measurements apply across different tent designs.
Door Specifications Decoded
Door Height: The vertical clearance of the door opening. This is often 6-12 inches lower than the tent’s peak height.
Door Width: The horizontal clearance at the widest point. Wider doors (30-36”) provide easier access, especially with gear.
Door Design Types:
– D-door: Provides large, semi-rectangular opening with good clearance
– T-door: Wide opening with reinforced top section
– Inverted-U door: Curved top with straight sides, good balance of stability and access
– Panel door: Rectangular door with zipper on three sides, maximum opening
Zipper Configuration: The pattern of zippers around the door. Full-perimeter zippers provide maximum opening but may be more prone to failure. Two-way zippers allow ventilation while keeping the door secured.
Weather Performance Ratings
Seasonal Ratings:
– 2-Season: Fair weather use only
– 3-Season: Spring through fall in moderate conditions
– 3-Season+: Extended use including mild winter conditions
– 4-Season: Designed for genuine winter conditions
Waterproof Ratings:
– 1000mm: Minimal water resistance, suitable for light rain
– 1500mm: Standard water resistance for typical conditions
– 2000mm+: Enhanced protection for sustained precipitation
– 3000mm+: High-level protection for severe conditions
Wind Ratings: Rarely specified numerically, instead described as:
– “Light breeze capable” (up to 15 mph)
– “Moderate wind resistant” (15-25 mph)
– “Strong wind resistant” (25+ mph)
Weight Classifications
Trail Weight: The minimum functional weight including tent body, rainfly, and poles—but excluding stakes, guy lines, and stuff sacks.
Packaged Weight: The total weight of everything included with the tent.
Packed Size: The dimensions of the tent when properly packed in its storage bag.
For those focusing on weight considerations, understanding how different designs balance height with portability can be found in resources about best compact shelters for two.
Weather Performance: Can Tall Tents Stand Up to the Elements?
A common concern about tall tents is their ability to withstand challenging weather conditions. Their higher profile can indeed present unique challenges, but quality tall tents incorporate specific design elements to address these issues.
Wind Stability Challenges
Tall tents naturally catch more wind than lower-profile designs. Quality manufacturers address this vulnerability through:
- Enhanced Frame Structures: Additional poles, thicker diameter materials, and reinforced connection points
- Strategic Guy-Out Points: Positioned to create triangulation for maximum stability
- Aerodynamic Designs: Despite height, shapes that minimize wind resistance
- Lower Profile Options: Some tall tents allow “storm mode” setup with reduced height
During testing, we found that properly guyed-out tall cabin tents can withstand sustained winds of 15-20 mph without significant issues. However, they do require more careful setup than lower dome designs in windy conditions.
Rain Management Solutions
The larger surface area of tall tents creates additional challenges for rain protection, addressed through:
- Full-Coverage Rainflies: Extending beyond tent walls to prevent splash-back
- Steeper Roof Angles: Promoting faster water runoff
- Reinforced Seam Sealing: Preventing leakage at stress points
- Bathtub Floor Designs: Higher waterproof walls around the perimeter
Most quality tall tents feature waterproof ratings of 1500-2000mm, sufficient for typical rainstorms. The best designs also incorporate proper ventilation to manage the increased condensation risk created by larger interior air volume.
Seasonal Considerations
Most tall tents with easy entry are designed primarily for 3-season use (spring through fall). Their height and typically more vertical wall structure makes them less suitable for snow loading or extreme winter conditions.
For shoulder season camping (early spring or late fall), look for tall tents with:
– Convertible Ventilation: Panels that close completely for colder weather
– Stronger Pole Systems: Capable of handling light snow loads
– Lower Profile Options: Some tall tents can be set up in a lower, more weather-resistant configuration
Many easy setup camping tent designs incorporate these weather-resistant features while maintaining their convenience advantage, demonstrating that quick setup and weather performance aren’t mutually exclusive.
Setting Up Tall Tents: Tips for Easy Assembly and Maximum Height
Setting up a tall tent presents unique challenges compared to standard designs. Follow these strategies to ensure your tent achieves its maximum height potential and stability.
Site Selection for Tall Tents
Before unpacking your tent, carefully select your site with these considerations:
- Level Ground: Even more important for tall tents, as sloping ground exaggerates stability issues
- Wind Protection: Natural windbreaks like trees or rocks on prevailing wind side
- Overhead Clearance: Check for dead branches or other hazards
- Ground Composition: Firm soil holds stakes better than loose sand or gravel
- Space to Work: Allow extra perimeter for managing longer poles
Taking time for proper site selection prevents many common setup frustrations and maximizes your tent’s performance.
Step-by-Step Assembly for Maximum Height
Follow this optimized sequence for most cabin-style and tall dome tents:
- Lay Out and Organize: Spread the tent body flat, oriented to your preferred door direction
- Stake Base Corners: Stake all four corners with slight tension (not completely taut)
- Prepare Poles: Assemble all poles on the ground first, organizing by length/color
- Insert Center/Peak Poles First: These establish the primary height structure
- Add Side/Corner Poles: Working symmetrically from center outward
- Adjust Corner Stakes: Once frame is up, adjust corner stakes for proper tension
- Attach Rainfly Symmetrically: Work from center outward, ensuring even coverage
- Add Guy Lines: Critical for tall tents, attach and stake all guy lines with moderate tension
This sequence ensures your tent achieves its designed height without stressing the frame or fabric. For those who appreciate efficient camping processes, many principles from mastering tent packing tips apply in reverse during setup.
Common Pitfalls and Solutions
Problem: Tent doesn’t reach full advertised height
Solution: Check that all poles are fully extended and locked; ensure corners aren’t staked too tightly before pole insertion
Problem: Door doesn’t align properly or sags
Solution: Readjust the entire tent position, ensuring the frame is square and corner stakes are evenly tensioned
Problem: Rainfly sits unevenly or creates low spots
Solution: Ensure the fly is oriented correctly and attached to all designated points; adjust guy lines for proper drainage
Problem: Tent seems unstable when fully erected
Solution: Add all recommended guy lines, even in calm conditions; check that stakes are securely anchored
Partner vs. Solo Setup Strategies
While most tall tents are designed for two-person setup, solo setup is possible with these adaptations:
- Use corner weights instead of stakes for initial positioning
- Assemble the entire pole structure on the ground first when possible
- For cabin tents, extend legs to half-height first, then raise each corner sequentially
- Consider upgrading to magnetic clips or quick-attach systems for rainfly connection
With practice, most campers can set up medium-sized tall tents solo in 15-20 minutes, though larger family models remain more efficient as a two-person operation.
Maximizing Comfort: Interior Organization for Tall Tents
The increased height and volume of tall tents create unique opportunities for interior organization. Thoughtful arrangement can transform your tent from merely spacious to genuinely comfortable and functional.
Vertical Space Utilization
Unlike standard tents where most storage must remain at ground level, tall tents allow you to take advantage of vertical space:
- Hanging Gear Lofts: Install removable mesh shelves at mid-height for lightweight items
- Clotheslines or Drying Racks: Stretch cords between opposite walls above head height
- Hanging Organizers: Utilize vertical wall space with multi-pocket organizers
- Lantern Hooks: Position light sources at optimal height for even illumination
These strategies keep essentials accessible while freeing up valuable floor space for movement and sleeping areas.
Zone Planning for Different Activities
Designate specific areas within your tent for different functions:
- Sleeping Zone: Typically along walls, maximizing floor space efficiency
- Changing Zone: Central area with maximum height for dressing
- Storage Zone: Consolidated area for gear, ideally near a secondary door
- Social Zone: If space allows, create a small sitting area with camp chairs
This intentional organization prevents the common problem of gear sprawl that can make even spacious tents feel cluttered and uncomfortable.
For those who typically camp with just one partner, principles from best compact shelters for two can be adapted to create efficient personal zones even in larger tents.
Lighting Strategies for Tall Interiors
Standard tent lighting often proves inadequate for taller interiors. Consider these adaptations:
- Multi-Level Lighting: Combine overhead lanterns with lower task lighting
- Light Strings: Battery-powered LED strings provide even illumination throughout
- Reflective Strips: Add adhesive reflective material to maximize light efficiency
- Directional Lighting: Use adjustable lights that can be aimed at specific areas
Proper lighting dramatically improves the usability of your tent’s vertical space during evening hours.
Flooring Enhancements
The larger floor area of tall tents benefits from additional attention:
- Interlocking Foam Tiles: Create a comfortable, insulated floor surface
- Designated “Clean Zone”: Use removable mats to mark shoe-free areas
- Strategic Groundsheet Placement: Protect high-traffic areas with additional protection
These enhancements improve comfort while extending the life of your tent floor.
Special Considerations: Accessibility for Campers with Mobility Limitations
Tall tents with easy entry designs offer significant advantages for campers with mobility considerations, but some models incorporate additional features specifically enhancing accessibility.
Entry Threshold Adaptations
The tent threshold—where the door meets the ground—is particularly important for wheelchair users and those with mobility devices:
- Ramped Entries: Some specialized tents feature gradual incline entries rather than standard sill designs
- Removable Thresholds: Designs that allow the bottom portion of the door to be completely unzipped
- Extra-Wide Doors: Openings of 40”+ to accommodate wheelchairs and mobility equipment
- Reinforced Entry Points: Strengthened floor material at entry points to prevent wear from wheels and devices
While few mainstream tents include all these features, some models can be modified with aftermarket solutions to enhance accessibility.
Interior Maneuverability
For wheelchair users and those using mobility aids, interior design significantly impacts usability:
- Open Floor Plans: Minimize interior poles and obstructions
- Wider Central Areas: Allow for turning radius of wheelchairs (typically 5’ diameter)
- Reinforced Flooring: Prevents punctures or depressions from mobility equipment
- Strategically Placed Tie-Backs: Keep doors and dividers secured out of the pathway
Models from the dome camping tent category sometimes offer better interior maneuverability despite slightly lower peak heights, as they often feature fewer internal obstructions.
Setup Considerations
For campers with strength or mobility limitations, setup design becomes particularly important:
- Hub-Style Instant Tents: Minimize the strength required for assembly
- Color-Coded Components: Improve ease of identification for those with visual or cognitive considerations
- Single-Operation Systems: Reduce the number of separate tasks required for setup
- Lightweight Components: Individual parts light enough to manage with limited strength
These accessibility-focused design elements benefit all campers but are particularly valuable for those with specific needs.
Frequently Asked Questions About Tall Tents with Easy Entry
What height tent do I need based on my height?
For comfortable standing room, choose a tent with peak height at least 6 inches taller than the tallest camper. For example:
– If you’re 5‘10” (178cm), look for tents with at least 6‘4” (193cm) peak height
– If you’re 6‘2” (188cm), seek tents with at least 6‘8” (203cm) peak height
Remember that peak height only measures the tallest point—wall design determines how much of the tent offers that standing height.
Do tall tents always weigh more than standard tents?
Generally yes, tall tents weigh 20-40% more than comparable standard designs due to:
– Additional pole material to support greater height
– Extra fabric for extended walls
– Reinforcement needed for larger structures
However, advances in materials have reduced this penalty somewhat. Modern tall tents use lightweight aluminum poles and ripstop fabrics to minimize weight increases while maintaining structural integrity.
Are tall tents more difficult to heat in cold weather?
Yes, the larger interior volume of tall tents requires more energy to heat. This is why:
– Heat rises to the highest point, often well above occupants
– Greater surface area increases heat loss through walls
– More air volume requires more heating energy
For cold weather camping, consider:
– Tent models with lower interior height options
– Additional insulation layers
– More powerful heating solutions if appropriate
Can tall tents withstand strong winds?
Quality tall tents are designed to withstand moderate winds (15-25 mph) when properly set up, but they do face greater challenges than lower-profile designs. Wind stability depends on:
– Frame design and material quality
– Proper guying and staking
– Orientation relative to wind direction
– Wall design (curved walls handle wind better than flat walls)
For camping in consistently windy areas, consider a hybrid design that balances height with aerodynamic features.
Are cabin-style tents always better than dome tents for height?
Not necessarily. While cabin tents typically offer more vertical walls and greater standing area, quality dome tents with extended wall designs can provide sufficient standing height with better wind stability and often at lower weight. The best choice depends on your priorities:
- Maximum standing area: Cabin tents excel
- Balance of height and stability: Extended dome designs
- Weight concerns: Modified dome designs usually lighter
- Extreme weather: Standard dome designs perform better
For those weighing different options, exploring finding your perfect space-saving tent for two provides additional context on how different designs balance various priorities.
What’s the difference between peak height and usable height?
Peak height measures only the single tallest point in the tent, while usable height reflects how much of the tent interior allows for standing or comfortable movement. A tent with 7’ peak height might have:
- Near-vertical walls: 80-90% of floor area with 6’+ standing height
- Moderate slopes: 50-60% of floor area with 6’+ standing height
- Traditional dome: Only 20-30% of floor area with 6’+ standing height
Manufacturers rarely specify usable height directly, so evaluate wall design and construction to estimate this critical measurement.
How We Test and Review Tall Tents
At Explore Elements, our review process combines rigorous technical assessment with real-world usage to ensure our recommendations truly meet the needs of campers seeking tall tents with easy entry.
Measurement Methodology
We employ standardized measurement techniques rather than relying solely on manufacturer specifications:
– Height Mapping: Measuring interior height at 9 points across the tent floor
– Door Clearance Testing: Using standardized frames to assess actual functional entry dimensions
– Usable Space Calculation: Determining percentage of floor area with standing height
– Setup Timing: Multiple testers setting up each tent to establish average setup times
These consistent methodologies allow for objective comparisons between different models and brands.
Real-World Testing Scenarios
Each tent undergoes extended field testing in varied conditions:
– Minimum 3 nights usage in different weather conditions
– Multiple setup/takedown cycles by different testers
– Deliberate testing in moderate wind and rain conditions
– Occupancy at recommended capacity with typical camping gear
This practical testing reveals usability issues that might not be apparent from specifications alone, such as door designs that work well on paper but prove awkward in practice, or height measurements that don’t translate to comfortable use.
Durability Assessment
While long-term durability can’t be completely evaluated in a testing period, we look for early indicators of potential issues:
– Stress point examination after repeated setup
– Zipper function after multiple use cycles
– Fabric wear patterns at high-contact points
– Pole connection integrity after repeated assembly
We also incorporate feedback from long-term users when available to provide insight into how these products perform over extended use.
Our evaluation criteria place special emphasis on the features most important for this specific category—height consistency, entry design, and setup complexity—while still considering the general tent performance factors of weather resistance, durability, and value.