
1. Understanding Trekking Pole Tents and Their Compatibility Requirements
Trekking pole tents represent an innovative evolution in backpacking shelter design. These ultralight tents eliminate traditional dedicated tent poles, instead utilizing the trekking poles you already carry while hiking. This clever design approach has made these shelters increasingly popular among weight-conscious outdoor enthusiasts.
The appeal of trekking pole tents is easy to understand. By repurposing equipment you’re already carrying, these shelters typically reduce pack weight by 1-2 pounds (0.45-0.9 kg) – a significant savings when every ounce matters. This multi-functional approach aligns perfectly with the minimalist philosophy many backpackers embrace.
Trekking pole backpacking tents offer several key advantages:
- Substantial weight reduction – Often weighing 30-50% less than traditional pole tents
- Simplified packing – Fewer separate components to manage
- Space efficiency – Less bulk in your backpack
- Potential cost savings – One piece of gear serves multiple purposes
However, the effectiveness of this system hinges entirely on compatibility between your trekking poles and tent. Mismatched components can lead to frustrating setup issues, structural instability, and even shelter failure in challenging weather conditions.
The consequences of incompatible gear can range from minor inconveniences to serious safety concerns. Imagine reaching camp as a storm approaches, only to discover your poles are too short for your tent’s peak height. Or worse, having your shelter collapse in the middle of the night during heavy rain because your poles couldn’t support the load.
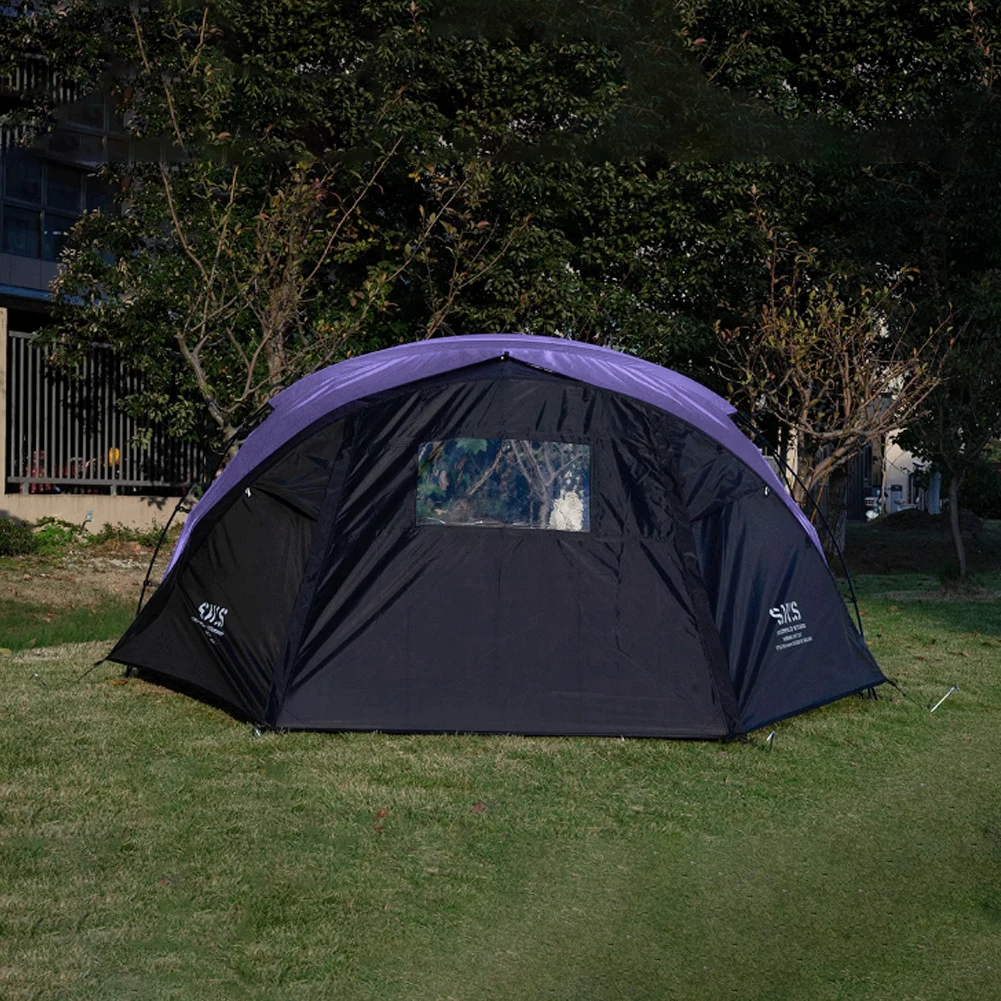
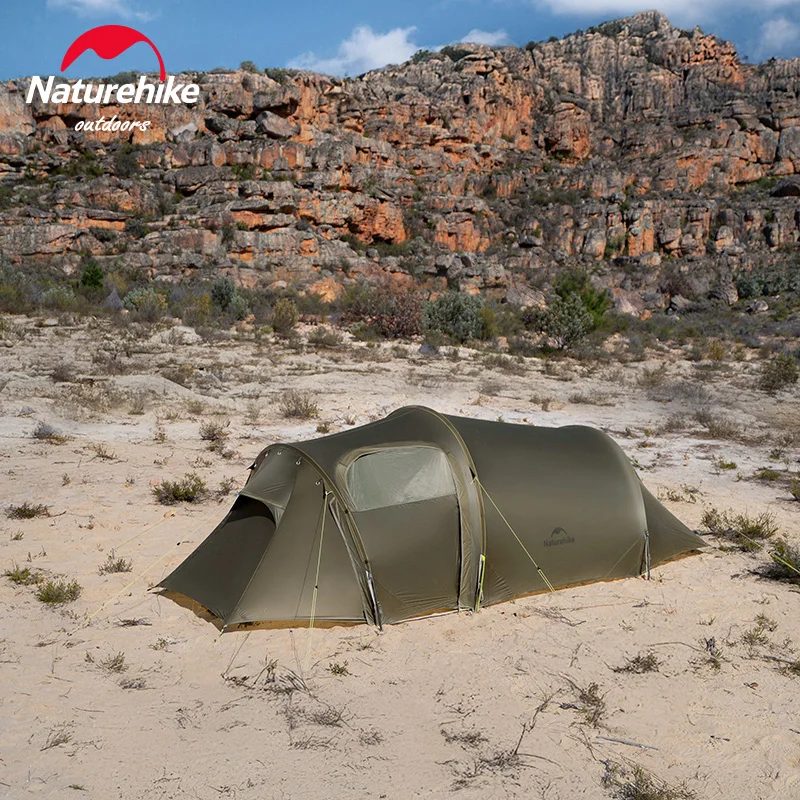
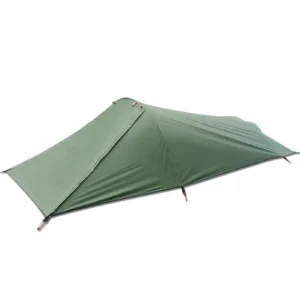
Whether you prefer a pyramid (mid) style, A-frame design, or wedge configuration, understanding how your two-person lightweight tent setup interacts with trekking poles is essential for a successful backcountry experience. The relationship between these components determines your shelter’s stability, weather resistance, and overall performance.
For those seeking maximum weight savings, ultralight trekking pole tents push this efficiency even further, often weighing under 2 pounds (0.9 kg). However, these ultra-minimalist designs typically require even more precise pole compatibility to function properly.
2. Essential Compatibility Factors: Trekking Pole Specifications
When evaluating whether your trekking poles will work with a particular tent, several key specifications determine compatibility. Understanding these factors helps ensure your shelter stands strong in all conditions.
Length Requirements
The most critical compatibility factor is pole length. Different tent designs require specific heights to achieve proper tension and structural stability:
Adjustable vs. fixed-length poles: Adjustable poles offer significant advantages for tent use, allowing you to fine-tune to exact height requirements. Fixed-length poles provide limited flexibility.
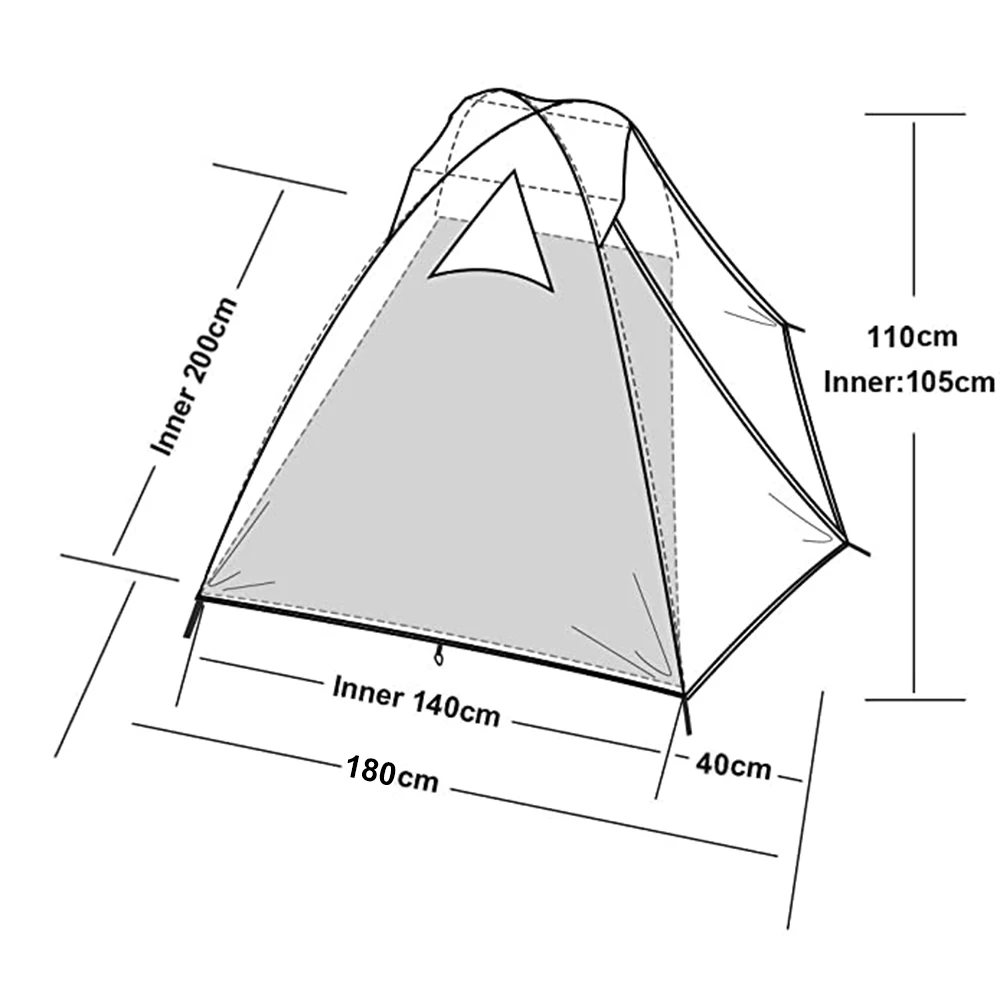
Measuring effective usable length: The functional length of a trekking pole extends from the tip to where the handle begins to widen. This measurement—not the manufacturer’s stated overall length—determines compatibility.
Typical length ranges: Most trekking pole tents require poles between 115-130 cm (45-51 inches), though some designs need taller poles up to 145 cm (57 inches) or allow for shorter options down to 100 cm (39 inches).
Strength and Load-Bearing Capacity
Not all trekking poles are built to withstand the lateral forces exerted by tent fabrics, especially in challenging conditions:
Material differences: Aluminum poles generally offer better strength-to-weight ratios for tent support compared to carbon fiber, which excels at vibration dampening while hiking but may be more prone to snapping under tent tension.
Weight capacity: Look for poles rated to support at least 300 lbs (136 kg) for reliable tent use.
Shaft diameter: Wider shafts (typically 16-18mm) provide greater stability when supporting a tent structure.
Understanding what size tent is good for 2 people helps determine the appropriate pole strength needed, as larger tents generally require sturdier support.
Tip Design and Compatibility
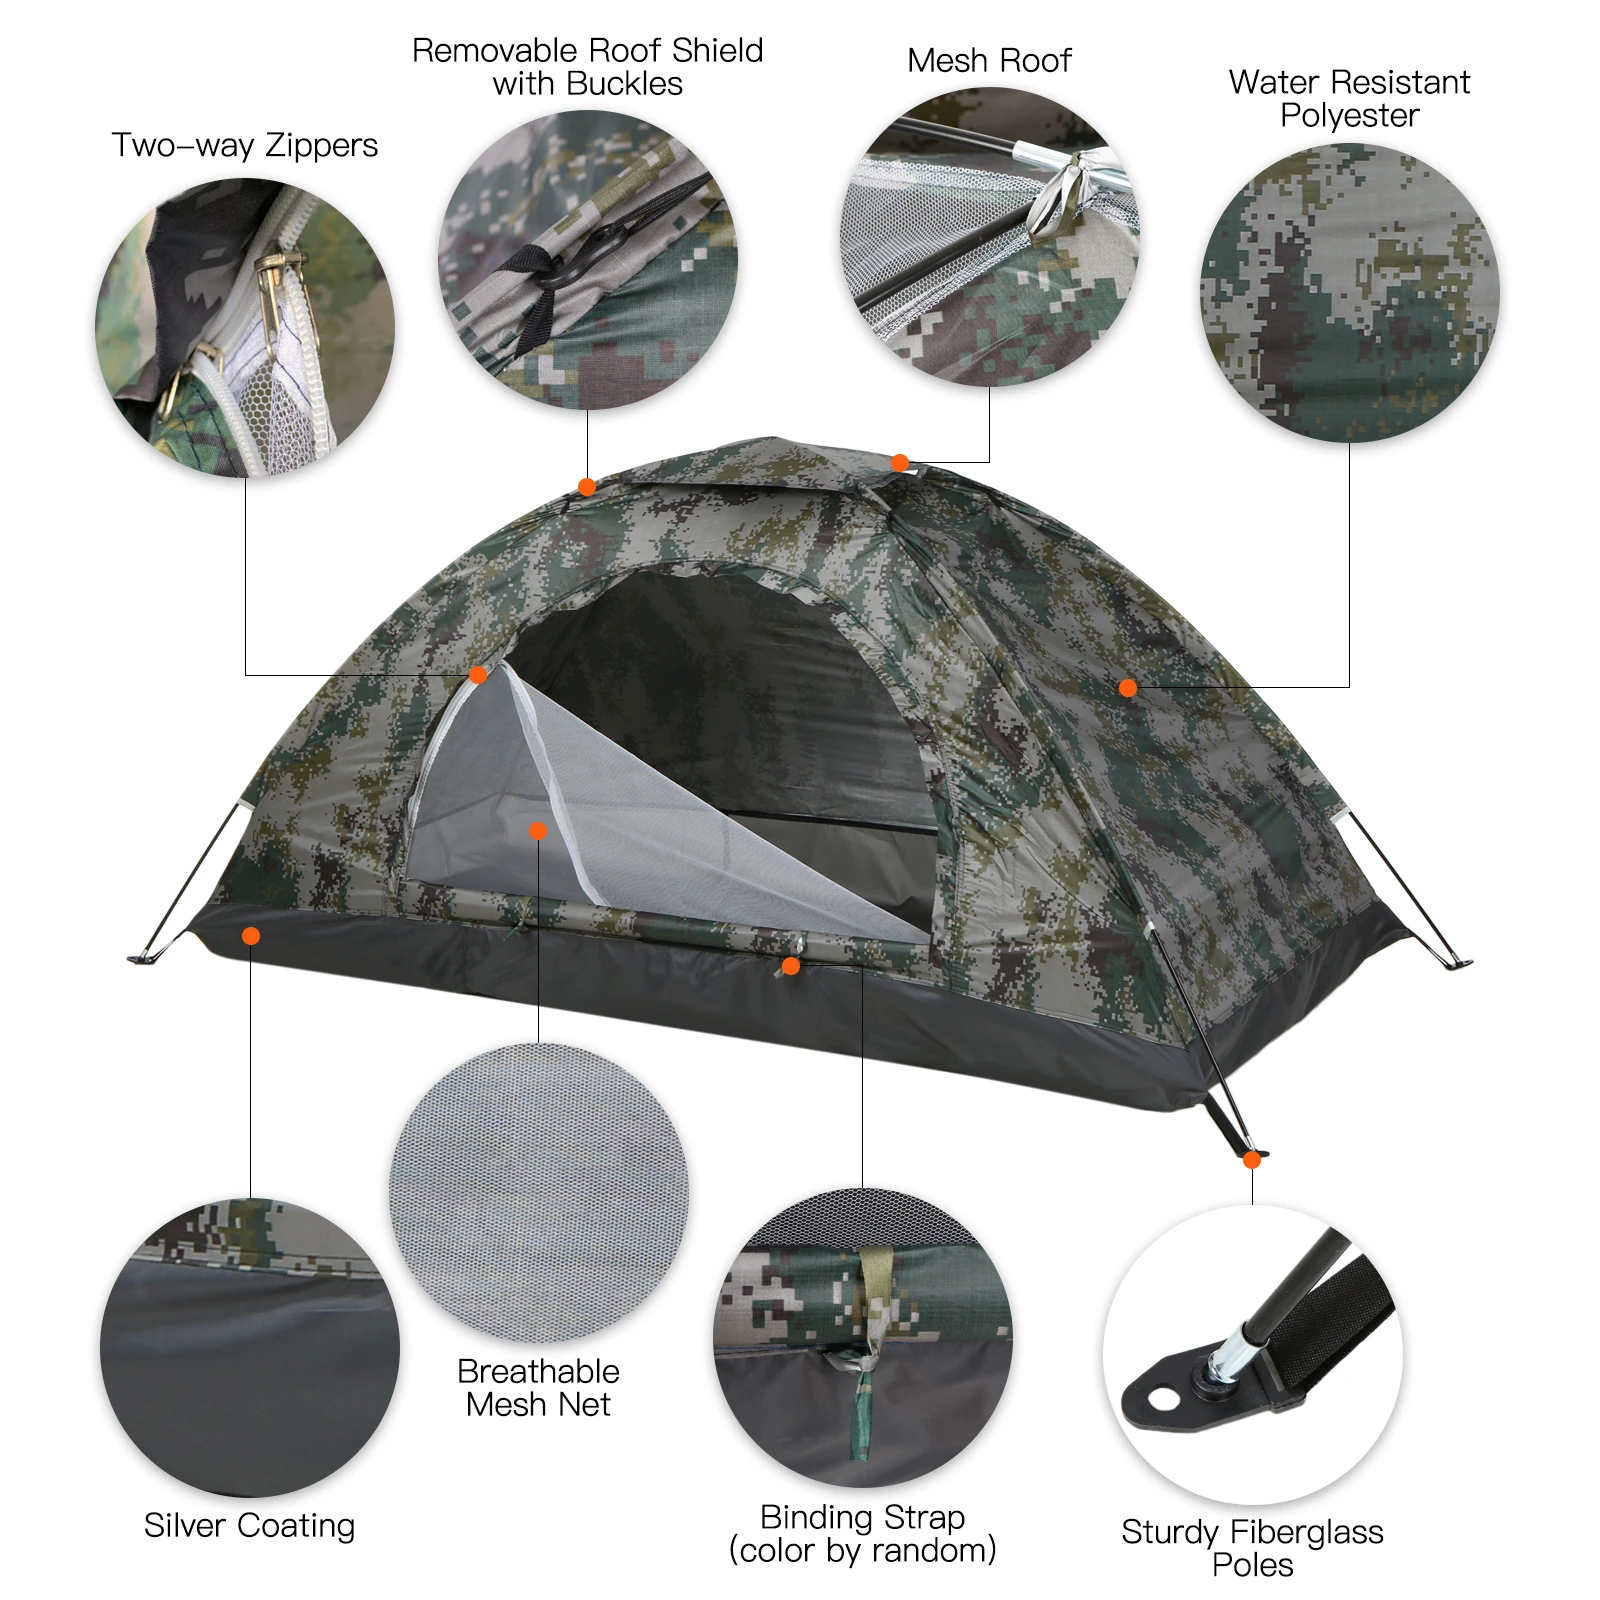
The point where your pole contacts the ground or connects to the tent requires special consideration:
Tip types: Carbide tips provide excellent ground grip but may damage tent materials. Rubber tips offer better protection but less stability on certain surfaces.
Tip protectors: Using protective caps when poles interface directly with tent fabric prevents punctures and tears.
Handle Design Considerations
Often overlooked, the handle end of your poles must also be compatible with your tent’s design:
Handle shape: Ergonomically curved handles may not sit properly in tent grommets or sleeves designed for straight handles.
Material implications: Cork handles conform to pressure points over time but may deteriorate faster with tent use. Foam handles provide better insulation but can wear quickly against abrasive tent materials.
3. Tent Design Elements That Determine Pole Requirements
Tent manufacturers design their shelters with specific pole configurations in mind. Understanding these design elements helps you determine whether your existing poles will work with a particular tent.
Required Pole Length Specifications
The height and structure of your tent directly influence required pole length:
Manufacturer recommendations: Always begin by checking the tent specifications, which should clearly state required pole lengths. These are typically found in product descriptions or setup instructions.
Design height influence: A tent’s peak height isn’t just about interior space—it’s a critical structural consideration that determines the minimum pole length needed for proper setup.
Single vs. dual/multiple pole configurations: Some tents require a single center pole, while others need two or more poles of varying lengths. More complex designs might specify different lengths for front and rear poles.
Pole Orientation Requirements
How poles interface with the tent varies significantly between designs:
Tip-up vs. handle-up designs: Some tents require poles to be inserted tip-end up, while others need the handle end pointing upward. This orientation affects both setup procedure and long-term durability.
Orientation effects on wear: Using poles in the manufacturer’s specified orientation prevents premature wear on both the poles and tent attachment points.
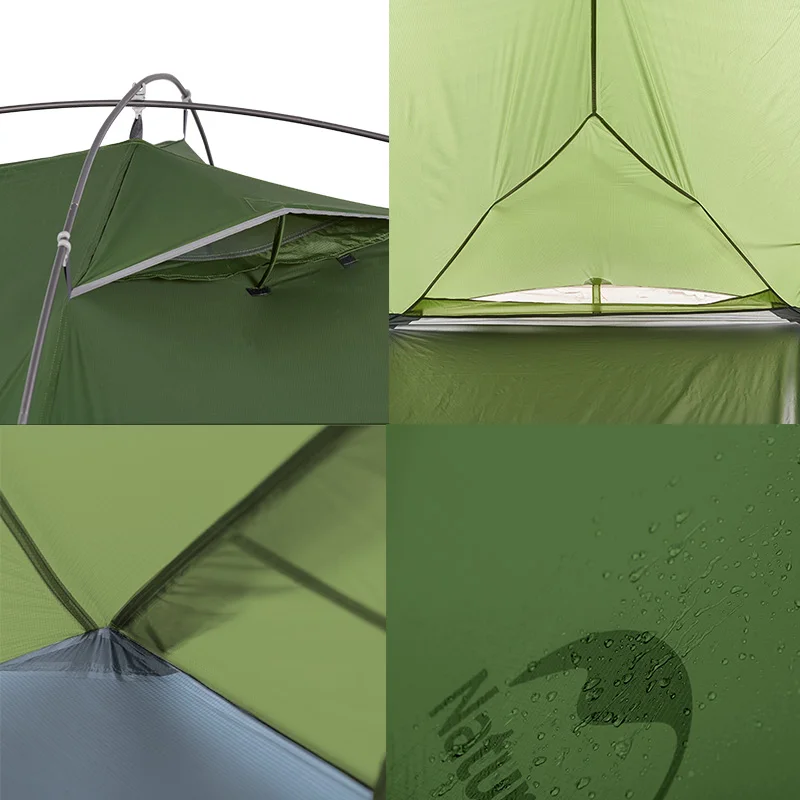
Attachment Mechanisms
The interface between poles and tent varies widely between manufacturers:
Grommet-based systems: Metal or reinforced fabric grommets require specific tip diameters for secure positioning without slipping.
Pocket/sleeve systems: Fabric pockets that hold pole tips or handles must match the dimensions of your pole components.
Reinforced apex points: These specialized connection points often have specific diameter requirements and load distribution designs.
Choosing the ultimate compact shelter for two involves considering how these attachment systems work with your existing equipment.
Tent Geometry’s Influence
The overall shape of your tent creates specific requirements:
Pitch angle effects: Steeper wall angles require longer poles for the same floor area compared to more gradually sloped designs.
Interior space relationship: A tent’s pole length directly determines headroom and usable interior volume. Even slightly too-short poles can significantly reduce livable space.
For those seeking weight savings without compatibility headaches, lightweight backpacking tents often balance conventional pole structures with reasonable weight, providing an alternative to trekking pole designs.
4. How to Assess Trekking Pole and Tent Compatibility Before Purchase
Making informed decisions before buying prevents compatibility disappointments in the field. These systematic assessment approaches help ensure your gear works together seamlessly.
Research Methods Before Buying
Thorough research prevents costly compatibility mistakes:
- Manufacturer specifications: Start with the official specifications for both tent and poles. Look specifically for:
- Required pole length (minimum and maximum)
- Recommended tip type
- Number of poles needed
Any specific orientation requirements
User reviews and forums: Experienced users often share valuable compatibility insights. Search for specific combinations of tents and pole models to find real-world experiences.
Retailer expertise: Specialty outdoor retailers typically have staff who can provide guidance on compatibility based on their experience with various gear combinations.
Key Questions When Buying a Tent
When evaluating trekking pole tents, ask these critical questions:
- What are the exact pole length requirements?
- Does the tent require a specific pole tip design?
- Is the tent designed for tip-up or handle-up pole orientation?
- What alternatives exist if my current poles aren’t compatible?
- How adjustable is the tent design to accommodate different pole lengths?
Understanding various camping shelter options for two provides context for these compatibility considerations.
Key Features in Trekking Poles for Tent Use
If purchasing poles with tent use in mind, prioritize these features:
Length adjustability: Look for poles with adjustment ranges that exceed your tent’s requirements by at least 5-10 cm (2-4 inches) on either end for versatility.
Strong locking mechanisms: External lever locks generally provide more stability for tent use than twist locks, which can slip under constant tension.
Appropriate tip design: Removable baskets and interchangeable tips offer maximum versatility.
Handle compatibility: Straight-design handles typically work better with tent systems than heavily ergonomic shapes.
When assessing overall shelter needs, consider whether a 2-person tent is actually big enough for your space requirements, as this affects the structural demands placed on your trekking poles.
5. Step-by-Step Guide: Setting Up Your Trekking Pole Tent Correctly
Proper setup technique maximizes stability while preventing damage to both tent and poles. Follow this systematic approach for best results.
Site Selection and Preparation
Choose level ground whenever possible to avoid uneven tension on poles and fabric.
Clear the site of sharp rocks, sticks and debris that could damage your tent floor.
Consider wind direction and position your tent with the lowest, most aerodynamic end facing the prevailing wind.
Assess overhead hazards like dead branches or loose rocks that could fall on your shelter.
Initial Setup Process
Lay out the tent body completely flat, orienting it according to manufacturer instructions.
Stake out the corners in the recommended sequence (usually opposing corners first).
Adjust poles to the required length before insertion, following the tent’s specifications.
Prepare guylines by untangling them and ensuring adjusters move freely.
Pole Insertion Techniques
Confirm proper orientation (handle-up or tip-up) according to tent design.
Insert poles carefully into their designated attachment points, avoiding forcing them through fabric.
Maintain proper angle as specified in the instructions—usually 70-85 degrees from horizontal for optimal stability.
Secure the pole base against slipping by creating a small depression in the ground or using a specialized pole foot.
Tensioning Process
Follow the recommended sequence for tightening guylines—typically working from major structural points outward.
Adjust pole height in small increments if needed to achieve proper tension.
Check fabric tension throughout the tent, looking for wrinkles or sagging areas.
Make final adjustments based on current weather conditions—tighter for wind, slightly looser for rain to accommodate fabric stretching.
For environment-specific guidance, learn how compact camping shelters for forest hiking require special setup considerations in wooded areas.
6. Troubleshooting Common Trekking Pole Tent Compatibility Issues
Even with careful planning, compatibility challenges can arise. Here are solutions to common problems you might encounter.
Issue: Poles Seem Too Short for the Tent
Solutions:
– Recheck the manufacturer’s specified pole length requirement
– Extend poles to their maximum safe length
– Dig shallow depressions at pole positions to effectively increase pole height
– Reduce tent footprint by adjusting stake positions inward slightly
– Use rocks or logs under pole tips to add height (ensure stability)
Issue: Tent Sagging or Instability
Solutions:
– Verify poles are extended to the correct length
– Reposition poles to maintain proper vertical alignment
– Check that all guylines are properly tensioned in the correct sequence
– Add additional stakes at midpoints between corners
– Cross-tension opposing sides for improved structural stability
Issue: Pole Tips Damaging Tent Fabric
Solutions:
– Use rubber tip protectors or caps designed for trekking poles
– Place small pieces of durable fabric at contact points
– Add reinforcement patches to vulnerable areas
– Consider switching to a handle-up configuration if tent design allows
– Use tennis balls with small holes cut in them as improvised tip covers
Proper tent packing tips help prevent damage during transport, ensuring your shelter remains in good condition between trips.
Issue: Poles Slipping or Collapsing
Solutions:
– Clean locking mechanisms of dirt and debris
– Tighten external lever locks to increase holding power
– Create more secure ground contact by forming small depressions for pole tips
– Add friction to slippery surfaces with a small piece of cloth or rubber
– Check poles for damage or wear that might prevent proper locking
Issue: Difficulty Achieving Proper Tension
Solutions:
– Follow a systematic tensioning pattern starting from main structural points
– Add additional guylines to distribute tension more evenly
– Adjust stake positions outward slightly to increase fabric tension
– Fine-tune pole position and angle for optimal tension distribution
– Consider weather conditions—fabric may need different tension in humidity
For all-weather performance, waterproof backpacking tents require special attention to guyline and stake placement to maintain their weather resistance.
7. Advanced Compatibility Solutions and Alternative Setups
When standard configurations don’t work, creative solutions can bridge compatibility gaps. These approaches help adapt almost any combination of poles and tents.
Using Alternative Pole Options
Dedicated tent poles can supplement or replace trekking poles when needed, though they add pack weight.
Adjustable pole jacks extend effective pole length by 3-8 inches (7.5-20 cm), solving many compatibility issues.
Alternative materials like carbon fiber replacement sections can strengthen weak points or extend length.
Adapting Incompatible Equipment
Handle-tent interface issues can be resolved using specialized adapters or DIY solutions like foam sleeves that improve fit.
Insufficient pole length can be addressed by:
- Modifying stake positions to reduce required height
- Adding platform structures under pole bases
Combining trekking poles with shorter poles or sticks
Tip compatibility can be improved with universal tip adapters that create standardized connection points.
Space-saving tents often benefit from these adaptive techniques, maximizing functionality while minimizing pack size.
Specialized Setups for Extreme Conditions
- Winter camping adaptations:
- Use pole baskets to prevent sinking in snow
- Add snow-specific guyline anchors
Consider pole length extensions for deeper snow
High wind configuration:
- Lower overall tent height for improved wind resistance
- Add redundant guylines at 45-degree angles
Use poles at their strongest length setting (typically 80-90% extended)
Ultralight minimalist options:
- Single-pole pyramid setups using one trekking pole
- Tarp configurations requiring minimal pole support
- Hybrid systems combining natural supports with poles
4-season winter 2-person tents often include specific adaptation features for extreme conditions that work well with properly configured trekking poles.
8. Choosing the Most Versatile Trekking Poles for Tent Compatibility
If you’re selecting new trekking poles with tent use in mind, certain features dramatically improve versatility across different shelter designs.
Key Features That Enhance Pole Versatility
Maximum adjustable length range: Look for poles that adjust from approximately 100-140 cm (39-55 inches) to accommodate various tent heights.
Strong and reliable locking mechanisms: External lever locks (also called flick locks) generally outperform twist locks for tent applications due to their superior holding power under constant tension.
Interchangeable tips and baskets: Removable and replaceable components allow customization for different terrain and tent interfaces.
Durable construction materials: Thicker-walled aluminum or reinforced carbon fiber better withstands the lateral forces tent use creates.
Material Considerations
- Aluminum benefits for tent use:
- Greater durability when used for shelter support
- Better resistance to lateral pressure
- More affordable replacement if damaged
Typically 15-20% heavier than carbon alternatives
Carbon fiber considerations:
- Significantly lighter weight
- More prone to snapping under tent pressure
- Less durable at connection points
Typically 30-50% more expensive
Hybrid options combining aluminum lower sections with carbon upper portions offer balanced performance for tent use.
Special Features Worth Considering
Anti-shock mechanisms can reduce stability in tent applications and add weight—consider poles without this feature for shelter use.
Grip extensions (secondary grip areas below the main handle) provide additional length adjustment options.
Weight capacity ratings should exceed 300 lbs (136 kg) for reliable tent support.
Packability and field repairability become crucial when your shelter depends on pole functionality.
For comprehensive shelter options, best compact shelters for two provides additional context on selecting appropriate support systems.
9. Evaluating Trekking Pole Tents for Maximum Compatibility
When choosing a trekking pole tent, certain design elements offer greater flexibility with different pole types. Understanding these features helps you select a shelter compatible with various pole options.
Design Features That Enhance Compatibility
Adjustable attachment points that accommodate different pole lengths through sliding connections or multiple attachment options.
Reinforced pole contact areas with additional fabric layers or protective patches that prevent wear and damage.
Multiple pitching configurations allowing setup with different pole heights, numbers, or positions based on available equipment.
Clear length specifications that precisely identify minimum, ideal, and maximum pole lengths for proper setup.
Versatility Considerations
Adaptability to different pole types through universal connection systems rather than brand-specific designs.
Alternative setup options like using sticks, paddles, or skiing equipment when trekking poles aren’t available.
Seasonal flexibility allowing different configurations for summer ventilation versus winter storm protection.
Durability at Pole Contact Points
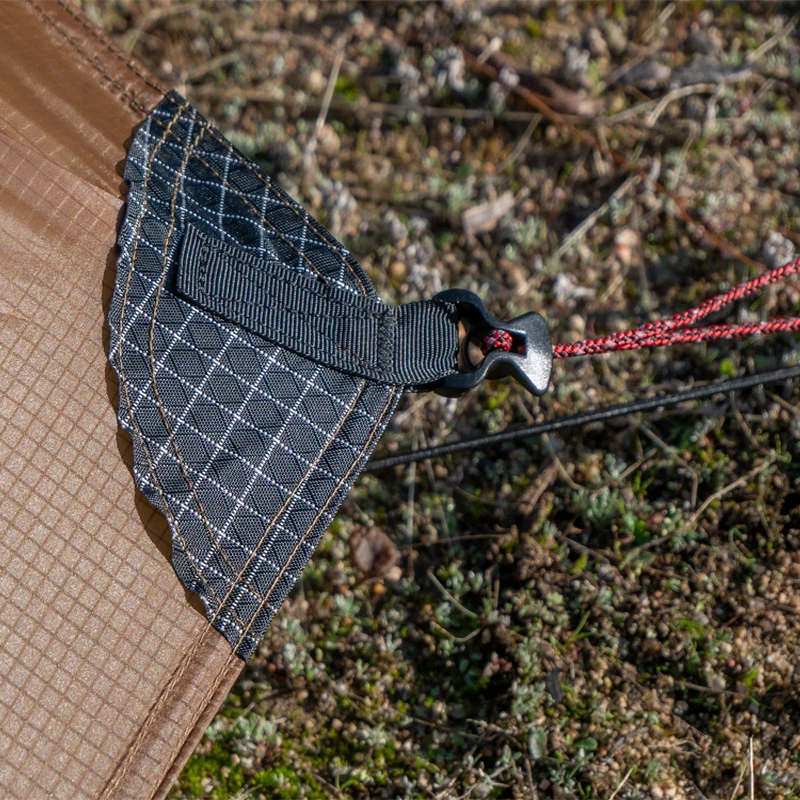
Reinforcement quality at connection points significantly affects long-term compatibility as weak points develop stress tears.
Stress distribution design that spreads tension across wider areas prevents localized damage at pole interface points.
Material strength at connection points with higher denier fabric or specialized materials improves longevity.
Ultralight backpacking tents often incorporate these versatility features while maintaining minimal weight, making them excellent choices for trekking pole compatibility.
10. Trekking Pole Tent Compatibility FAQ
Can I use any trekking pole with any trekking pole tent?
No, compatibility depends on several factors including pole length, tip design, strength, and the tent’s specific requirements. Most tents specify minimum pole heights and may require particular configurations. Always check manufacturer specifications before attempting to pair different brands or models.
What if my poles are slightly shorter than recommended?
If your poles are 1-2 inches (2.5-5 cm) shorter than recommended, you can often compensate by:
– Reducing the footprint slightly by moving stakes inward
– Creating a small platform under pole bases with rocks or flat objects
– Using pole extenders or adapters designed for this purpose
Significant shortfalls (more than 3 inches/7.5 cm) typically result in unstable setups with inadequate headroom.
Are carbon fiber poles strong enough for tent support?
High-quality carbon fiber poles can support most trekking pole tents in moderate conditions. However, they’re more prone to catastrophic failure under lateral pressure than aluminum alternatives. For extreme weather conditions or larger shelters, aluminum poles typically provide more reliable support despite their weight penalty.
How do I protect my tent from damage by pole tips?
Use protective strategies including:
– Rubber tip protectors specifically designed for trekking poles
– Small pieces of durable fabric placed at contact points
– Tennis balls with holes cut in them as improvised covers
– Specialized tent pole cups that create safe interfaces
Can I use trekking pole tents in winter conditions?
Yes, many trekking pole tents work well in winter when properly configured. Consider:
– Using poles at slightly shorter settings to improve stability against snow loads
– Adding snow baskets to prevent poles from sinking
– Increasing guyline and stake reinforcement for added strength
– Checking that your poles’ locking mechanisms work properly in cold conditions
For in-depth guidance on weight considerations, the complete guide to tent weight for backpacking provides valuable context.
11. Adapting Your Setup for Different Environmental Conditions
Environmental factors significantly influence trekking pole tent performance. Adapting your configuration to specific conditions ensures stability and safety.
High Wind Adaptations
Lower pole height configurations: Reduce overall tent height by 2-4 inches (5-10 cm) to create a lower profile against wind.
Additional guyline placement: Add guylines at mid-panel points and increase anchor points by 30-50%.
Stake selection and positioning: Use longer, Y-shaped stakes driven at 45-degree angles away from the tent for maximum holding power.
Wind-oriented setup: Position the lowest, most aerodynamic end of your shelter into the prevailing wind direction.
Winter Camping Considerations
Snow loading impact: Heavy snow accumulation can exceed the weight capacity of standard trekking poles. Consider using stronger poles or additional mid-panel supports.
Alternative pole positioning: Create snow trenches for pole bases or use buried objects as anchors to improve stability.
Temperature effects: Cold temperatures can affect locking mechanisms and make carbon fiber more brittle. Keep poles warm before setup when possible.
Desert and Rocky Terrain Setup
Securing poles on hard surfaces: Use rock stacks (cairns) around pole bases or specialized rock adapters when stakes won’t penetrate.
Protection against heat expansion: Leave slight slack in fabric during daytime setup to accommodate thermal expansion in extreme heat.
Adapting for lack of stake-friendly ground: Use rocks, filled stuff sacks, or trekking poles as anchors when conventional staking is impossible.
For specialized winter conditions, winter camping tents offer features specifically designed to work with trekking poles in snow and cold environments.
12. Compatibility Considerations When Upgrading Your Gear
When replacing either component of your shelter system, careful assessment prevents compatibility problems with existing equipment.
When Upgrading Tents
- Assessing if current poles will work:
- Compare the length requirements between old and new tents
- Check attachment mechanisms for similar design
Verify pole strength requirements haven’t increased
Questions to ask manufacturers:
- “What is the acceptable range of pole lengths for proper setup?”
- “Are there specific tip or handle requirements?”
“Is this tent compatible with [specific pole brand/model]?”
Adapting between different tent designs:
- Consider adapter kits designed for compatibility between brands
- Look for tents with multiple setup options or adjustable attachment points
- Evaluate whether the new design allows for pole improvisation
When Upgrading Trekking Poles
- Ensuring compatibility with existing tents:
- Match or exceed the length range of previous poles
- Check that locking mechanisms provide sufficient stability
Verify tip and handle designs work with tent connection points
Feature comparisons that matter for tent use:
- Locking mechanism strength under constant tension
- Shaft diameter at connection points
Material durability for lateral loads
Multi-use considerations beyond tent support:
- Balance tent compatibility with hiking comfort
- Consider weight distribution and grip ergonomics
- Evaluate packability and collapse size
Compact backpacking tents often offer greater flexibility when upgrading other components due to their adaptable designs.
13. Personal Experiences: Real-World Compatibility Lessons
Learning from others’ experiences helps avoid common pitfalls while discovering creative solutions to compatibility challenges.
Case Studies of Successful Adaptations
A solo hiker on the Pacific Crest Trail discovered his carbon fiber trekking poles were too weak for his pyramid tent in high winds. His solution: creating a hybrid support system by nesting one pole inside the other at the main support point, effectively doubling the strength while using the second pole for a vestibule support. This unexpected combination provided rock-solid stability through mountain storms.
Another backpacker found success with an unusual approach when one pole broke during a trip. By using a carefully selected branch as a spacer between the shortened pole and tent apex, she maintained proper height and tension distribution. This emergency fix worked so well she now carries a lightweight 6-inch (15 cm) aluminum tube as a permanent extender.
Learning from Compatibility Failures
A common misconception is that any adjustable pole will work with any trekking pole tent. One backpacker learned this lesson the hard way when his twist-lock poles gradually collapsed overnight during a rainstorm. The constant tension exceeded the locking mechanism’s capacity, resulting in a collapsed shelter and wet gear. The warning signs included slight slippage during setup and difficulty maintaining even tension.
Another cautionary tale involves incompatible tip designs. A hiker using sharp carbide tips without protection punctured his tent floor when a pole slipped during a midnight bathroom break. The lesson: always use protective interfaces between aggressive pole tips and tent materials, even for temporary pole placements.
14. Ensuring Long-Term Compatibility Through Proper Maintenance
Proper maintenance extends the functional compatibility between your trekking poles and tent. These practices prevent the most common failure points.
Maintaining Trekking Poles for Tent Use
- Lock mechanism care and cleaning:
- Clean sand and dirt from locking mechanisms after each trip
- Apply appropriate lubricant to moving parts (following manufacturer guidelines)
Check for and tighten any loose screws in external lever locks
Shaft inspection for stress damage:
- Examine poles for hairline cracks, especially near adjustment points
- Look for unusual bending or deformation that indicates structural weakness
Replace damaged sections before they fail in the field
Tip maintenance for secure tent interface:
- Check for excessive wear or mushrooming on tips
- Replace worn tips before they damage tent materials
- Clean built-up dirt from interchangeable tip systems
Preserving Tent Attachment Points
- Reinforcement options for high-stress areas:
- Apply seam grip or tenacious tape to developing wear points
- Add supplemental patches to pole interface areas showing wear
Reinforce guyline attachment points before they tear
Cleaning recommendations for grommets and pockets:
- Remove accumulated dirt from connection points
- Check for and repair fraying edges around grommets
Ensure drainage holes remain clear to prevent water damage
Storage practices to prevent material degradation:
- Store tent completely dry to prevent mildew that weakens fabric
- Avoid prolonged compression that can damage reinforced areas
- Store poles slightly loose (not fully collapsed) to reduce spring tension

Lightweight Backpacking Tent, Ultralight Backpacking Tent, Ultralight Bivy Tent
Ultralight Single Person Camping Tent with Aluminum Poles for 3-Season Backpacking Waterproof DesignPrice range: $94.88 through $326.82 Select options This product has multiple variants. The options may be chosen on the product page
Lightweight Backpacking Tent, Ultralight Backpacking Tent, Waterproof Backpacking Tent
$391.05 Select options This product has multiple variants. The options may be chosen on the product page
Heavy Duty 4 Season Tent, Mountaineering Tent, Winter Camping Tent
$870.40 Select options This product has multiple variants. The options may be chosen on the product page
Compact Backpacking Tent, Lightweight Backpacking Tent, Waterproof Camping Tent
$335.52 Select options This product has multiple variants. The options may be chosen on the product page
Ultralight Backpacking Tent, Ultralight Dome Tent, Winter Camping Tent
Price range: $369.63 through $370.07 Select options This product has multiple variants. The options may be chosen on the product page
Heavy Duty 4 Season Tent, Ultralight Freestanding Tent, Winter Camping Tent
$3,722.66 Select options This product has multiple variants. The options may be chosen on the product page
15. Are Specialized Tent Poles Ever a Better Option?
While trekking pole tents offer excellent weight savings, there are situations where dedicated tent poles might be preferable.
When Dedicated Tent Poles Might Be Preferable
Extremely challenging weather conditions where specialized arch or dome structures provide superior strength-to-weight ratios and wind resistance.
Specialized shelter designs that require precise pole flexibility or curvature impossible to achieve with straight trekking poles.
When weight isn’t the primary concern, such as car camping or shorter trips where the convenience of an integrated pole system outweighs minimal weight savings.
Comparing Packability and Versatility
Space considerations: Dedicated tent poles typically pack into a narrow bundle that fits along the edge of a backpack, while trekking poles must be carried externally or secured separately.
Multi-use advantages: Trekking poles serve multiple purposes (walking aid, river crossing tool, defensive tool) beyond shelter support.
Weight trade-offs: Dedicated poles add approximately 8-16 oz (227-454 g) to your pack weight, but eliminate setup complications and compatibility concerns.
Hybrid Approaches
Carrying backup pole solutions like lightweight carbon tent poles weighing 2-4 oz (56-113 g) provides emergency options if trekking poles fail.
Mixing trekking poles with dedicated poles creates versatile setups where trekking poles support main living areas while specialized poles create vestibules or awnings.
16. Conclusion: Building Your Perfect Trekking Pole and Tent System
Creating an effective trekking pole tent system requires understanding the critical compatibility factors between poles and shelter. By carefully evaluating length requirements, strength needs, connection mechanisms, and setup techniques, you can build a reliable shelter system that withstands challenging conditions while minimizing pack weight.
Remember that compatibility isn’t just about initial fit—it’s about long-term performance through proper maintenance, appropriate adaptations for varying conditions, and thoughtful upgrades as your gear evolves. Testing your complete system before backcountry trips provides confidence that your shelter will perform when you need it most.
With the knowledge from this guide, you can make informed decisions about trekking pole and tent pairings, troubleshoot common issues, and adapt to challenges in the field. The result is a shelter system that balances weight savings with reliability for confident wilderness adventures.